
Trinity Stitch Basics
On this page
FAQs (coming soon)
What Is Trinity Stitch?
Trinity stitch creates a highly textured fabric made up of small, star-like clusters. Each cluster is formed by working a single crochet 3 together (sc3tog) across 3 consecutive stitches, followed by a chain-1.
Trinity stitch is suitable for confident beginner crocheters. The sc3tog cluster may seem a little tricky at first, but once you understand where to place your hook, the stitch quickly becomes rhythmic and easy to work.
How Trinity Stitch Is Made
At its core, trinity stitch is made by alternating sc3tog clusters and chain-1 spaces.
The stitch is worked across the last chain just worked, next sc3tog, and next chain.
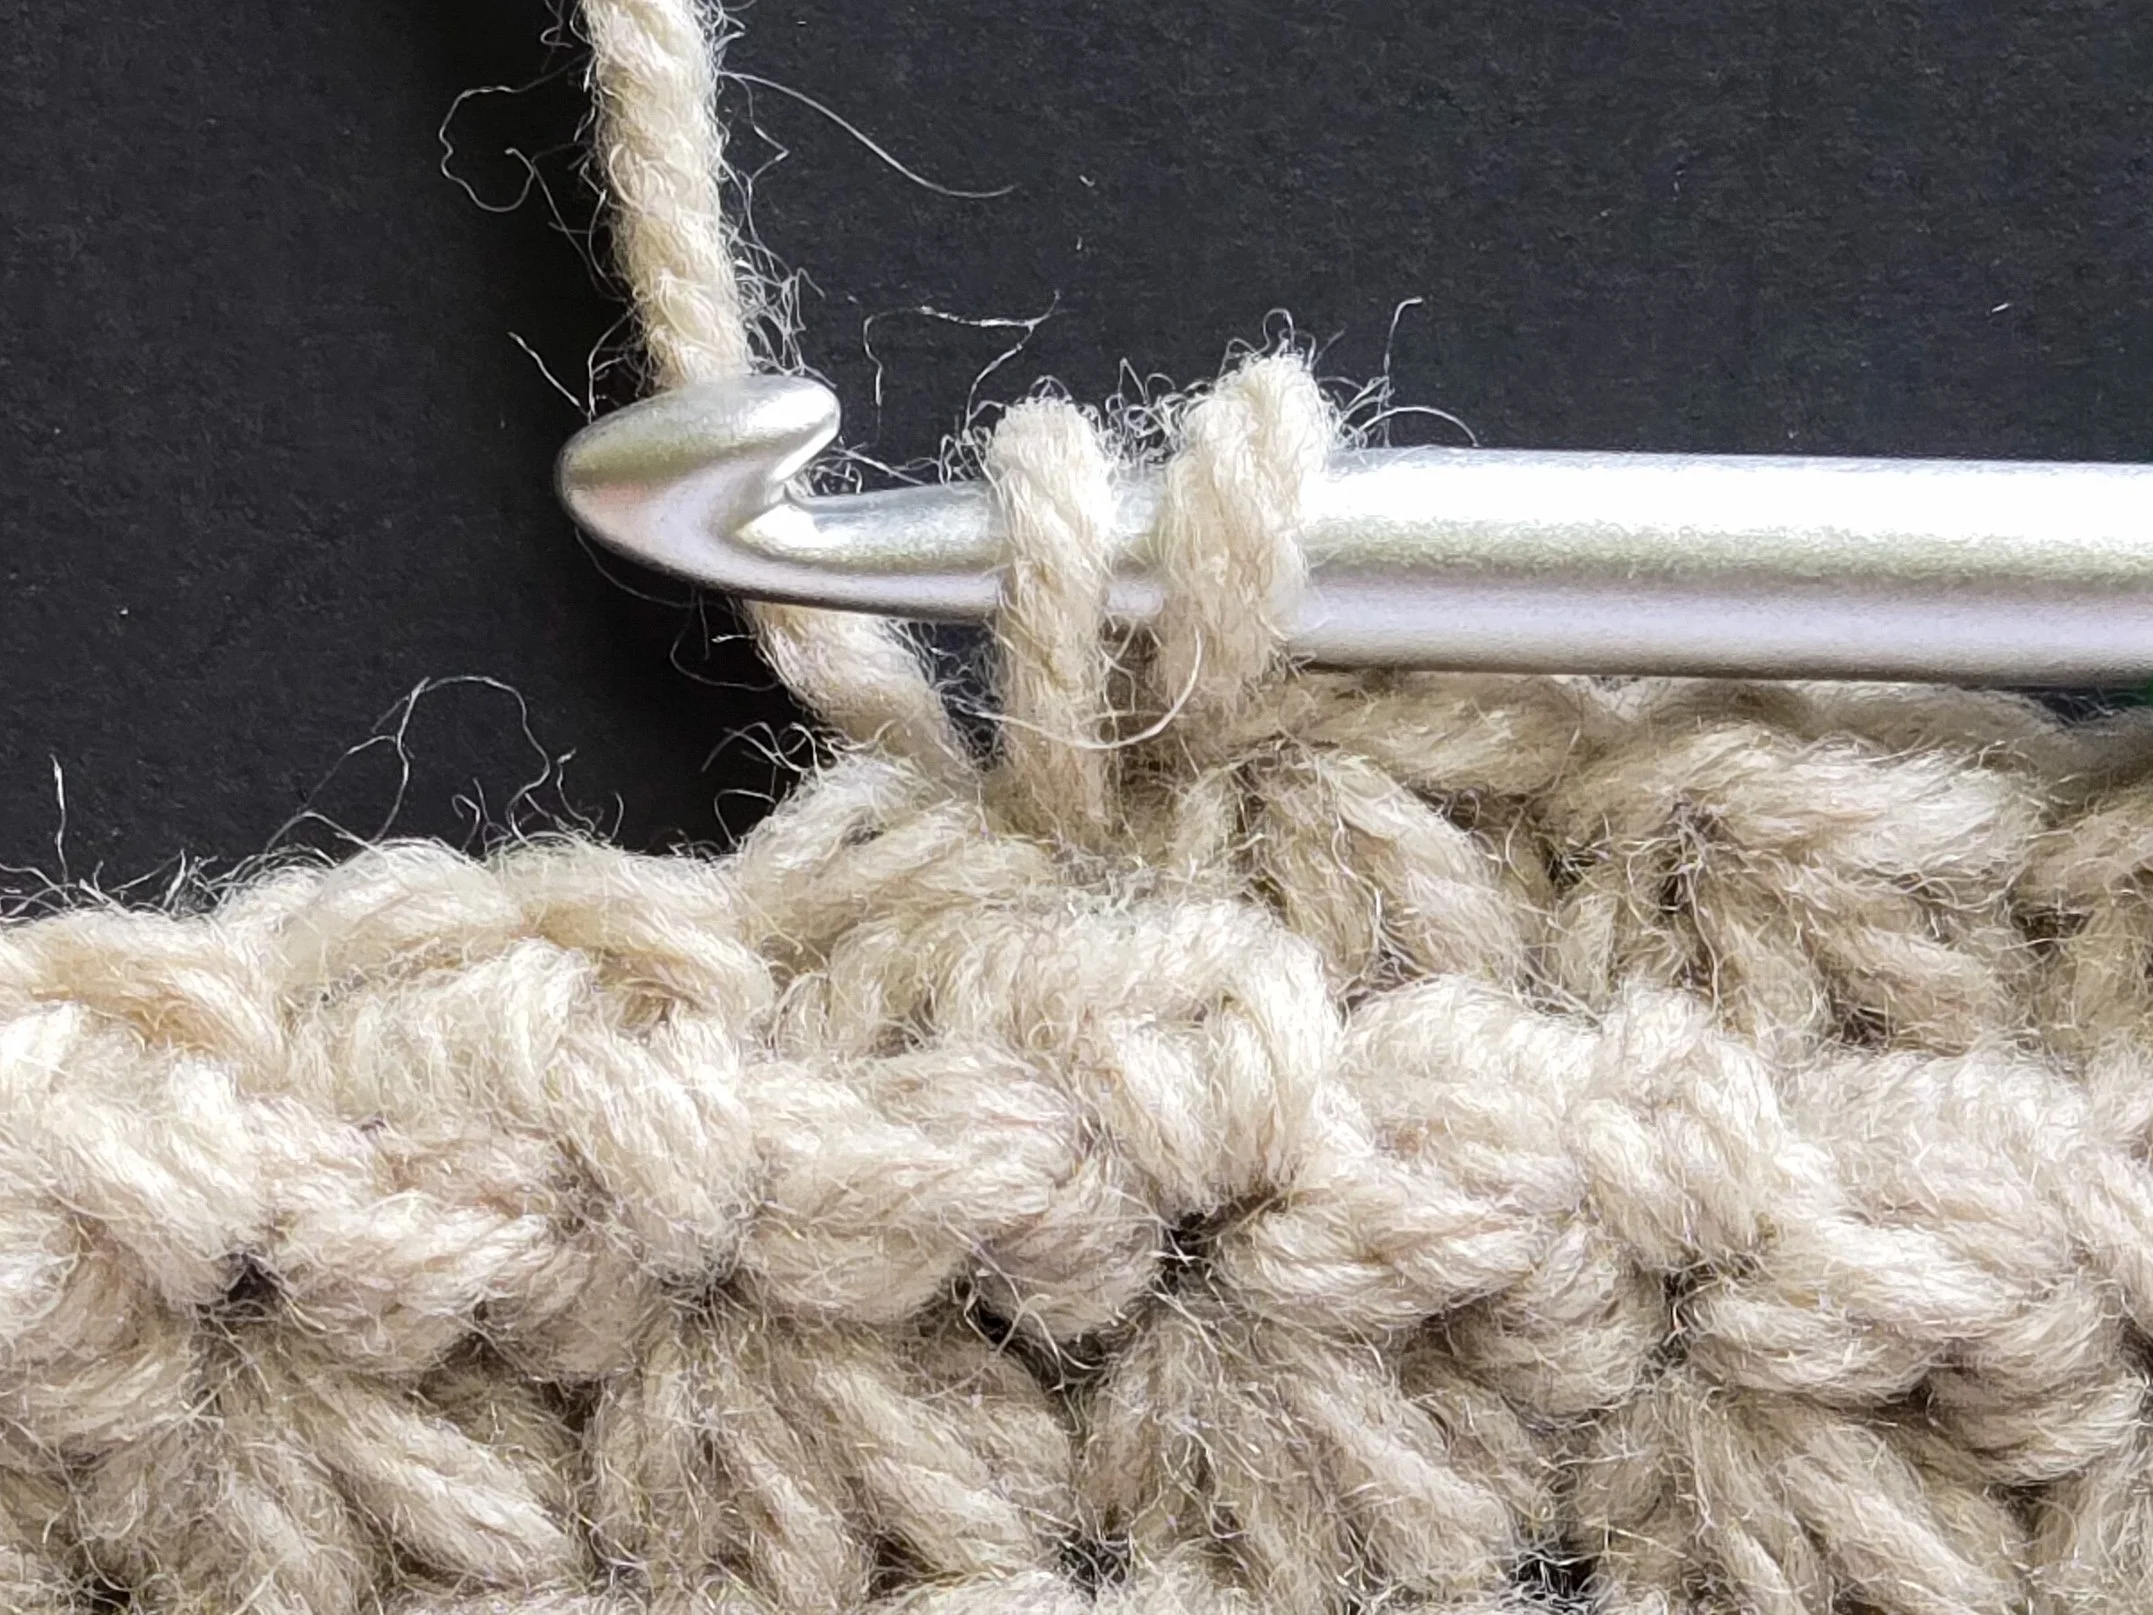
Insert hook in the same chain as the last stitch worked, yarn over, and pull up a loop.
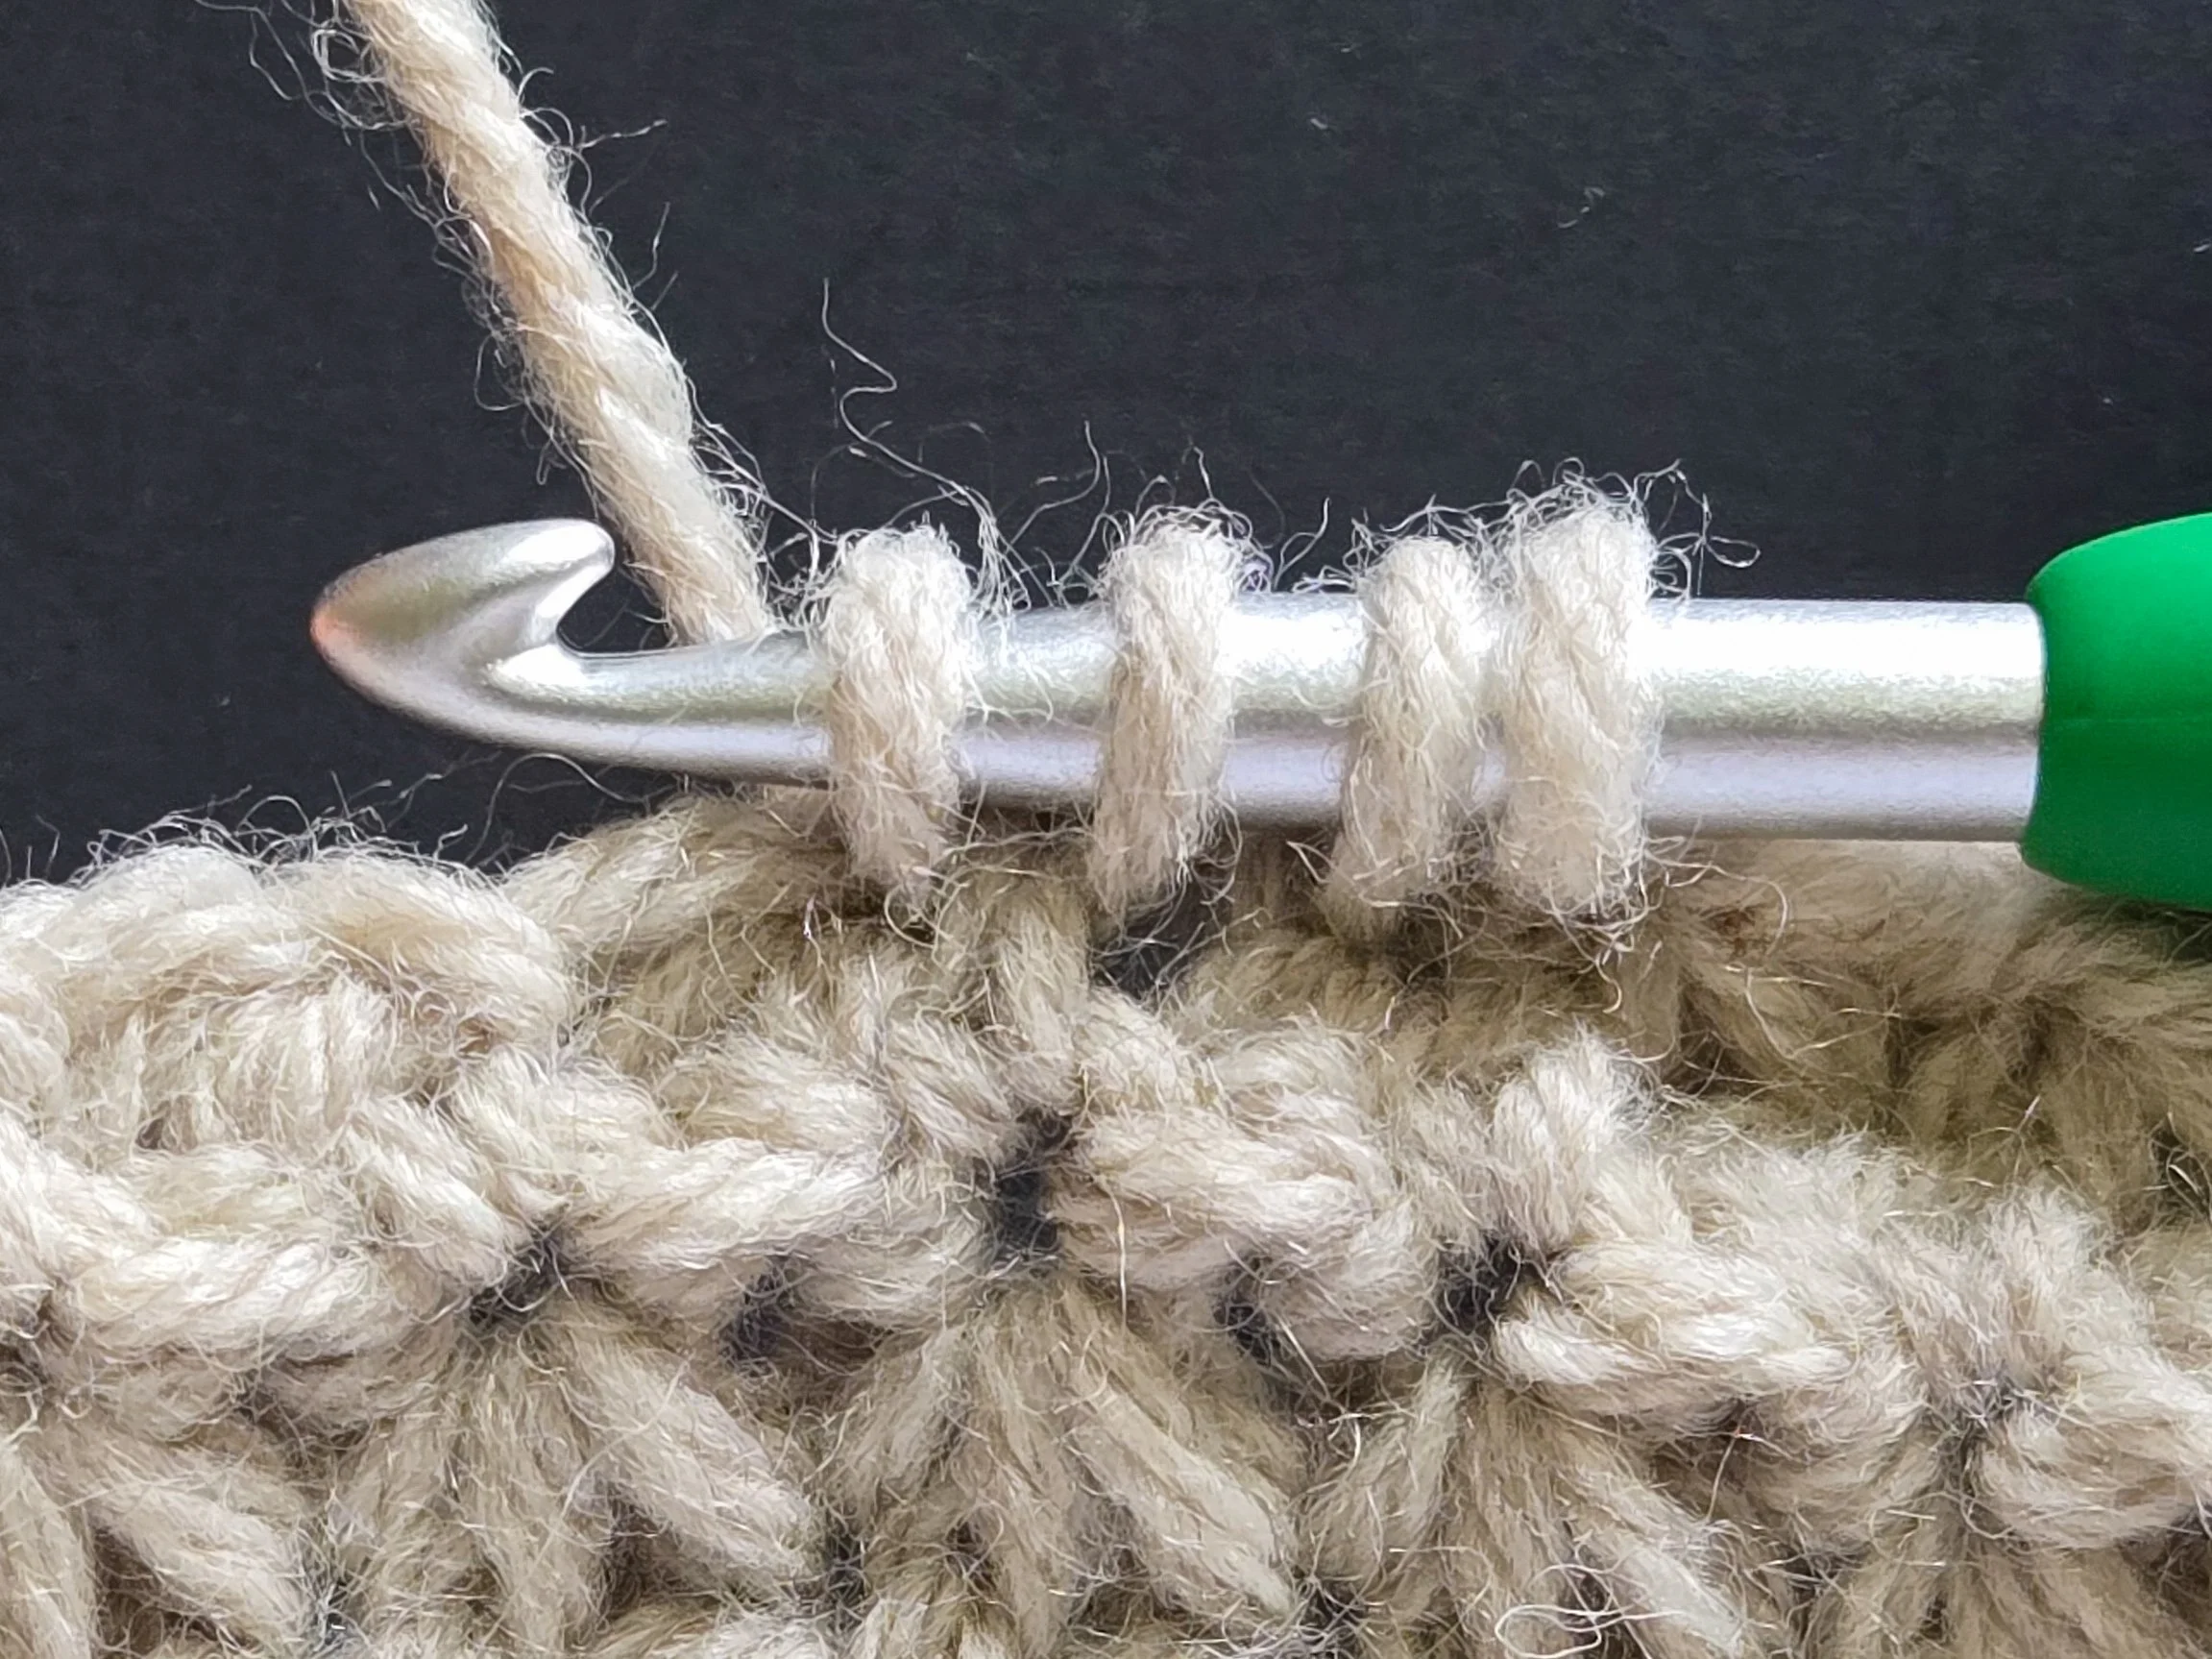
Pull up a loop in the next sc3tog and the following chain (4 loops on hook).
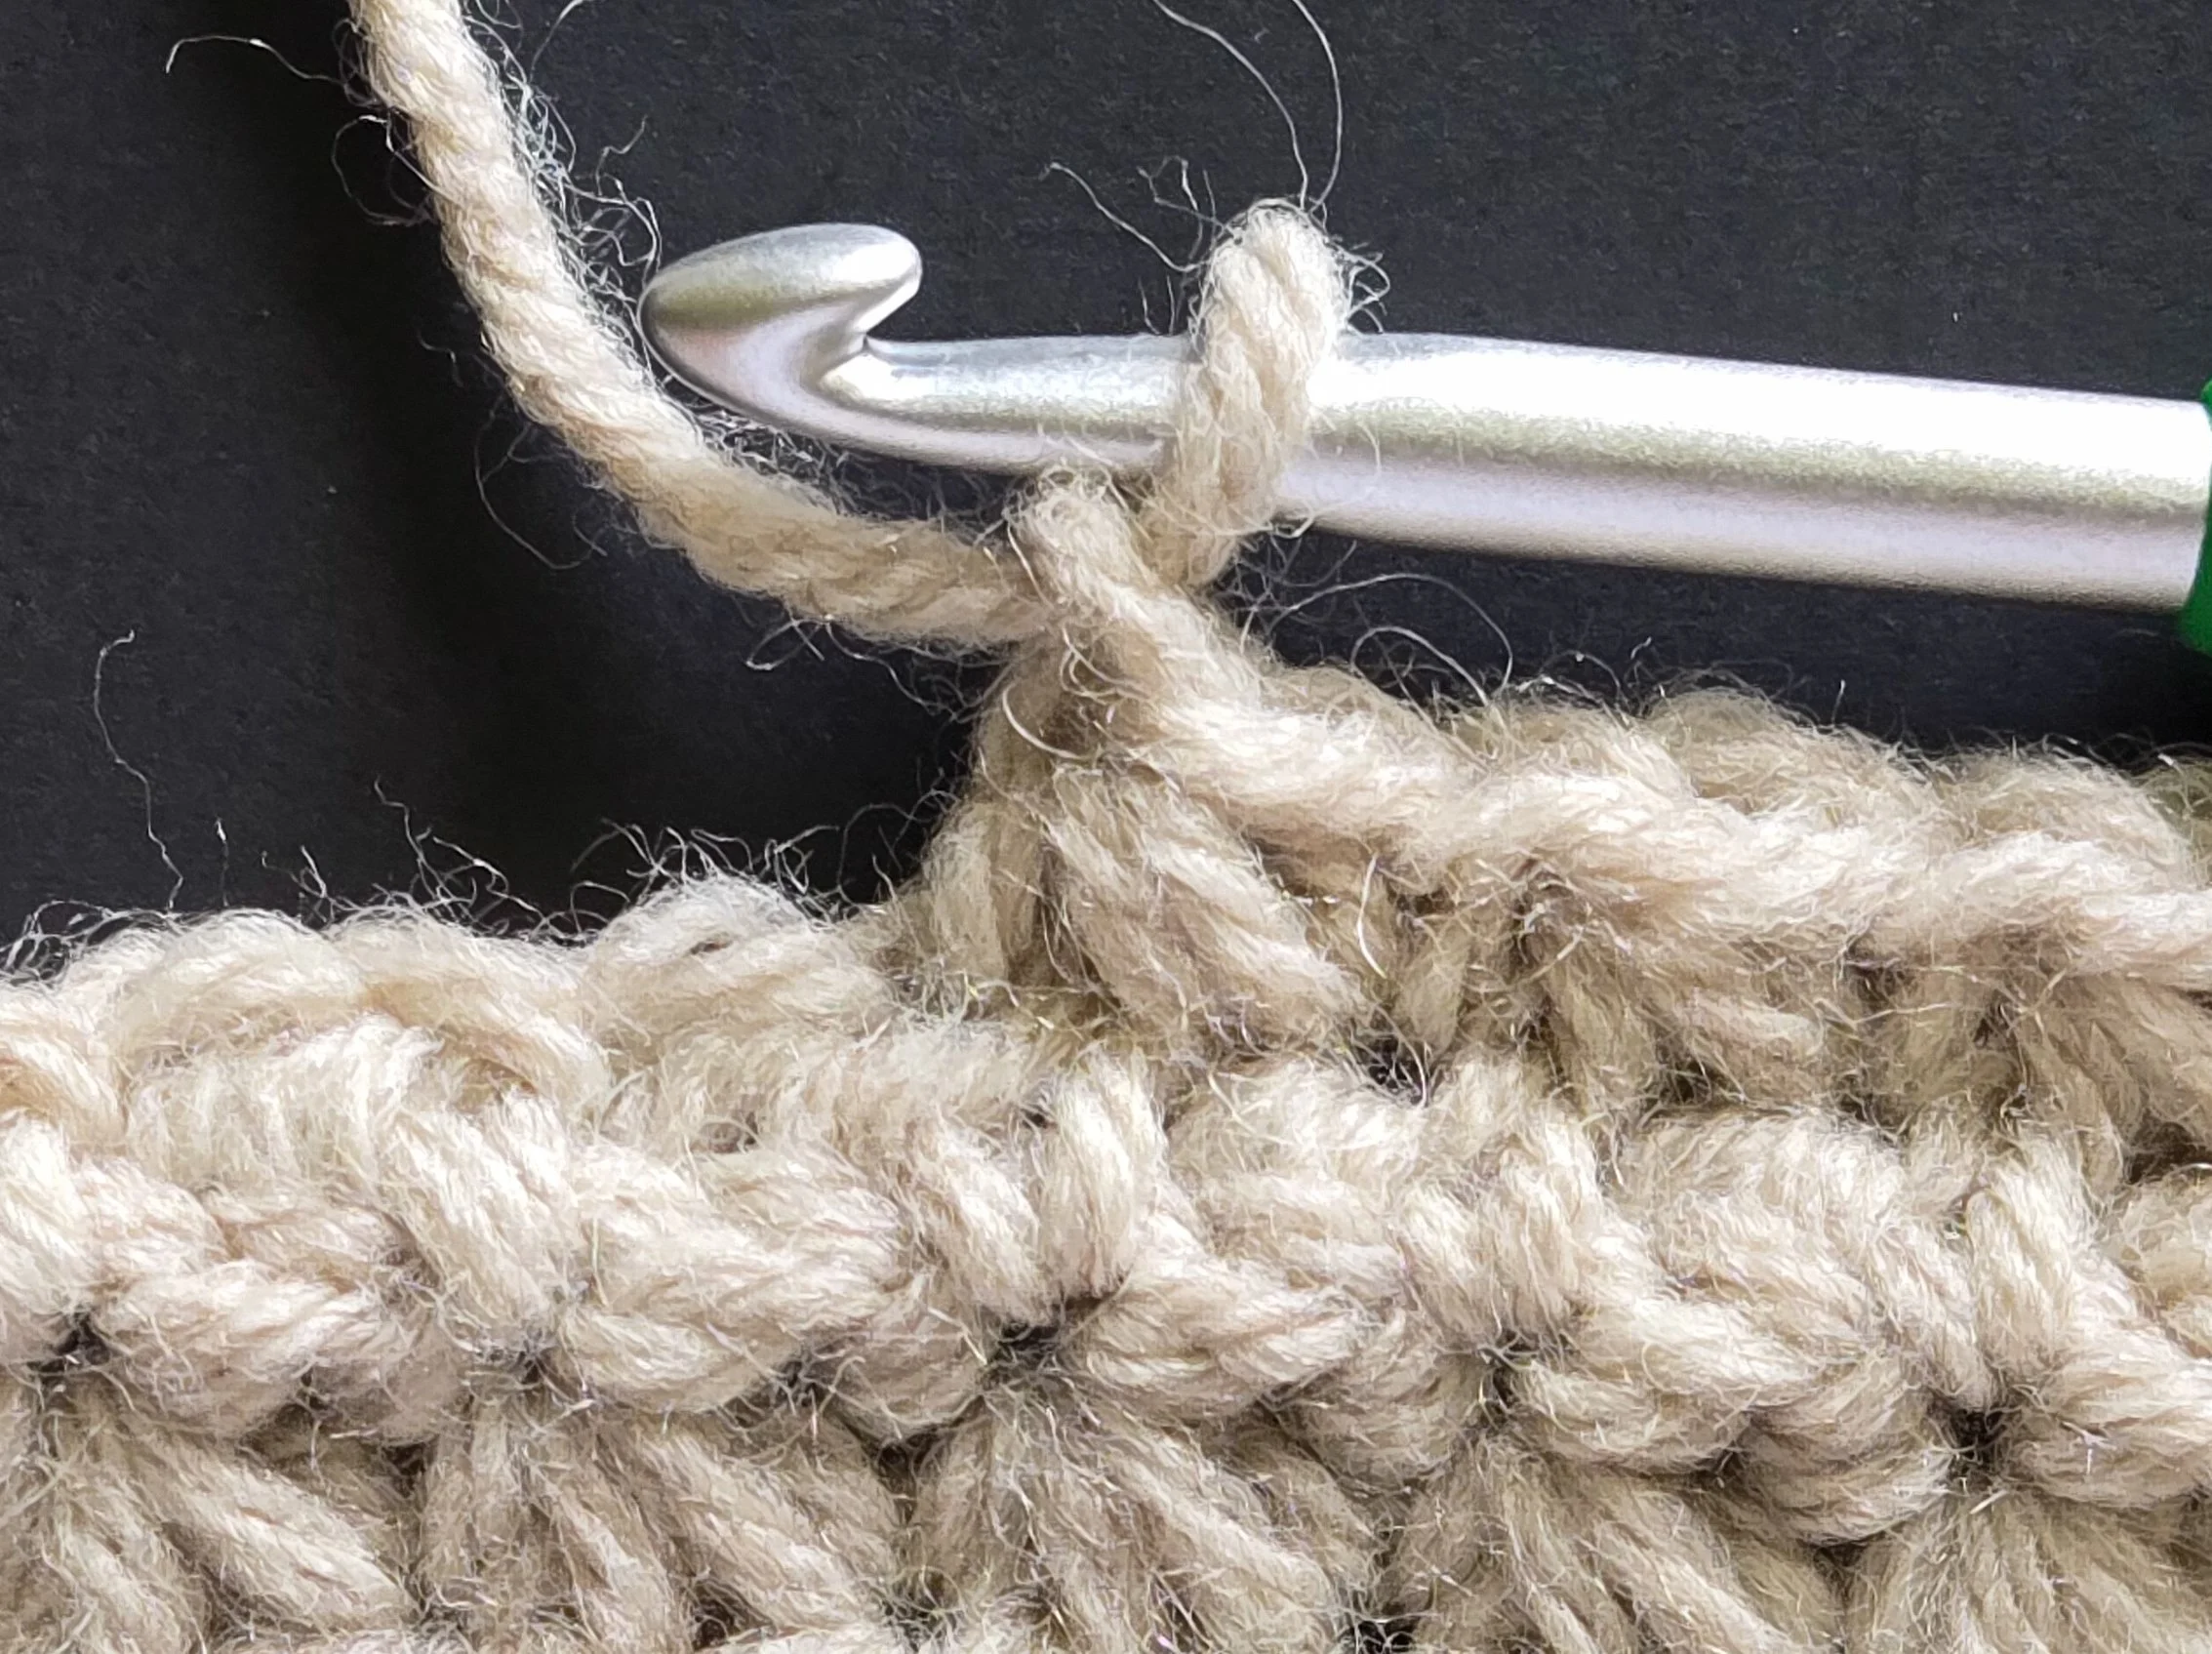
Yarn over and draw through all 4 loops on hook. Chain 1 to complete trinity stitch.
Why Stitch Placement Matters
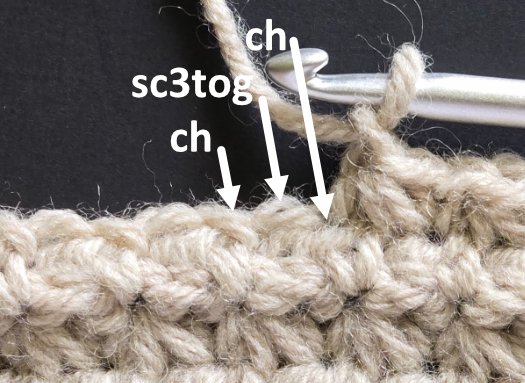
Each sc3tog is worked across the same sequence of stitches: the chain from the previous stitch, the next sc3tog, and the next chain.
Because the stitches overlap, maintaining the correct stitch placement is essential. Missing a stitch, working a sc2tog instead of a sc3tog, or forgetting a chain-1 can cause the stitch pattern to become misaligned.
Identifying Stitch Placement
To identify the next stitch placement, remember that the first loop is always drawn up in the same chain as the last stitch worked. The second loop is drawn up in the next stitch, which is often slightly larger and looser than the chains on either side. The third loop is drawn up in the following chain.
Once you recognize this sequence, finding the correct stitch placement becomes much easier.
Working Trinity Stitch in Rows: Two Methods
There are two common ways to work Trinity Stitch in rows. Both create the same stitch pattern, but they begin and end the rows differently.
Method 1 begins each row with a single crochet worked in the first stitch, followed by the next sc3tog. At the end of the row, you will not chain-1 after the last sc3tog. Instead, simply work a single crochet in the last stitch (this is also the stitch into which you worked the last leg of the last sc3tog). This creates a simple edge and is the method most commonly used in patterns.
Method 2 begins each row with a sc2tog followed by a chain-1, then continues with the next sc3tog. At the end of the row, you will work a chain-1 after the last sc3tog. Then work a sc2tog into the last stitch just worked and the last stitch.
For step-by-step demonstrations of both methods, see the accompanying video tutorial.
Patterns Worked in Rows
Working Trinity Stitch in Turned Rounds
Each round begins with a chain-1 and single crochet worked into the joining slip stitch from the previous round. Working into the joining slip stitch helps maintain the alignment of the stitch pattern.
Because the trinity stitch pattern alternates chains and sc3tog clusters, the beginning single crochet takes the place of the chain between the first and last sc3tog of the round, completing the stitch pattern repeat.
For this reason, do not work a chain after the beginning sc or before joining to it at the end of the round.
For a step-by-step demonstration, see the accompanying video tutorial.
Patterns Worked in Turned Rounds
Trinity Pillow Set ~ coming winter 2027
Checking Your Work: Common Mistakes
Taking a moment to check your work every few rows or rounds can help you catch misplaced stitches before they become difficult to correct.
Misplaced Stitches
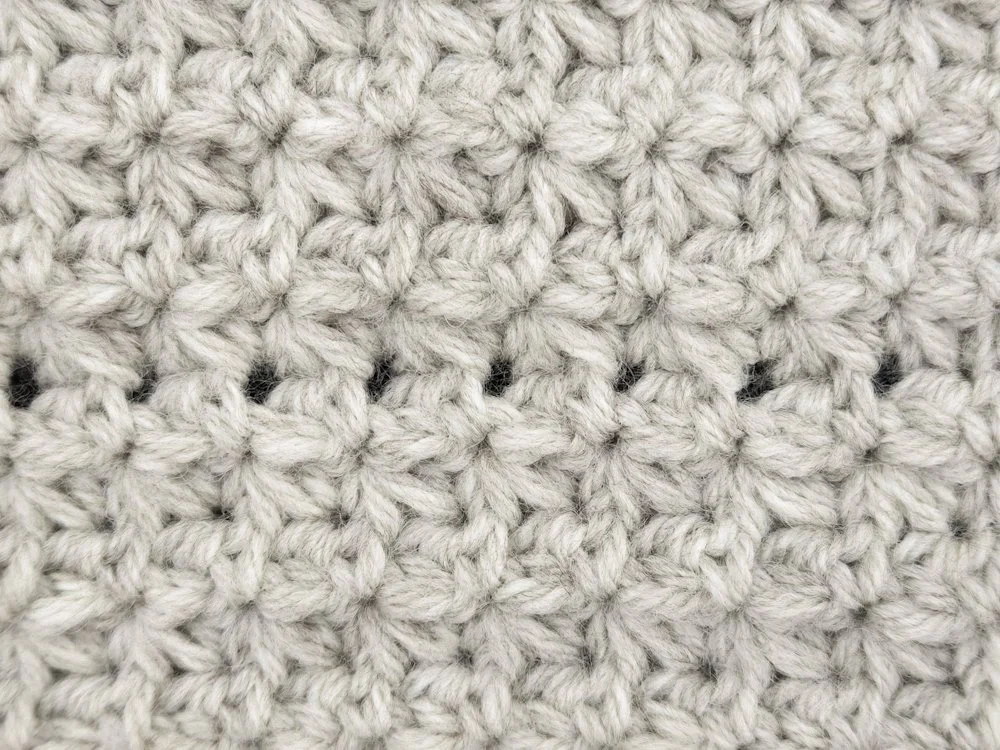
Misplaced stitches often create a visible line of holes or gaps in the fabric. If you notice a line of holes forming, compare your work to the photo below and check that each sc3tog is worked across all 3 required stitches and followed by a chain-1.
Misaligned Stitch Pattern
Here’s another example where the stitches have become misaligned. Instead of alternating across the fabric, the Trinity Stitch clusters are stacked directly on top of one another, creating vertical columns with large holes between them.
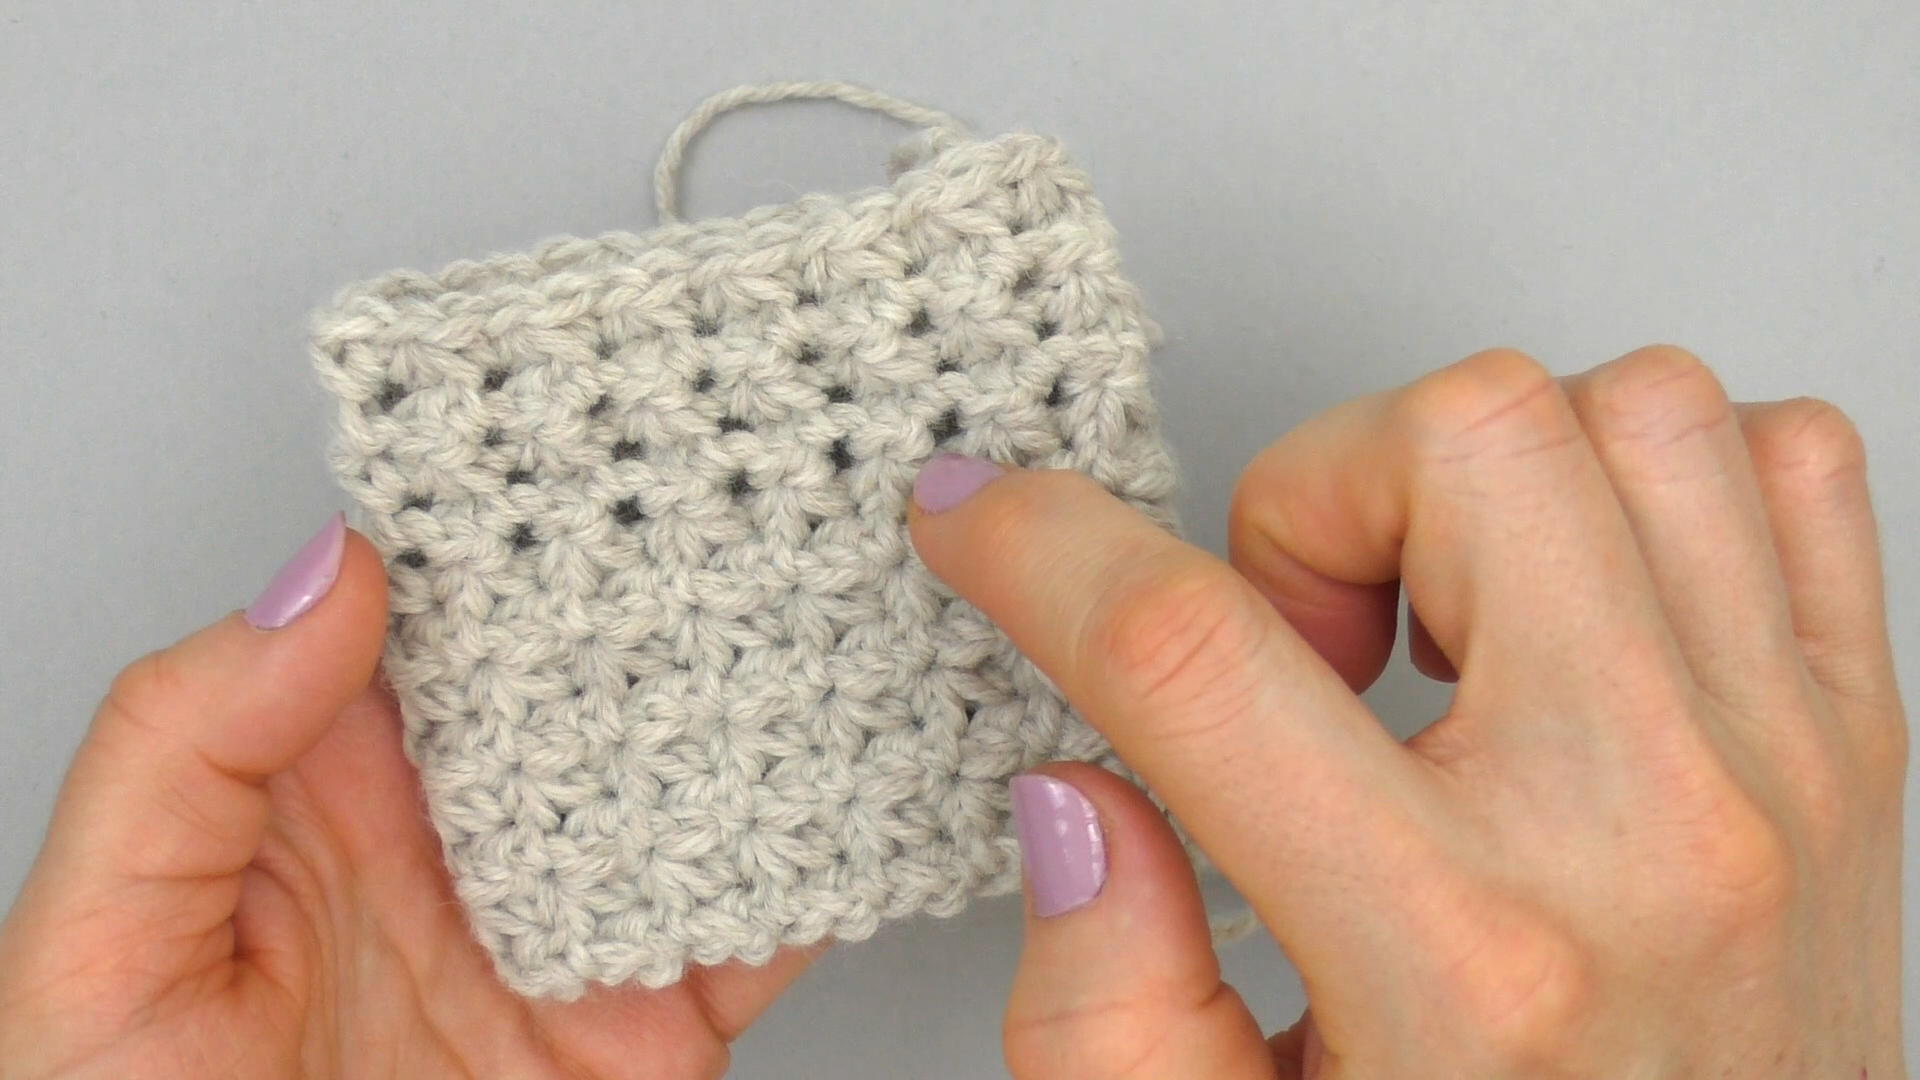
If your work begins to look like this, it’s usually a sign that the stitches are being worked in the wrong order. Rather than working into the chain just worked, the stitch has been worked into the next sc3tog, followed by the chain and the next sc3tog.
Because Trinity Stitch relies on proper stitch placement to maintain its distinctive texture and alignment, this small mistake becomes more noticeable with each round.
The good news is that it’s easy to fix if you catch it early. If you notice the clusters beginning to stack into columns or large holes appearing in the fabric, undo your work back to the last round that looks correct. Then double-check your stitch placement before continuing.
This is one reason I recommend checking your work regularly as you crochet. Catching a misaligned stitch early can save you a lot of time and frustration later on.
Related Patterns
Trinity Pillow Set ~ coming winter 2027
More Trinity Stitch tutorials are on the way! As I release new patterns and explore new techniques, I’ll continue expanding this resource with additional videos, tips, and troubleshooting.