
Crochet Wildflower Field Guide
Follow along as I design a nature-inspired, color-block crochet blanket filled with wildflower appliqués and botanical crochet motifs. Every flower in this collection is inspired by native plants found in the Rocky Mountains, and I’ll be sharing the creative process from sketches and color palettes to finished crochet motifs and blanket layout ideas.
Many of these wildflower appliqué patterns will be released here for free in 2026, along with step-by-step video tutorials. The complete collection and blanket pattern will follow in 2027.
Want to watch the ideas take shape? I’ll be sharing more of the experiments, design decisions, and discoveries behind the Crochet Wildflower Field Guide in my Curious Little Ideas series on YouTube. The series will be devoted heavily to this project throughout the rest of 2026, so if you’d like to come along for the creative process, watch the series on YouTube.
Want to stay in the loop? Subscribe to my newsletter for behind-the-scenes updates, new pattern announcements, and early access to new releases.
Want to help shape the patterns? Visit my Ravelry group to stay up to date on testing opportunities, learn more about the upcoming blanket test, and see the 2027 testing schedule.
Free Crochet Wildflower Applique Patterns

Blanket Flower
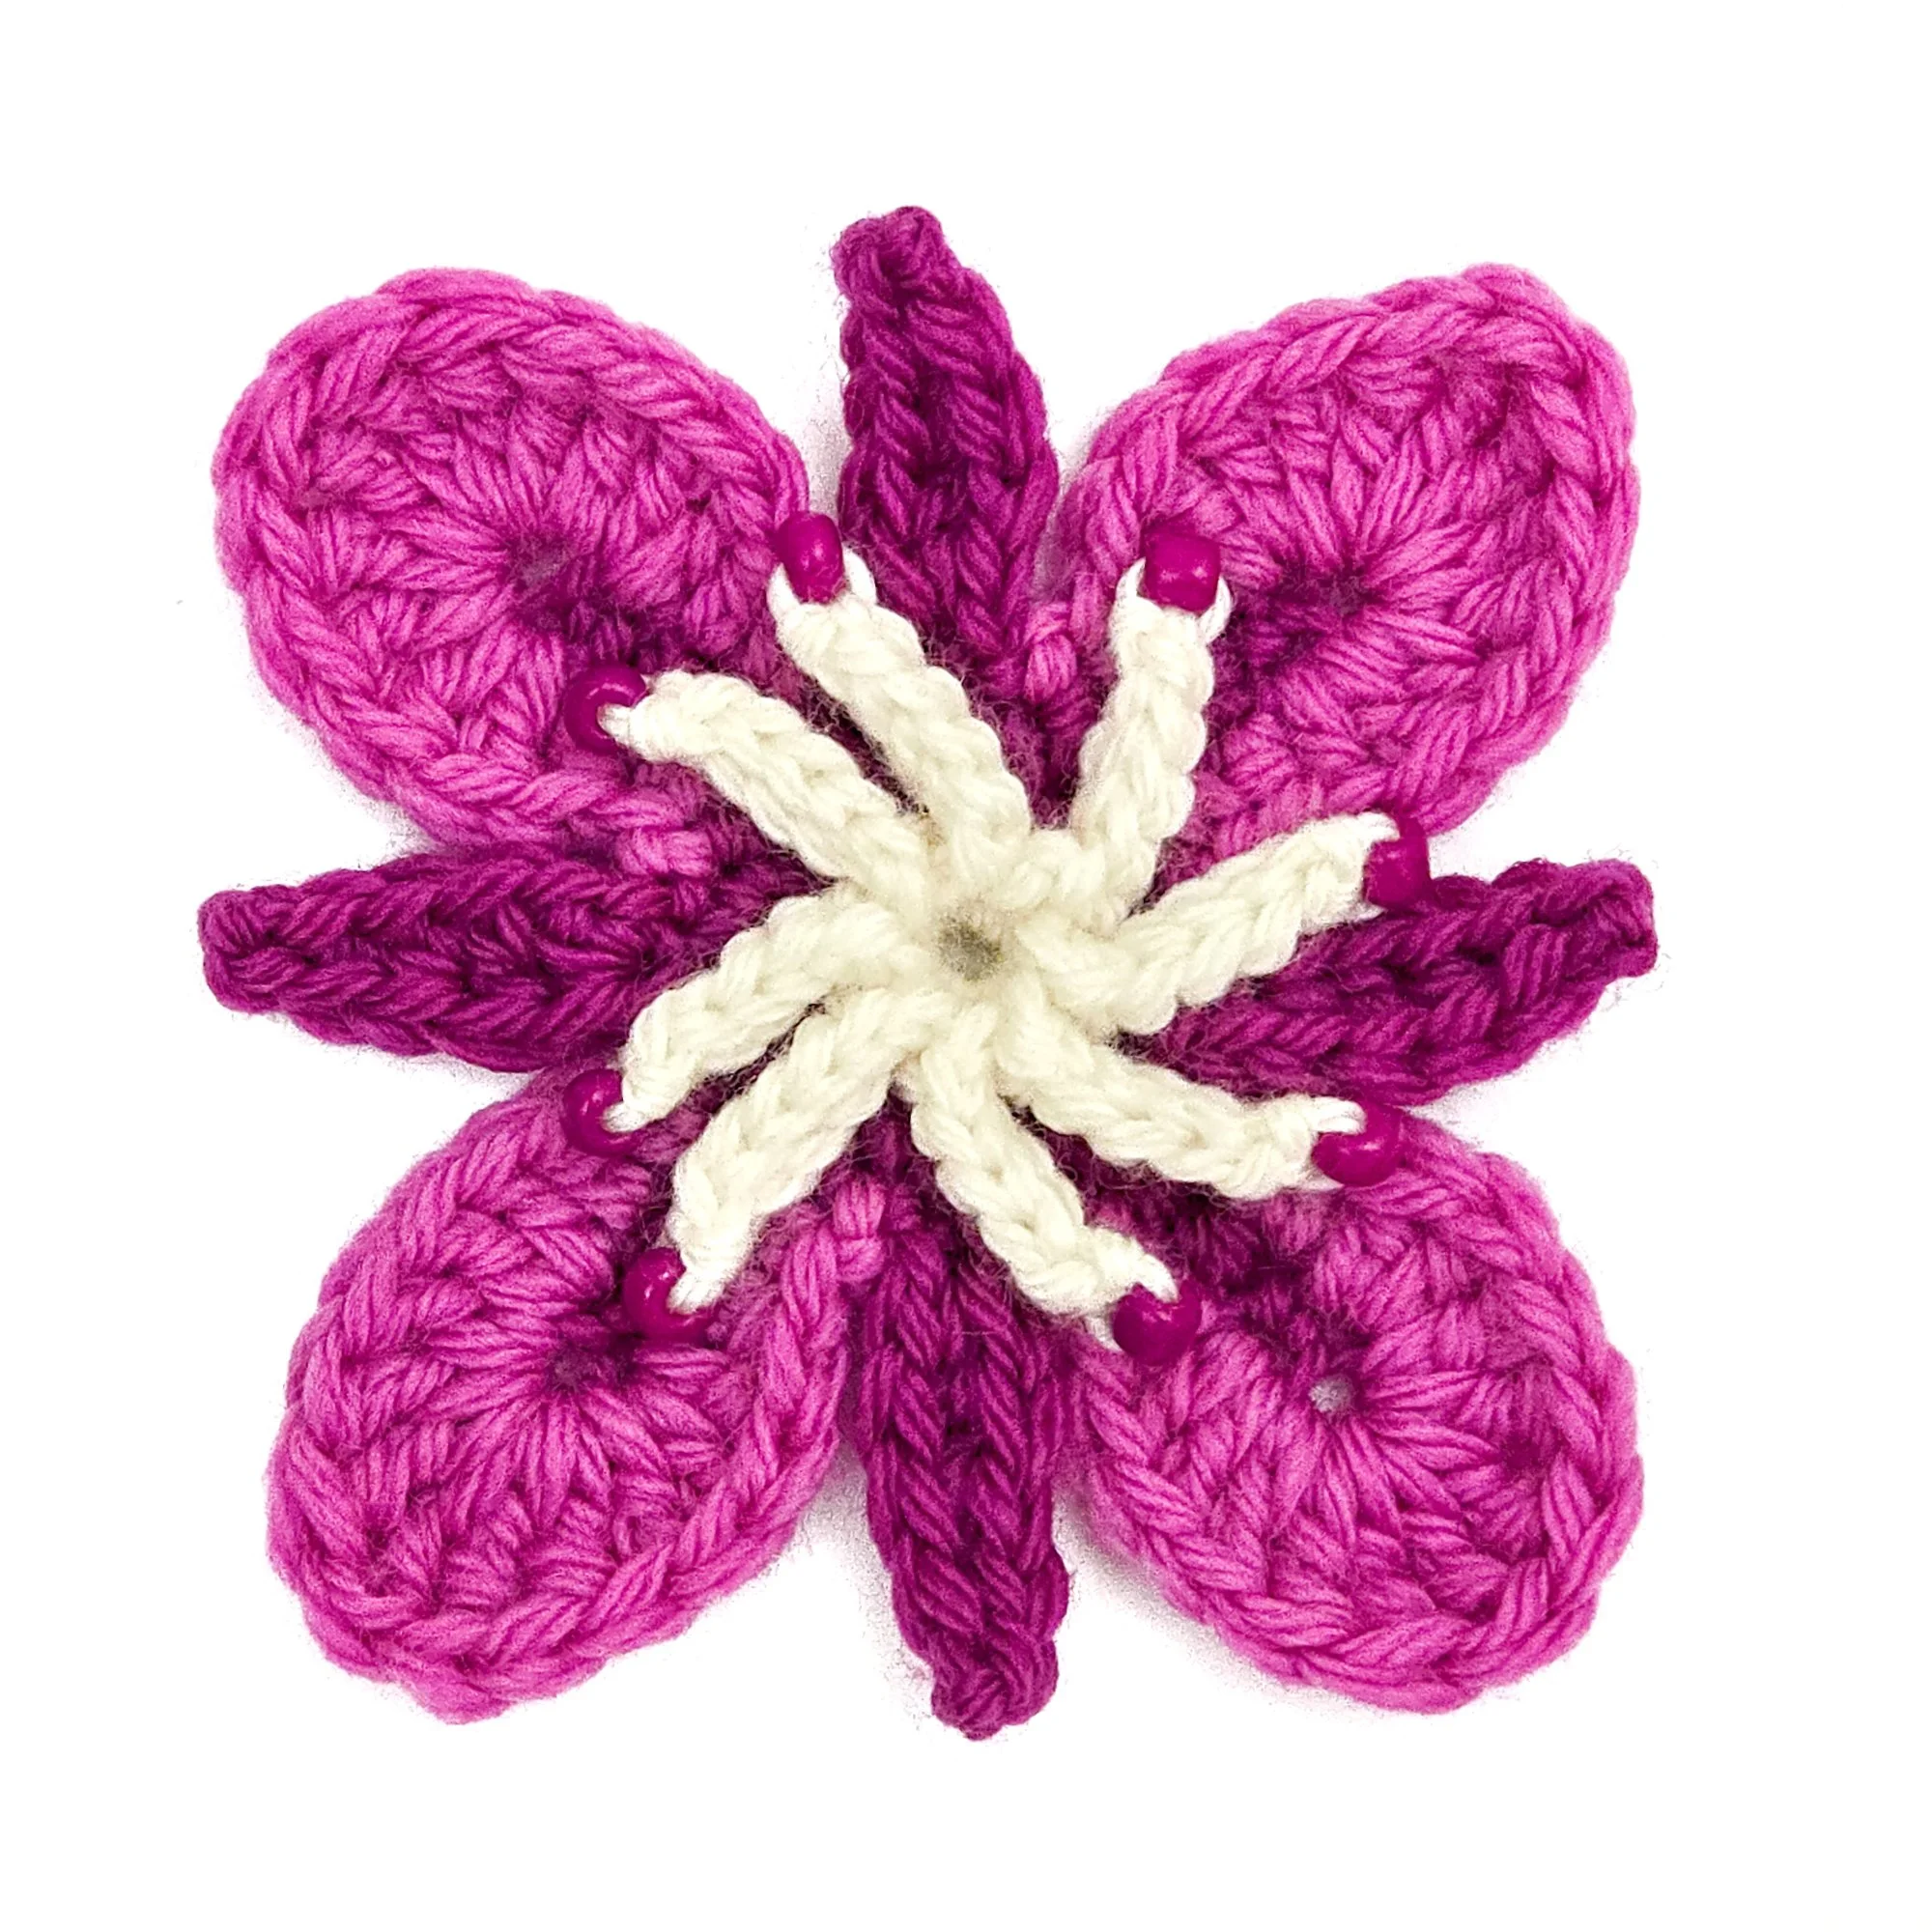
Fireweed
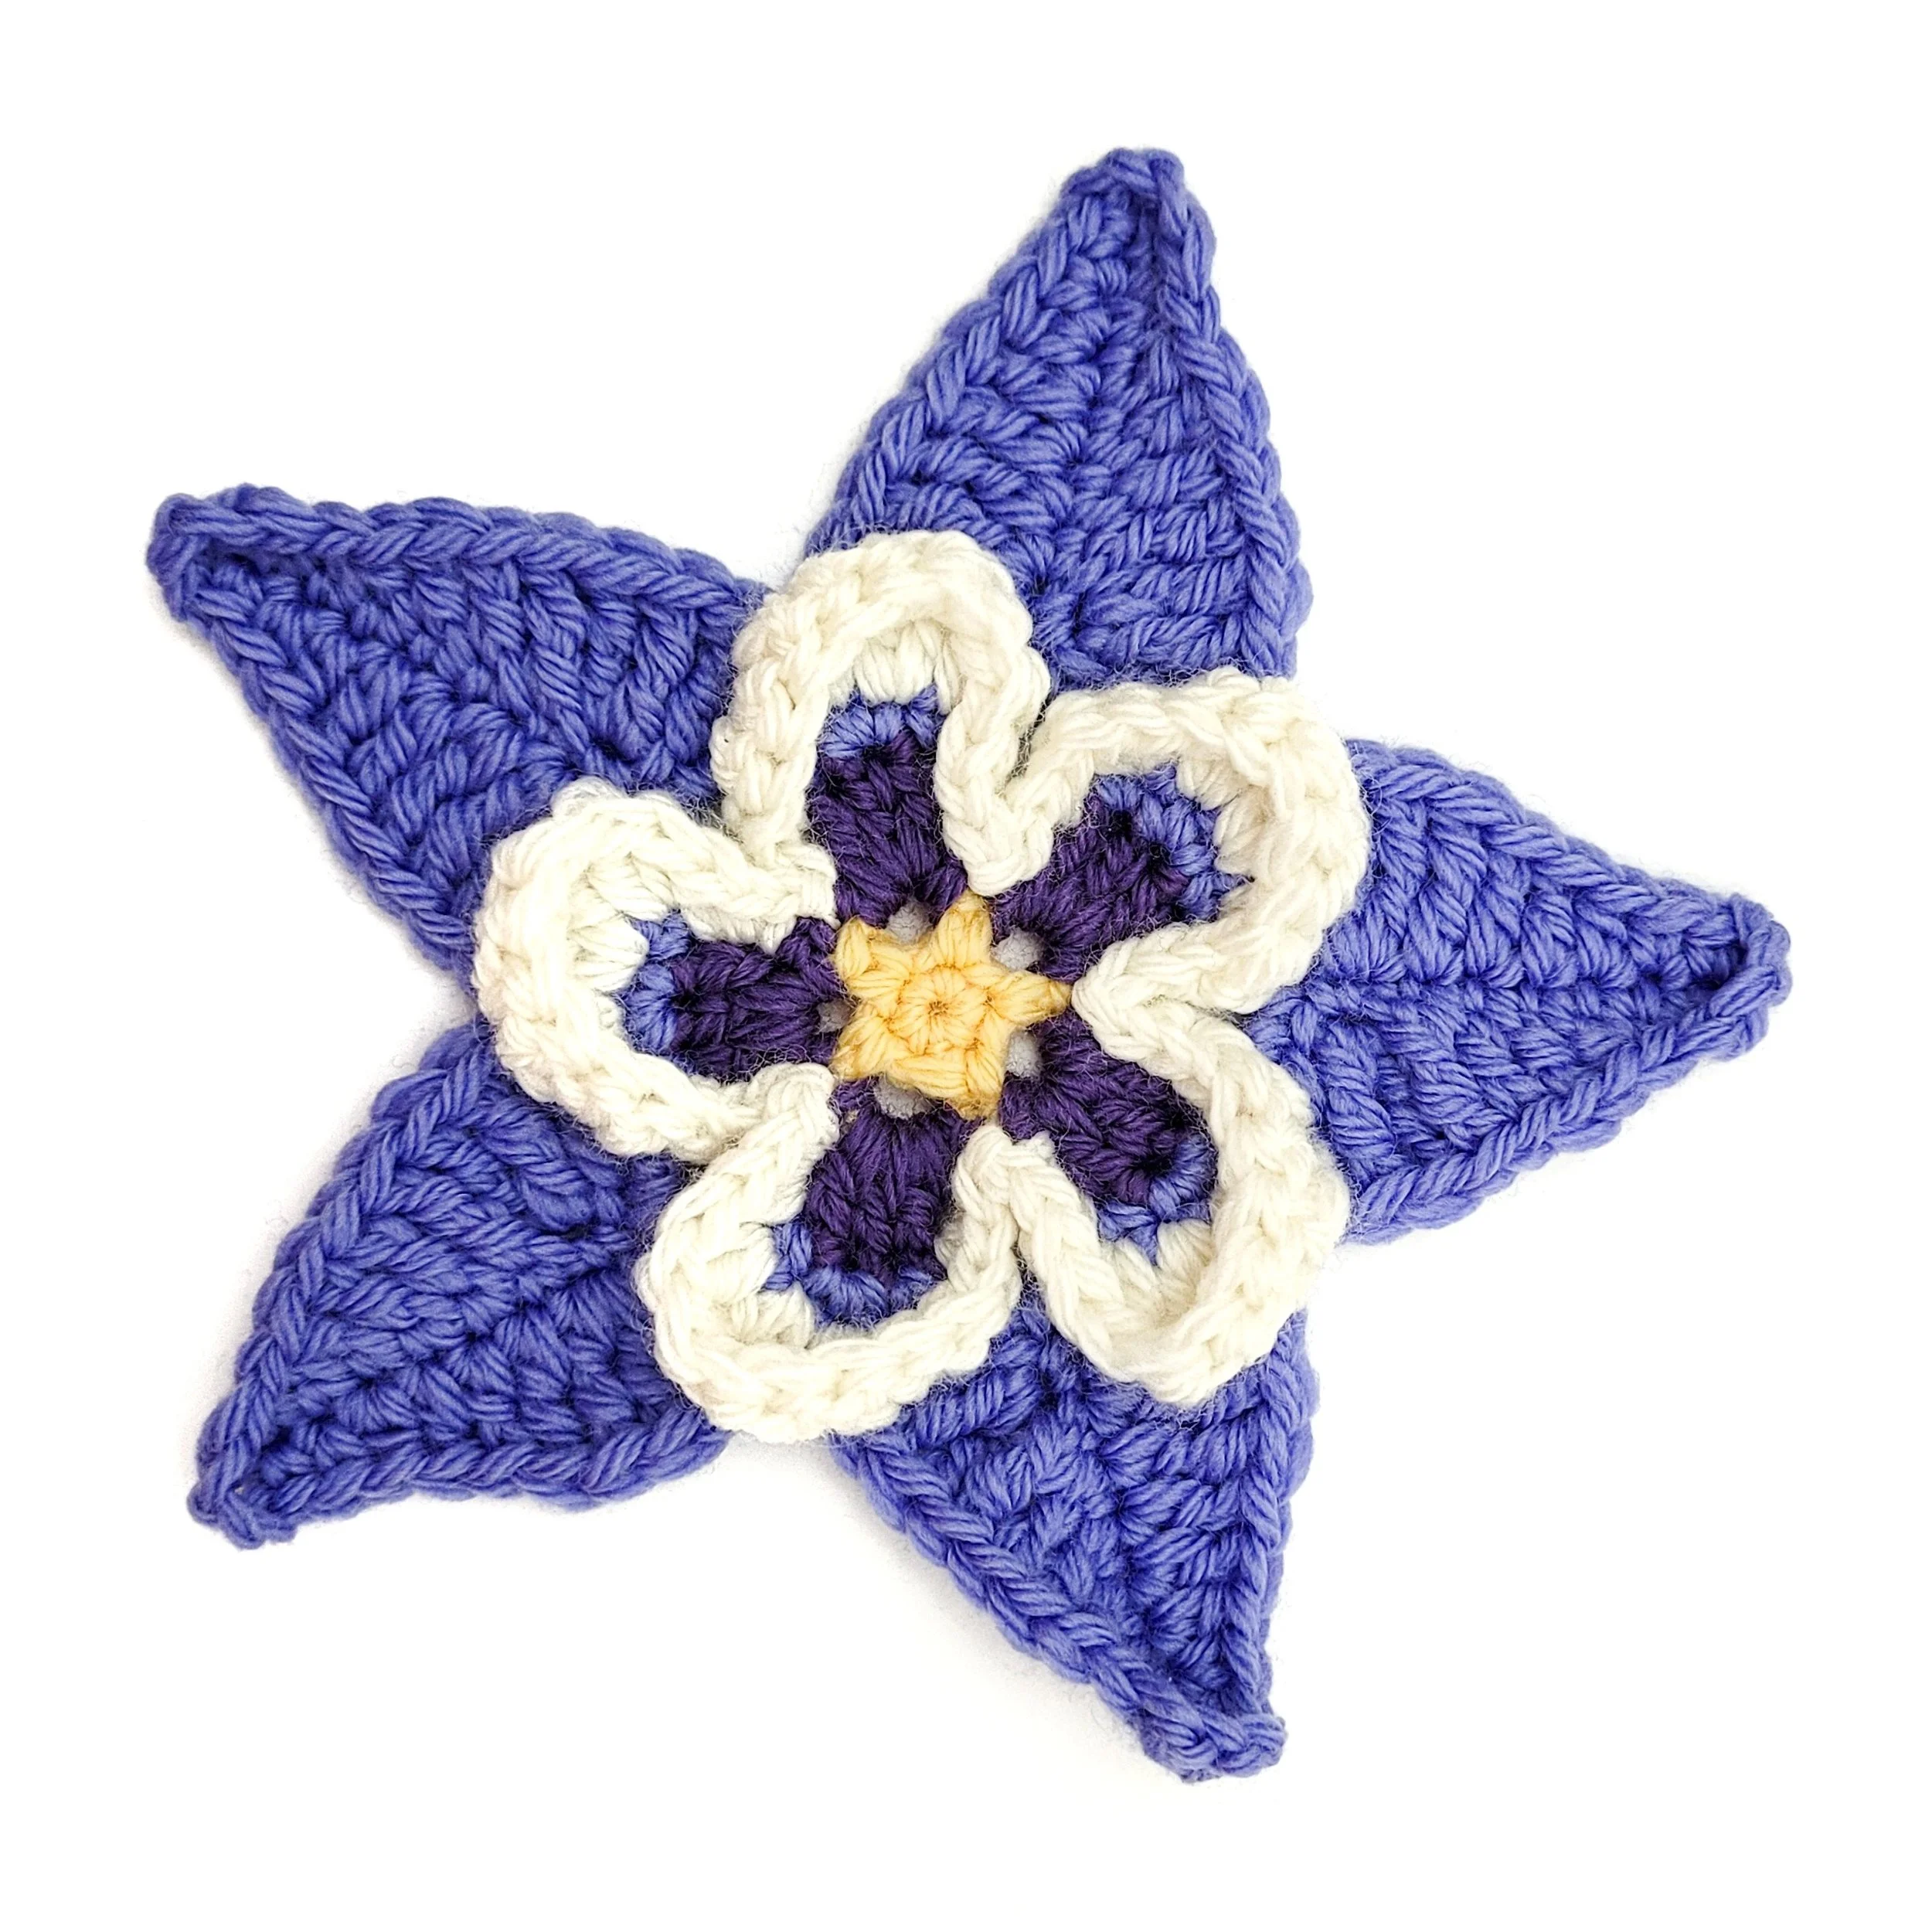
Columbine
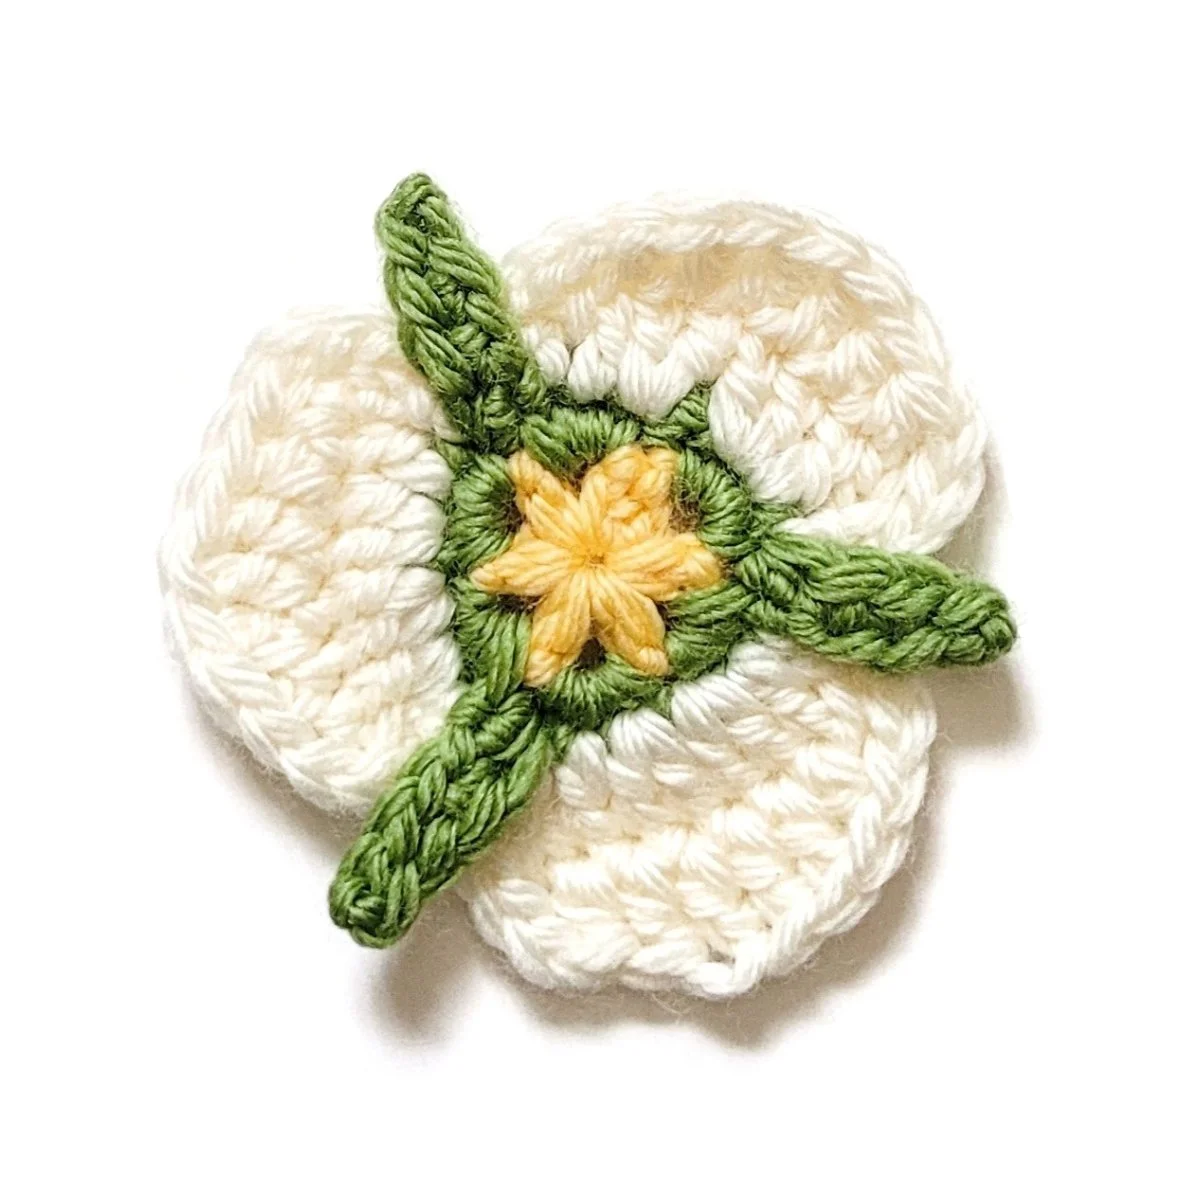
Mariposa Lily
Crochet Wildflower Field Journal
October 26, 2026
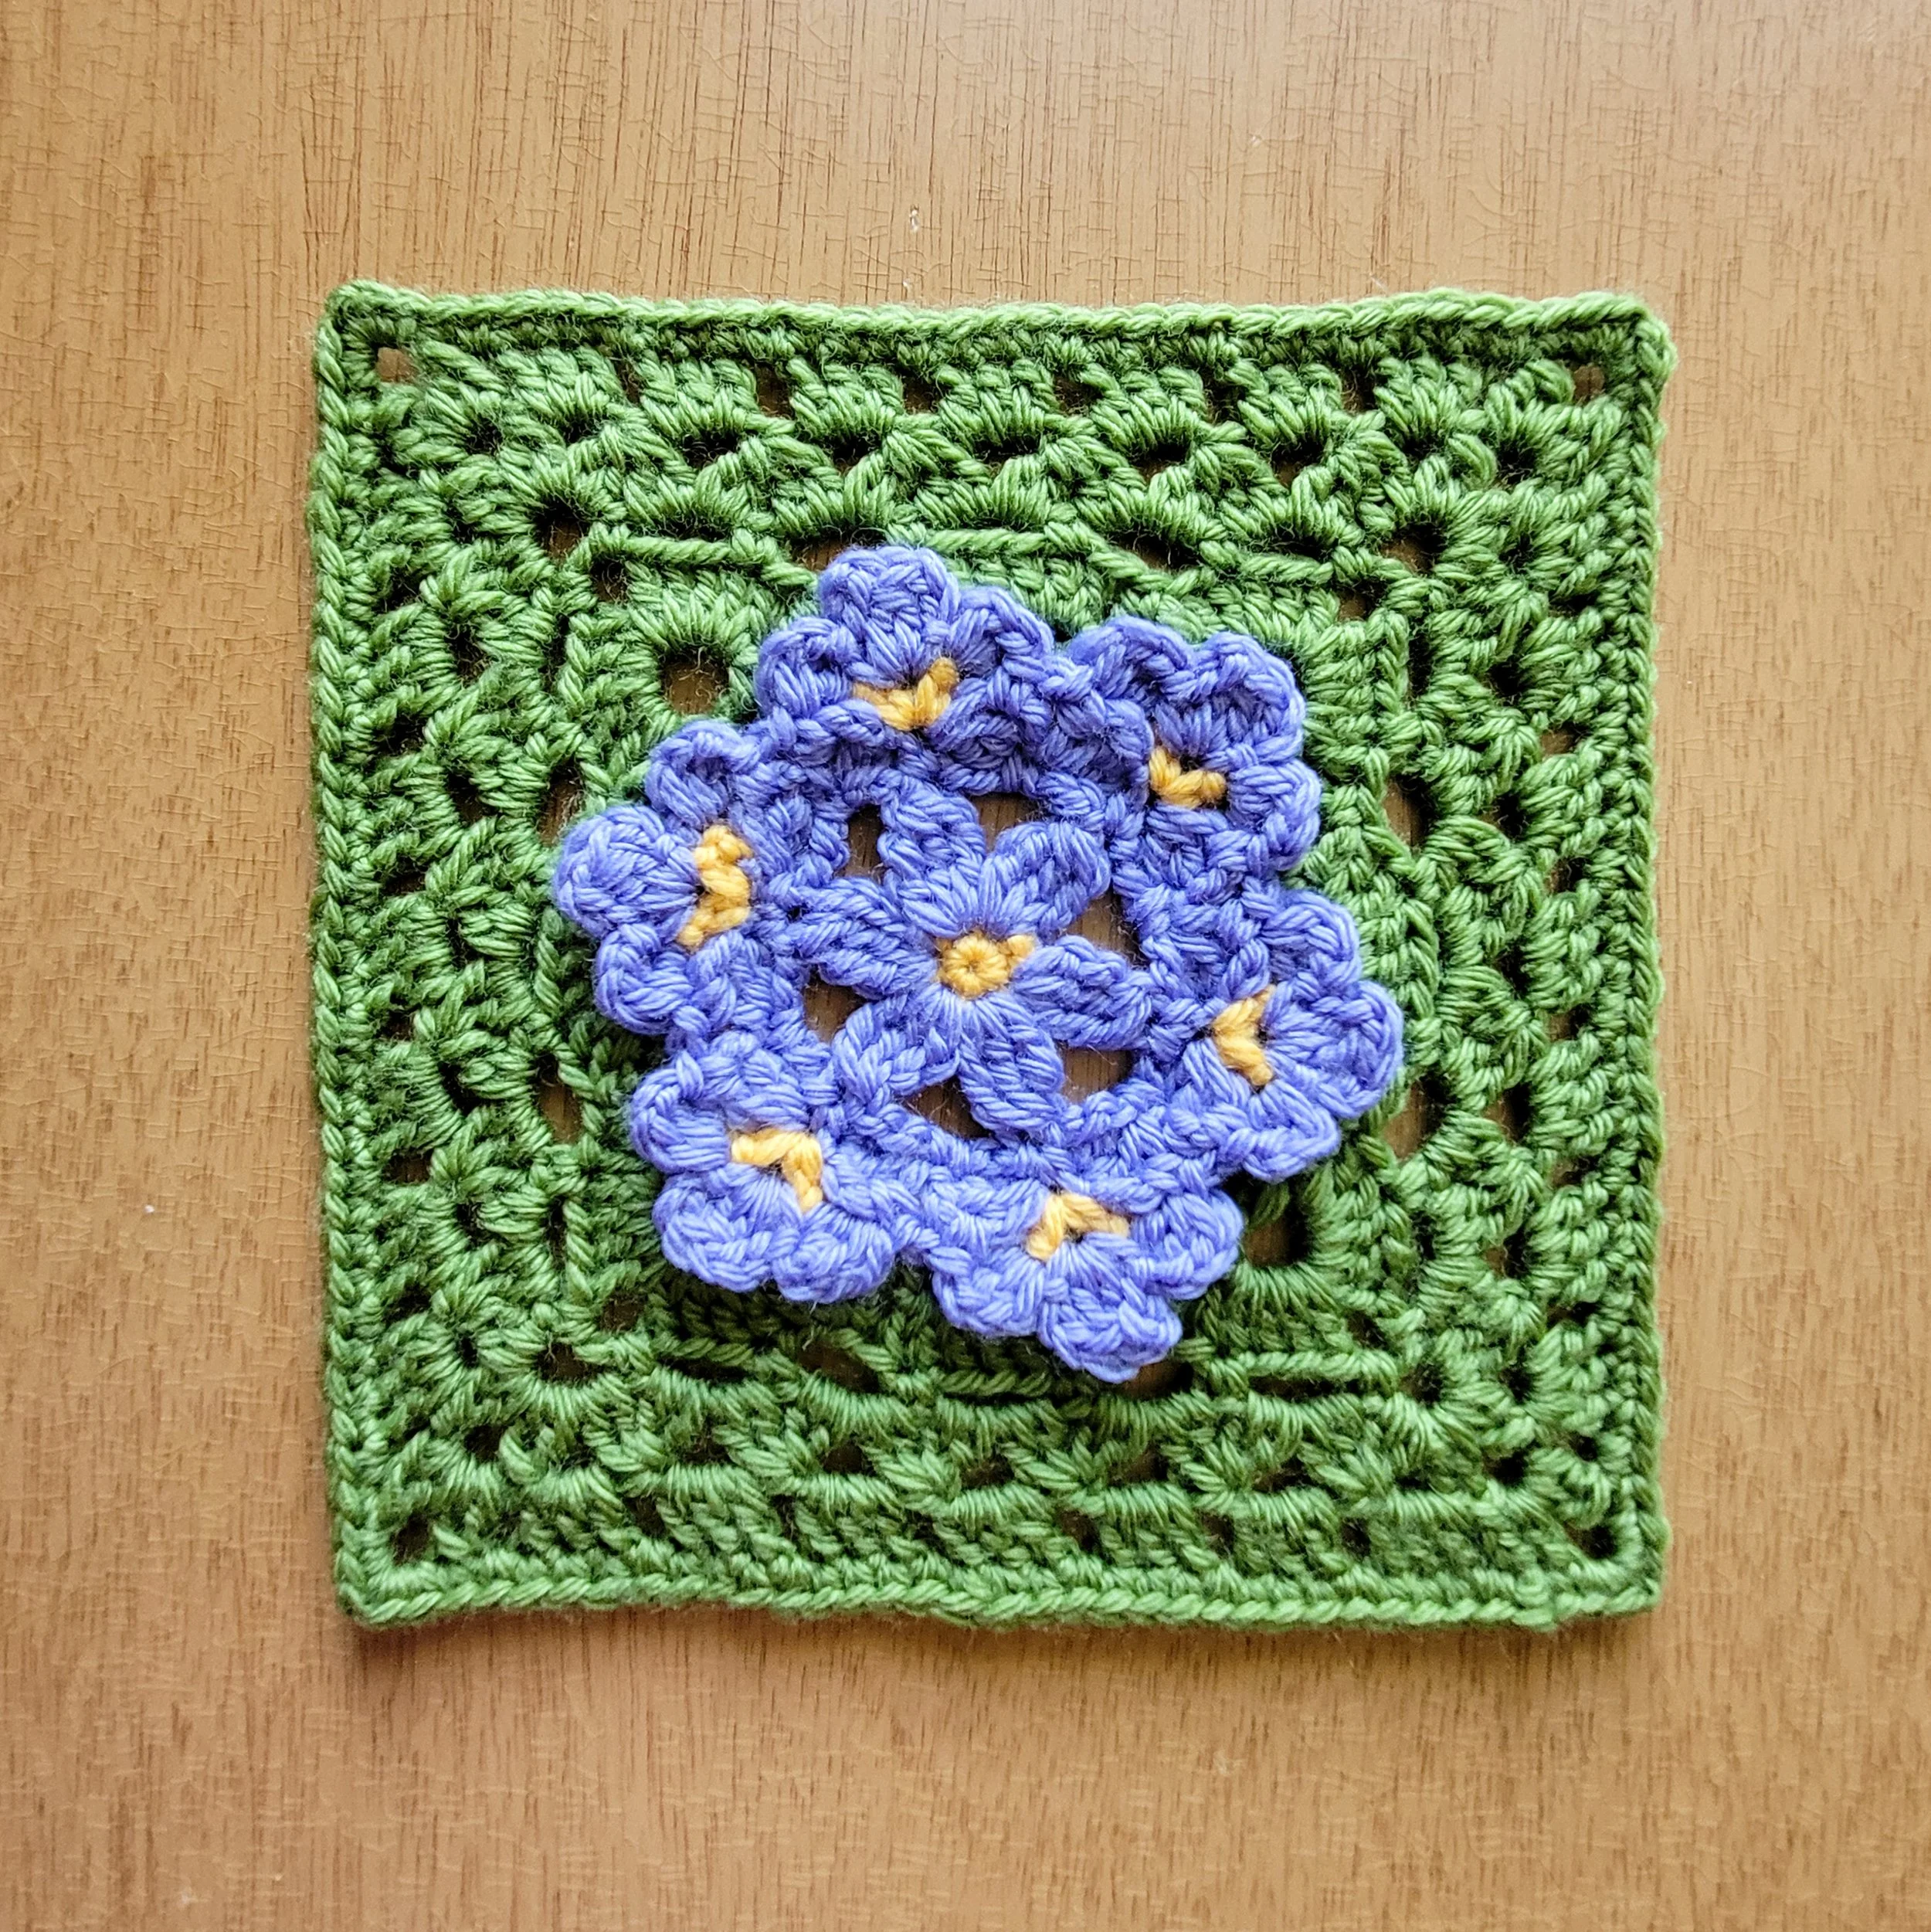
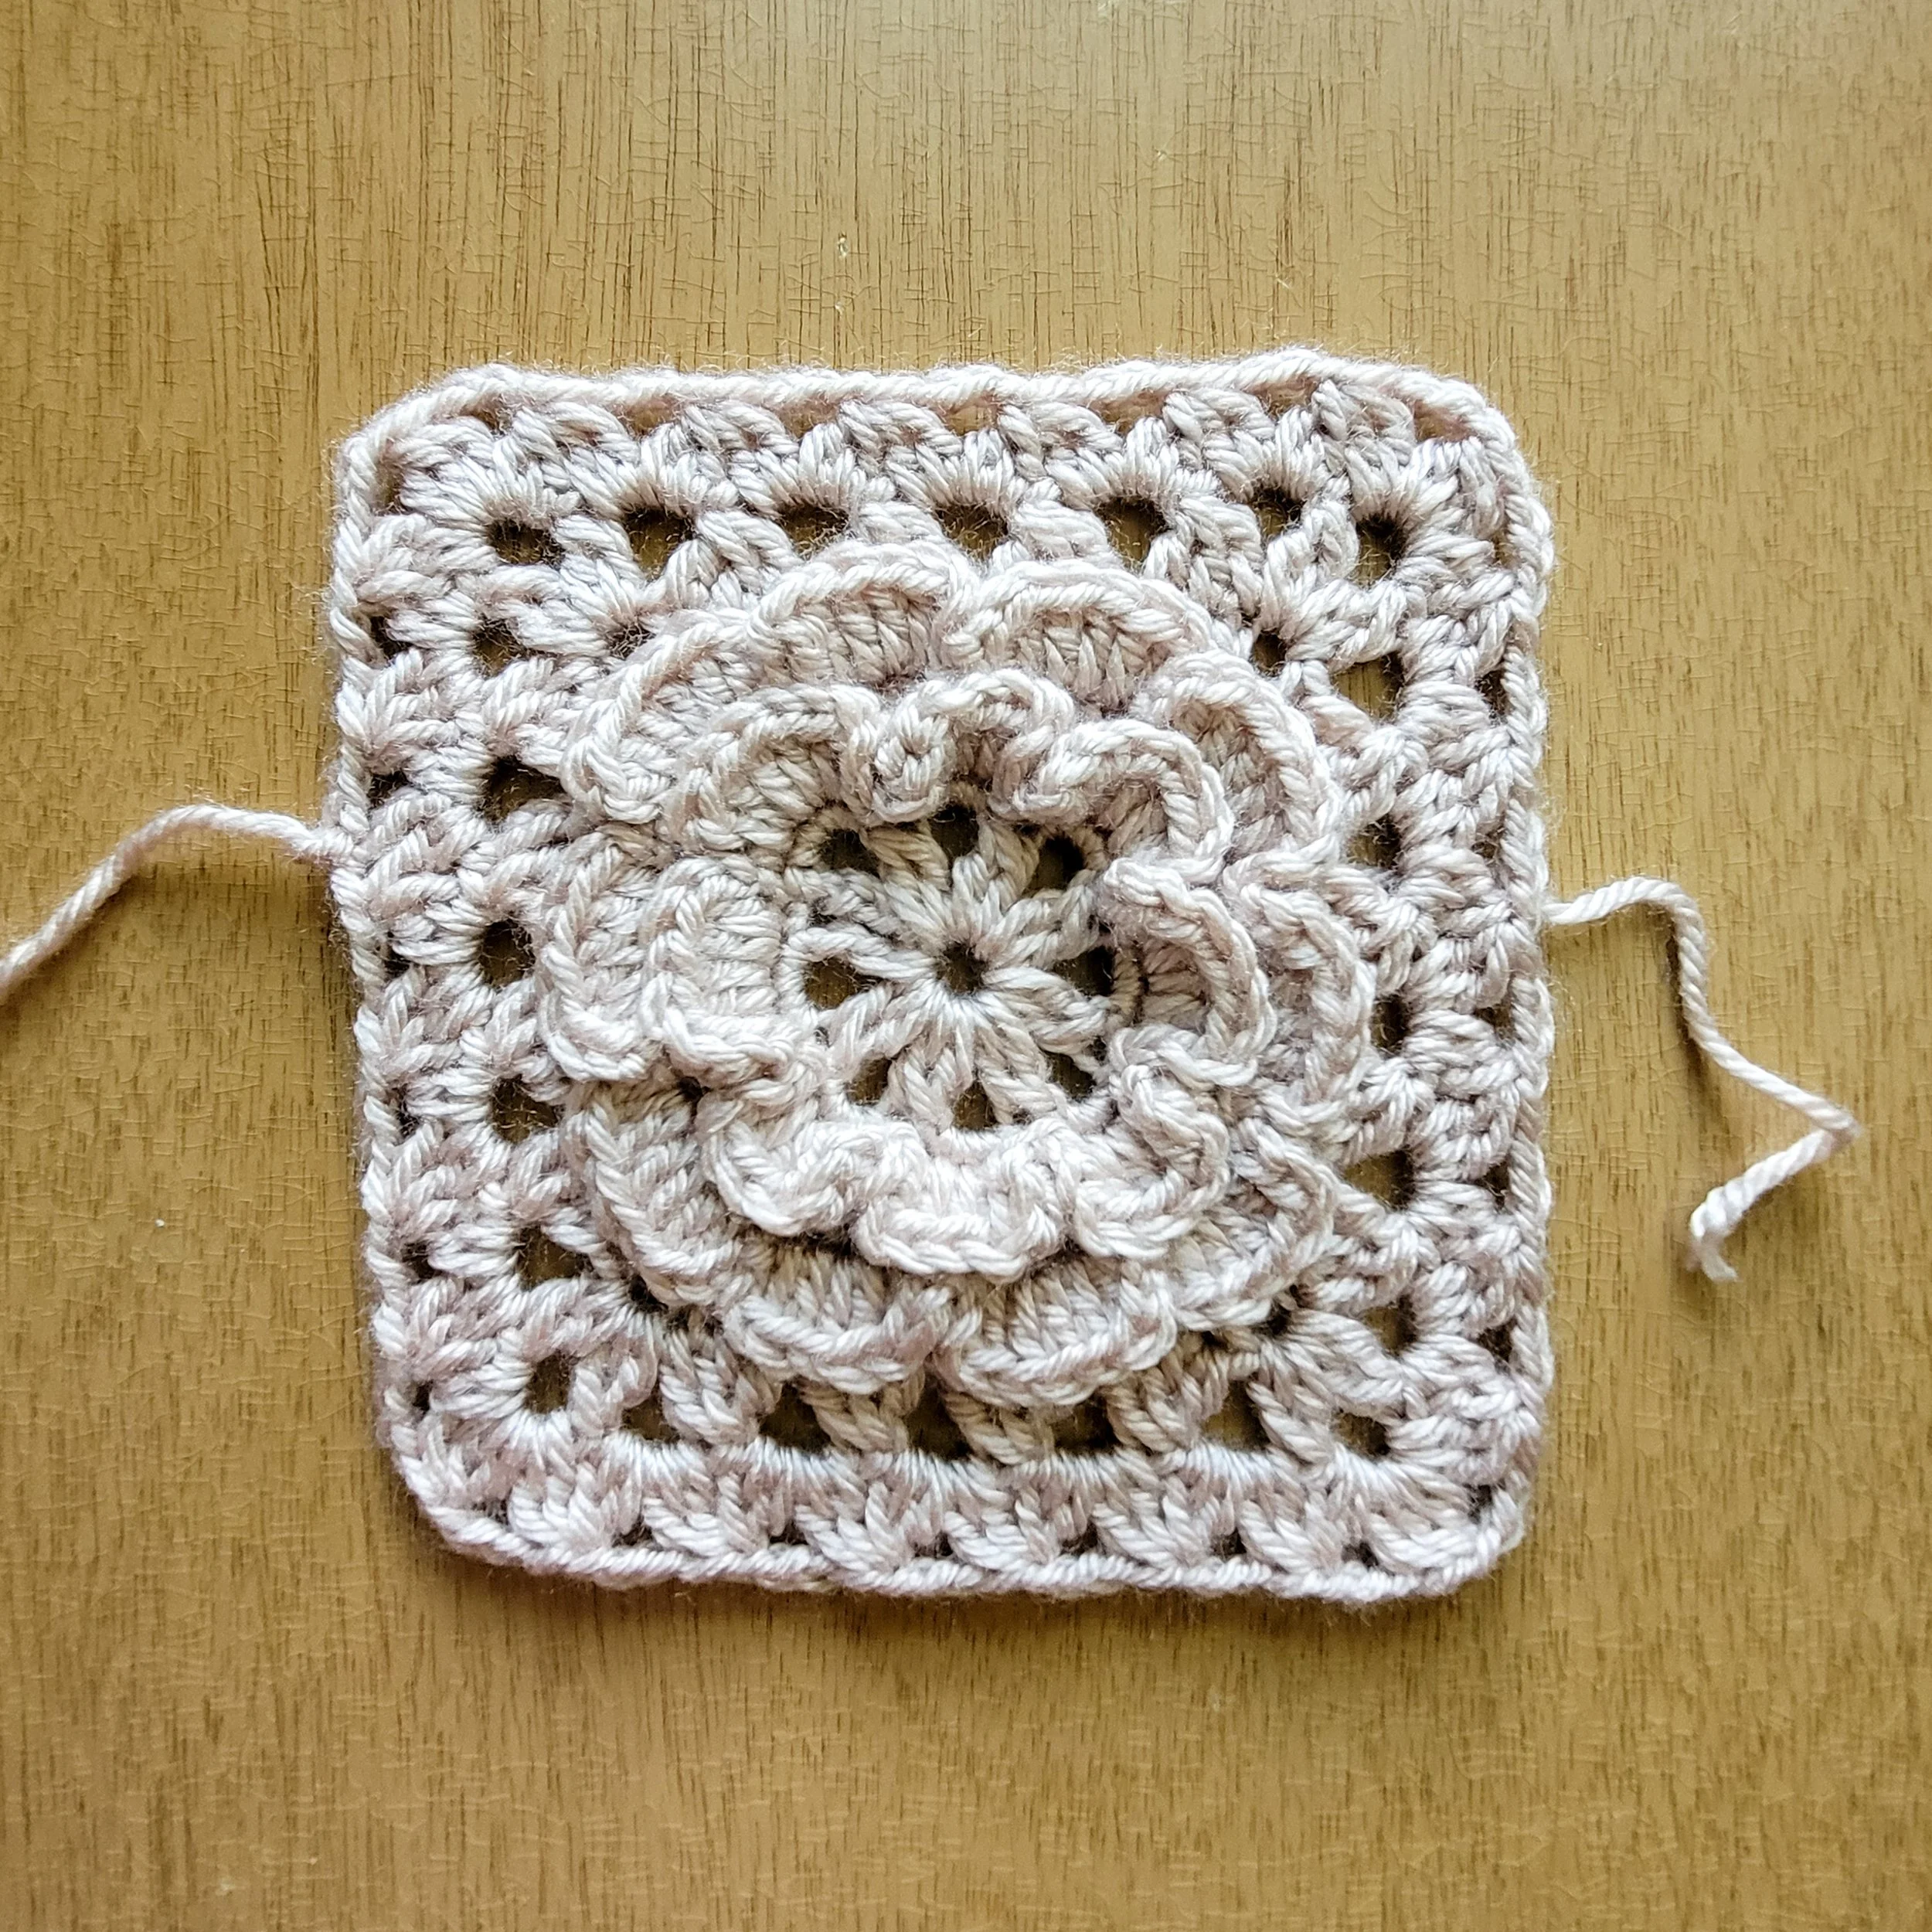
In my third, and hopefully final, redesign of this flower motif, I kept the approach of working into chain spaces at the back of the appliqué to create a round of shells that squared off the design. From there, I worked a round of single crochet stitches separated by chain spaces, creating the foundation for the leafy dc4tog stitches I borrowed from my early Checkered Rose Motif. I finished with a round of simple granny stitch.
It didn’t take long to see that the old stitch pattern was exactly what the Flower Cluster needed. It gave the background the texture and interest I’d been looking for while still allowing the flower itself to take center stage. And best of all, it’s a lot of fun to crochet!
October 26, 2026
I let the problem simmer while I worked on other things, hoping the right idea would eventually turn up. And then, quite unexpectedly, one day I found it hiding in an entirely different project!
A viewer recently asked me a question about one of the early trial motifs for my Checkered Rose Blanket. I went back to my My Design Process Revealed: The Checkered Rose Blanket video to revisit the design and help answer her question. While watching, I came across a stitch pattern I’d tried and ultimately set aside. In the last round, I used double crochet 4 together (dc4tog) stitches divided between two chain spaces to create a leaf-like cluster stitch. In the video, I even remark that I love how the stitch pattern looks and hope I’ll find the right design to use it in someday.
Seeing the stitch pattern again with fresh eyes, I immediately knew it belonged in the Flower Cluster motif.
October 26, 2026
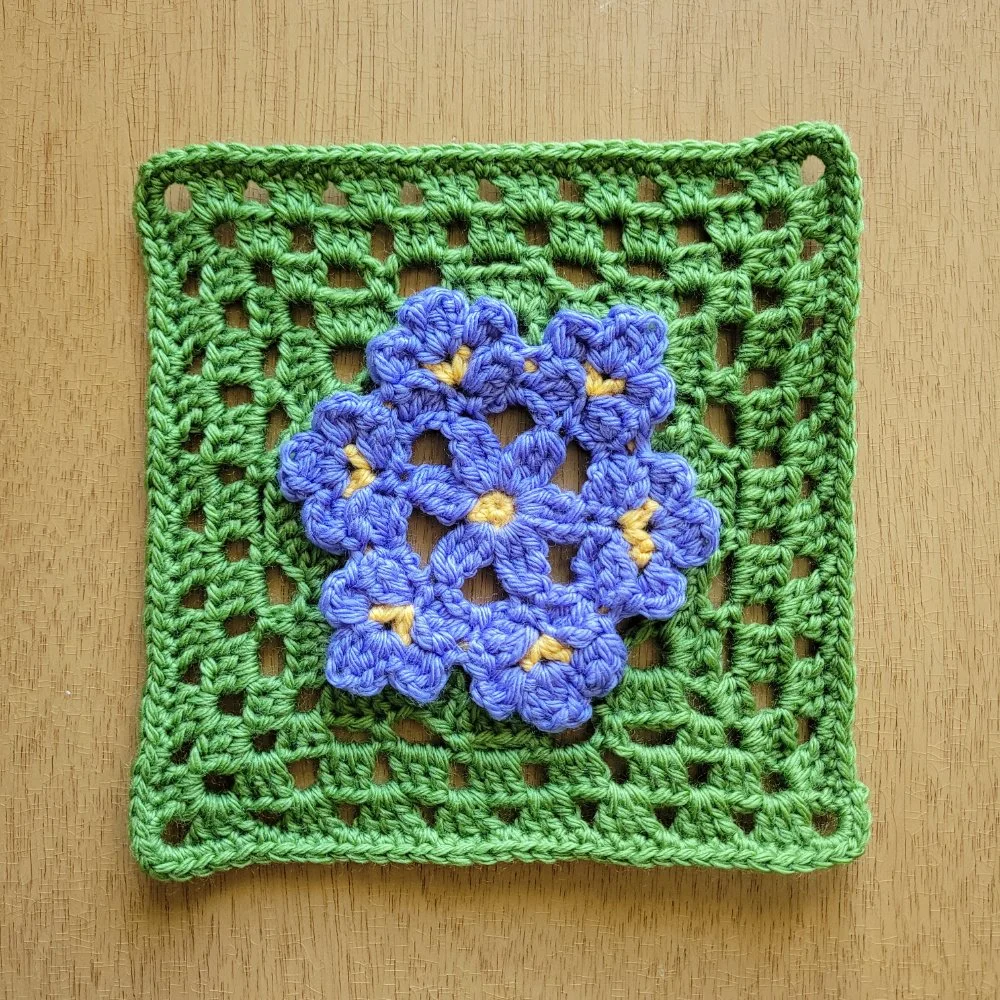
For my Flower Cluster background redesign, I decided to try a simpler approach. Rather than working outward from between the flower petals as I’d done before, I worked into chain spaces at the back of the appliqué, creating another round of chain spaces into which I could work a round of shell stitches.
For the final two rounds, I switched to granny stitch. I thought this would help the border blend in with the other motifs instead of competing with their textures.
And it worked! The background was simpler, and the flower fit in better with the overall design. There was just one little problem: it was so plain. The granny stitch made the cluster look like it was floating in a sea of green.
October 26, 2026
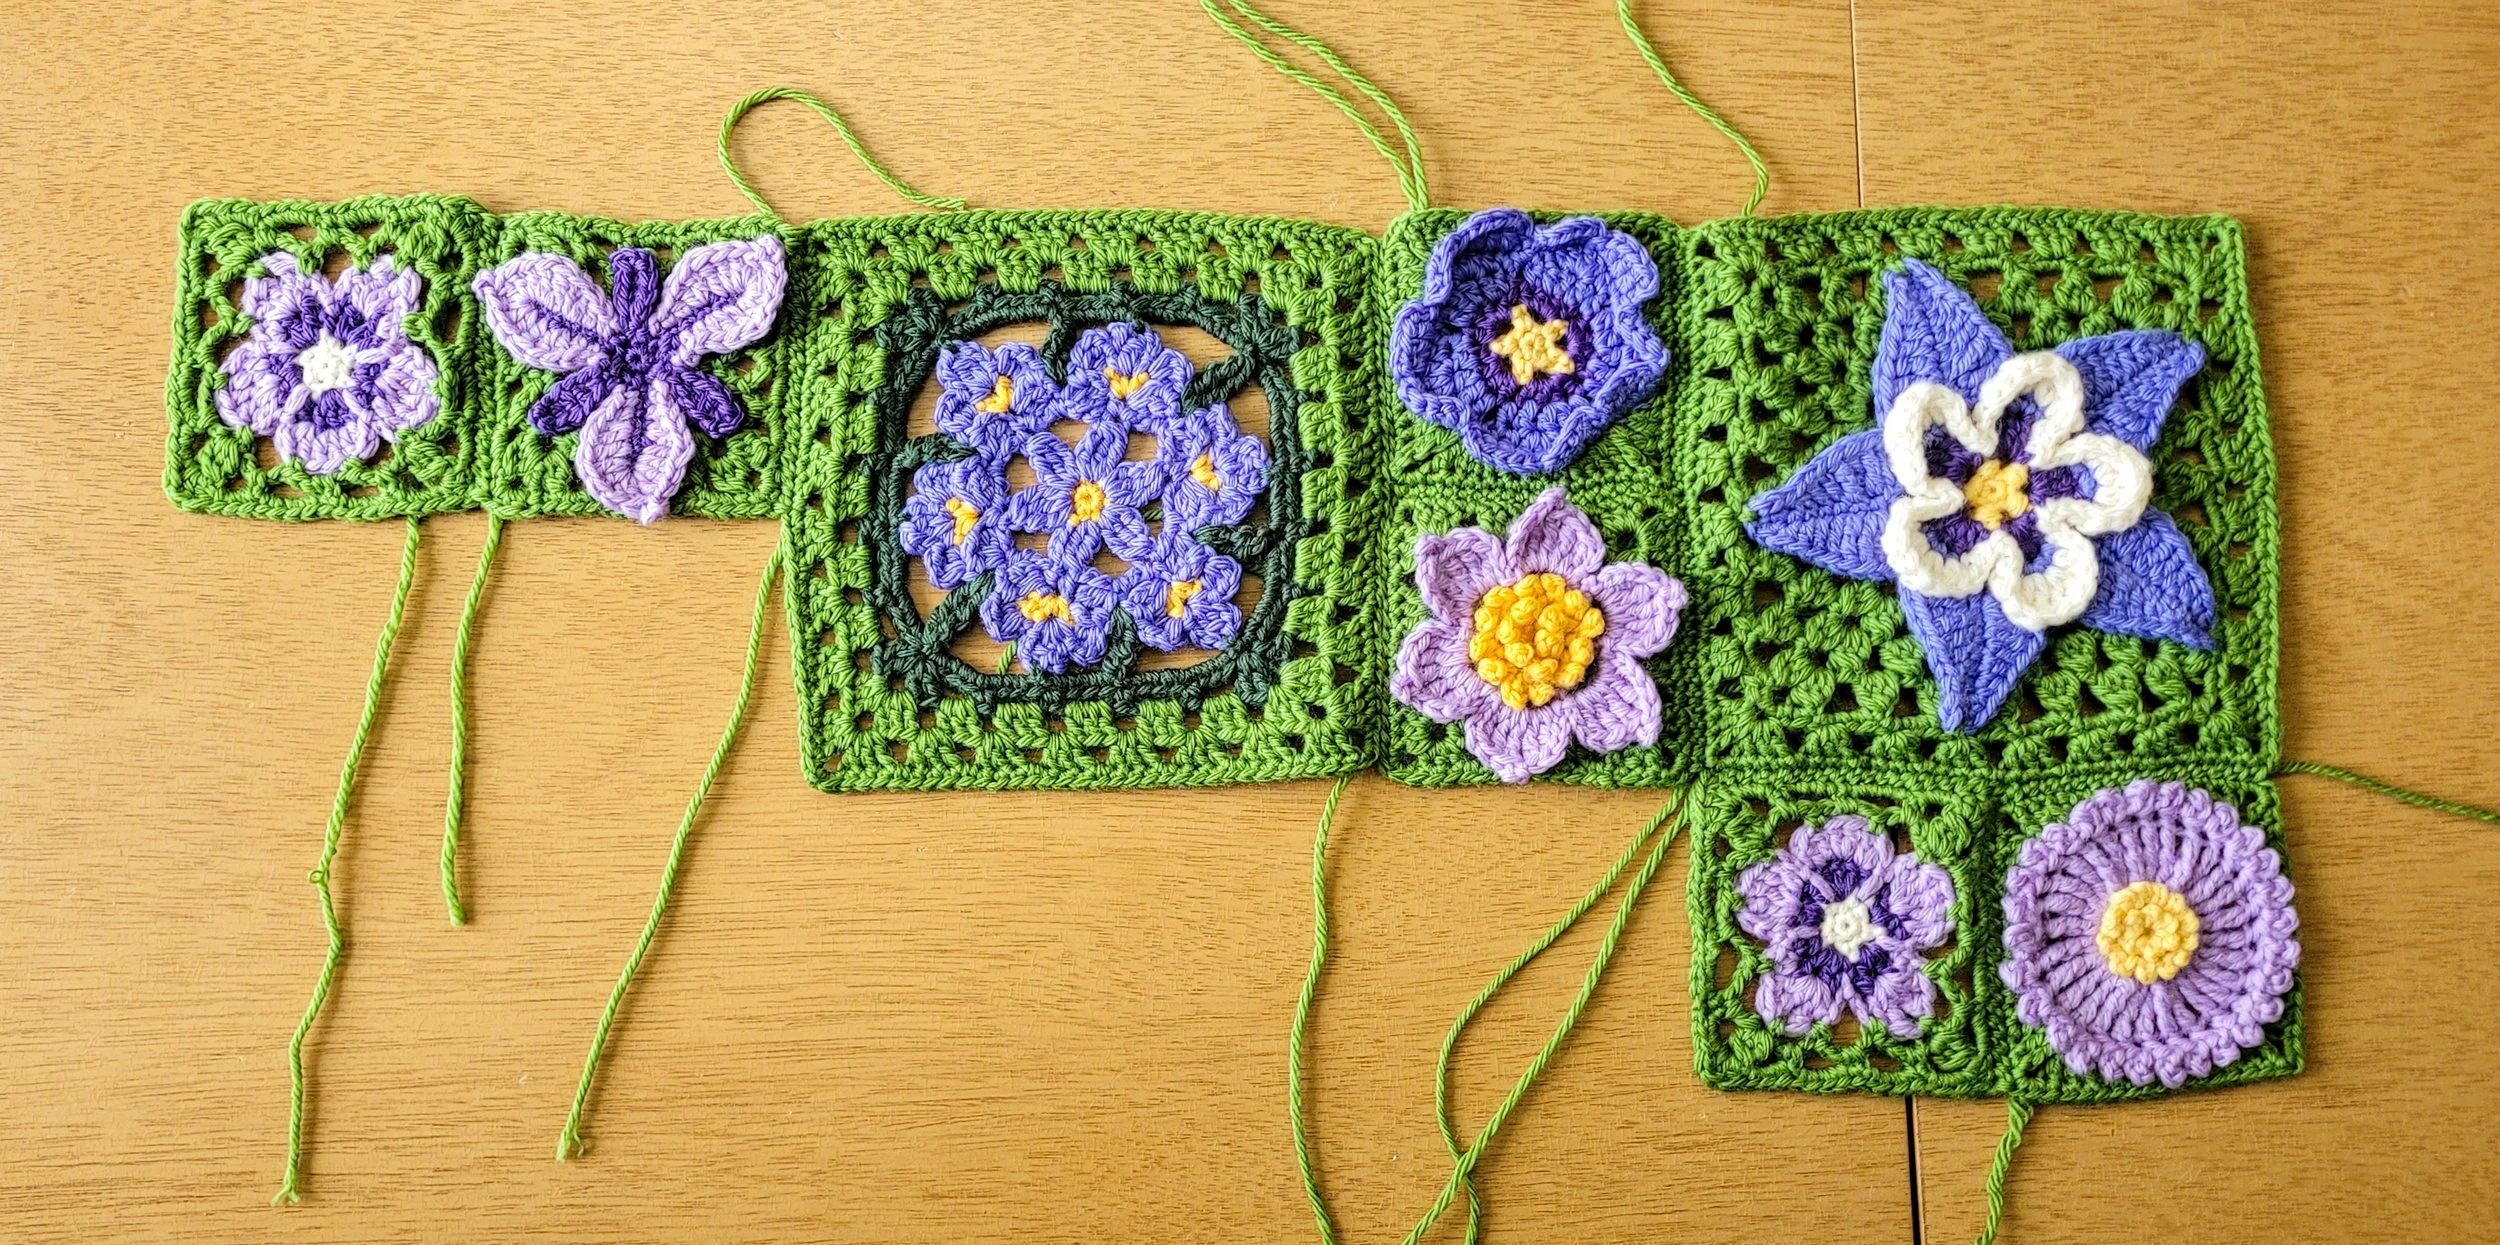
Before getting too far into my Crochet Wildflower Field Guide blanket, I wanted to join a few of the motifs in the blue section. I knew this would help me see how the flowers and backgrounds worked together and give me an opportunity to experiment with joining methods before committing to one for the whole blanket.
I’m glad I did! Seeing the motifs together revealed something I hadn’t quite noticed while working on them individually. The Flower Cluster, with its two-toned border and lacy background, stood out from the other flowers. It wasn’t that there was anything wrong with the motif itself, but its background had a different look and feel from the rest of the collection. That was my cue to rethink the design.
October 14, 2026
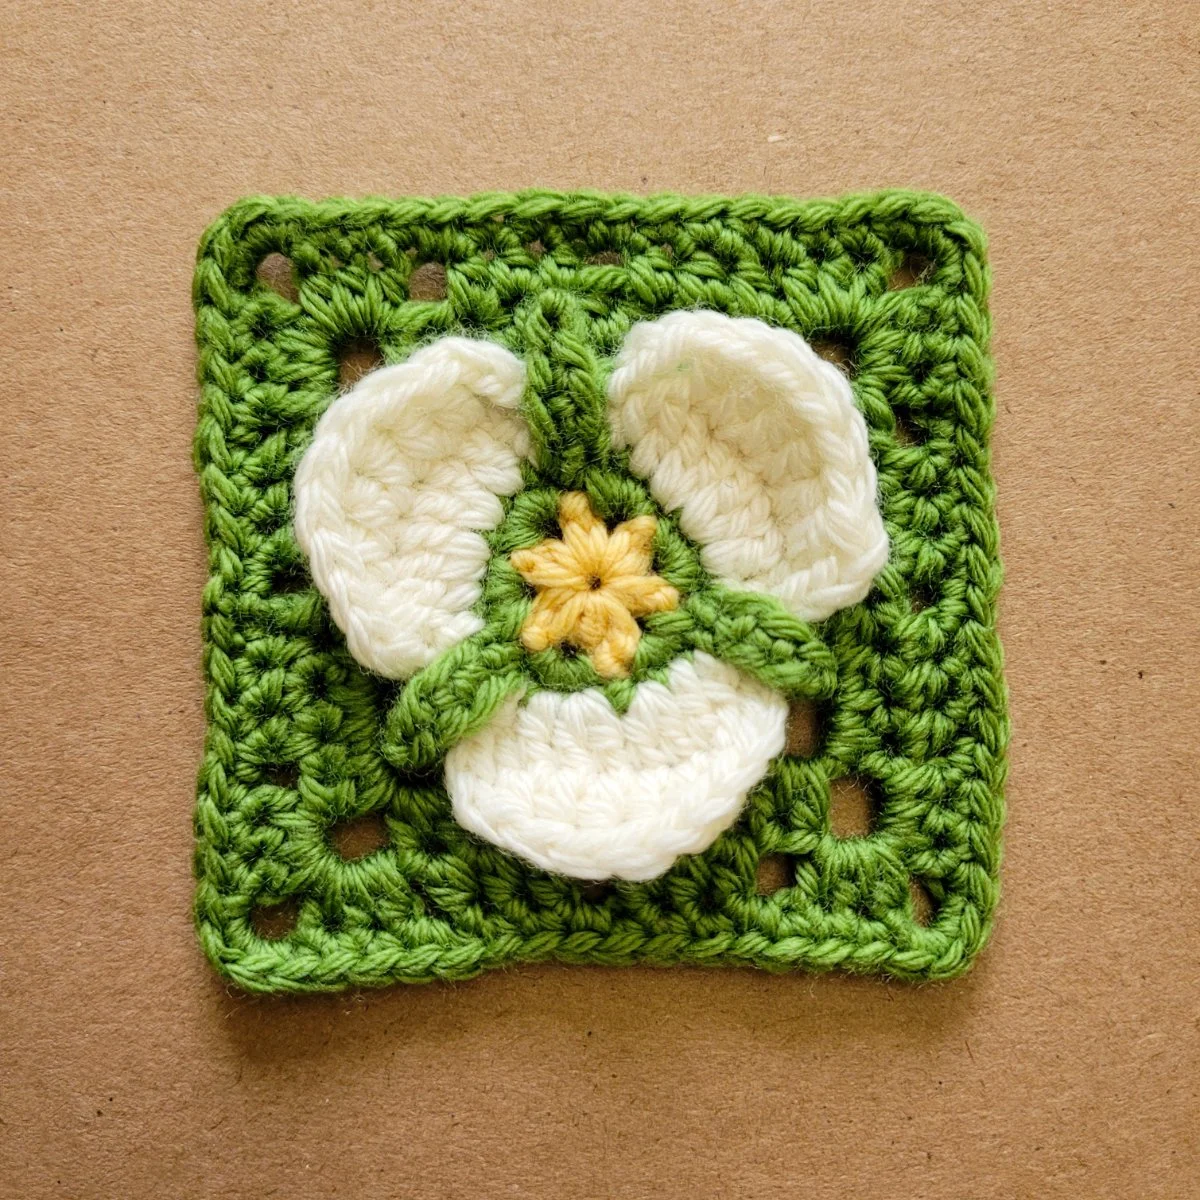
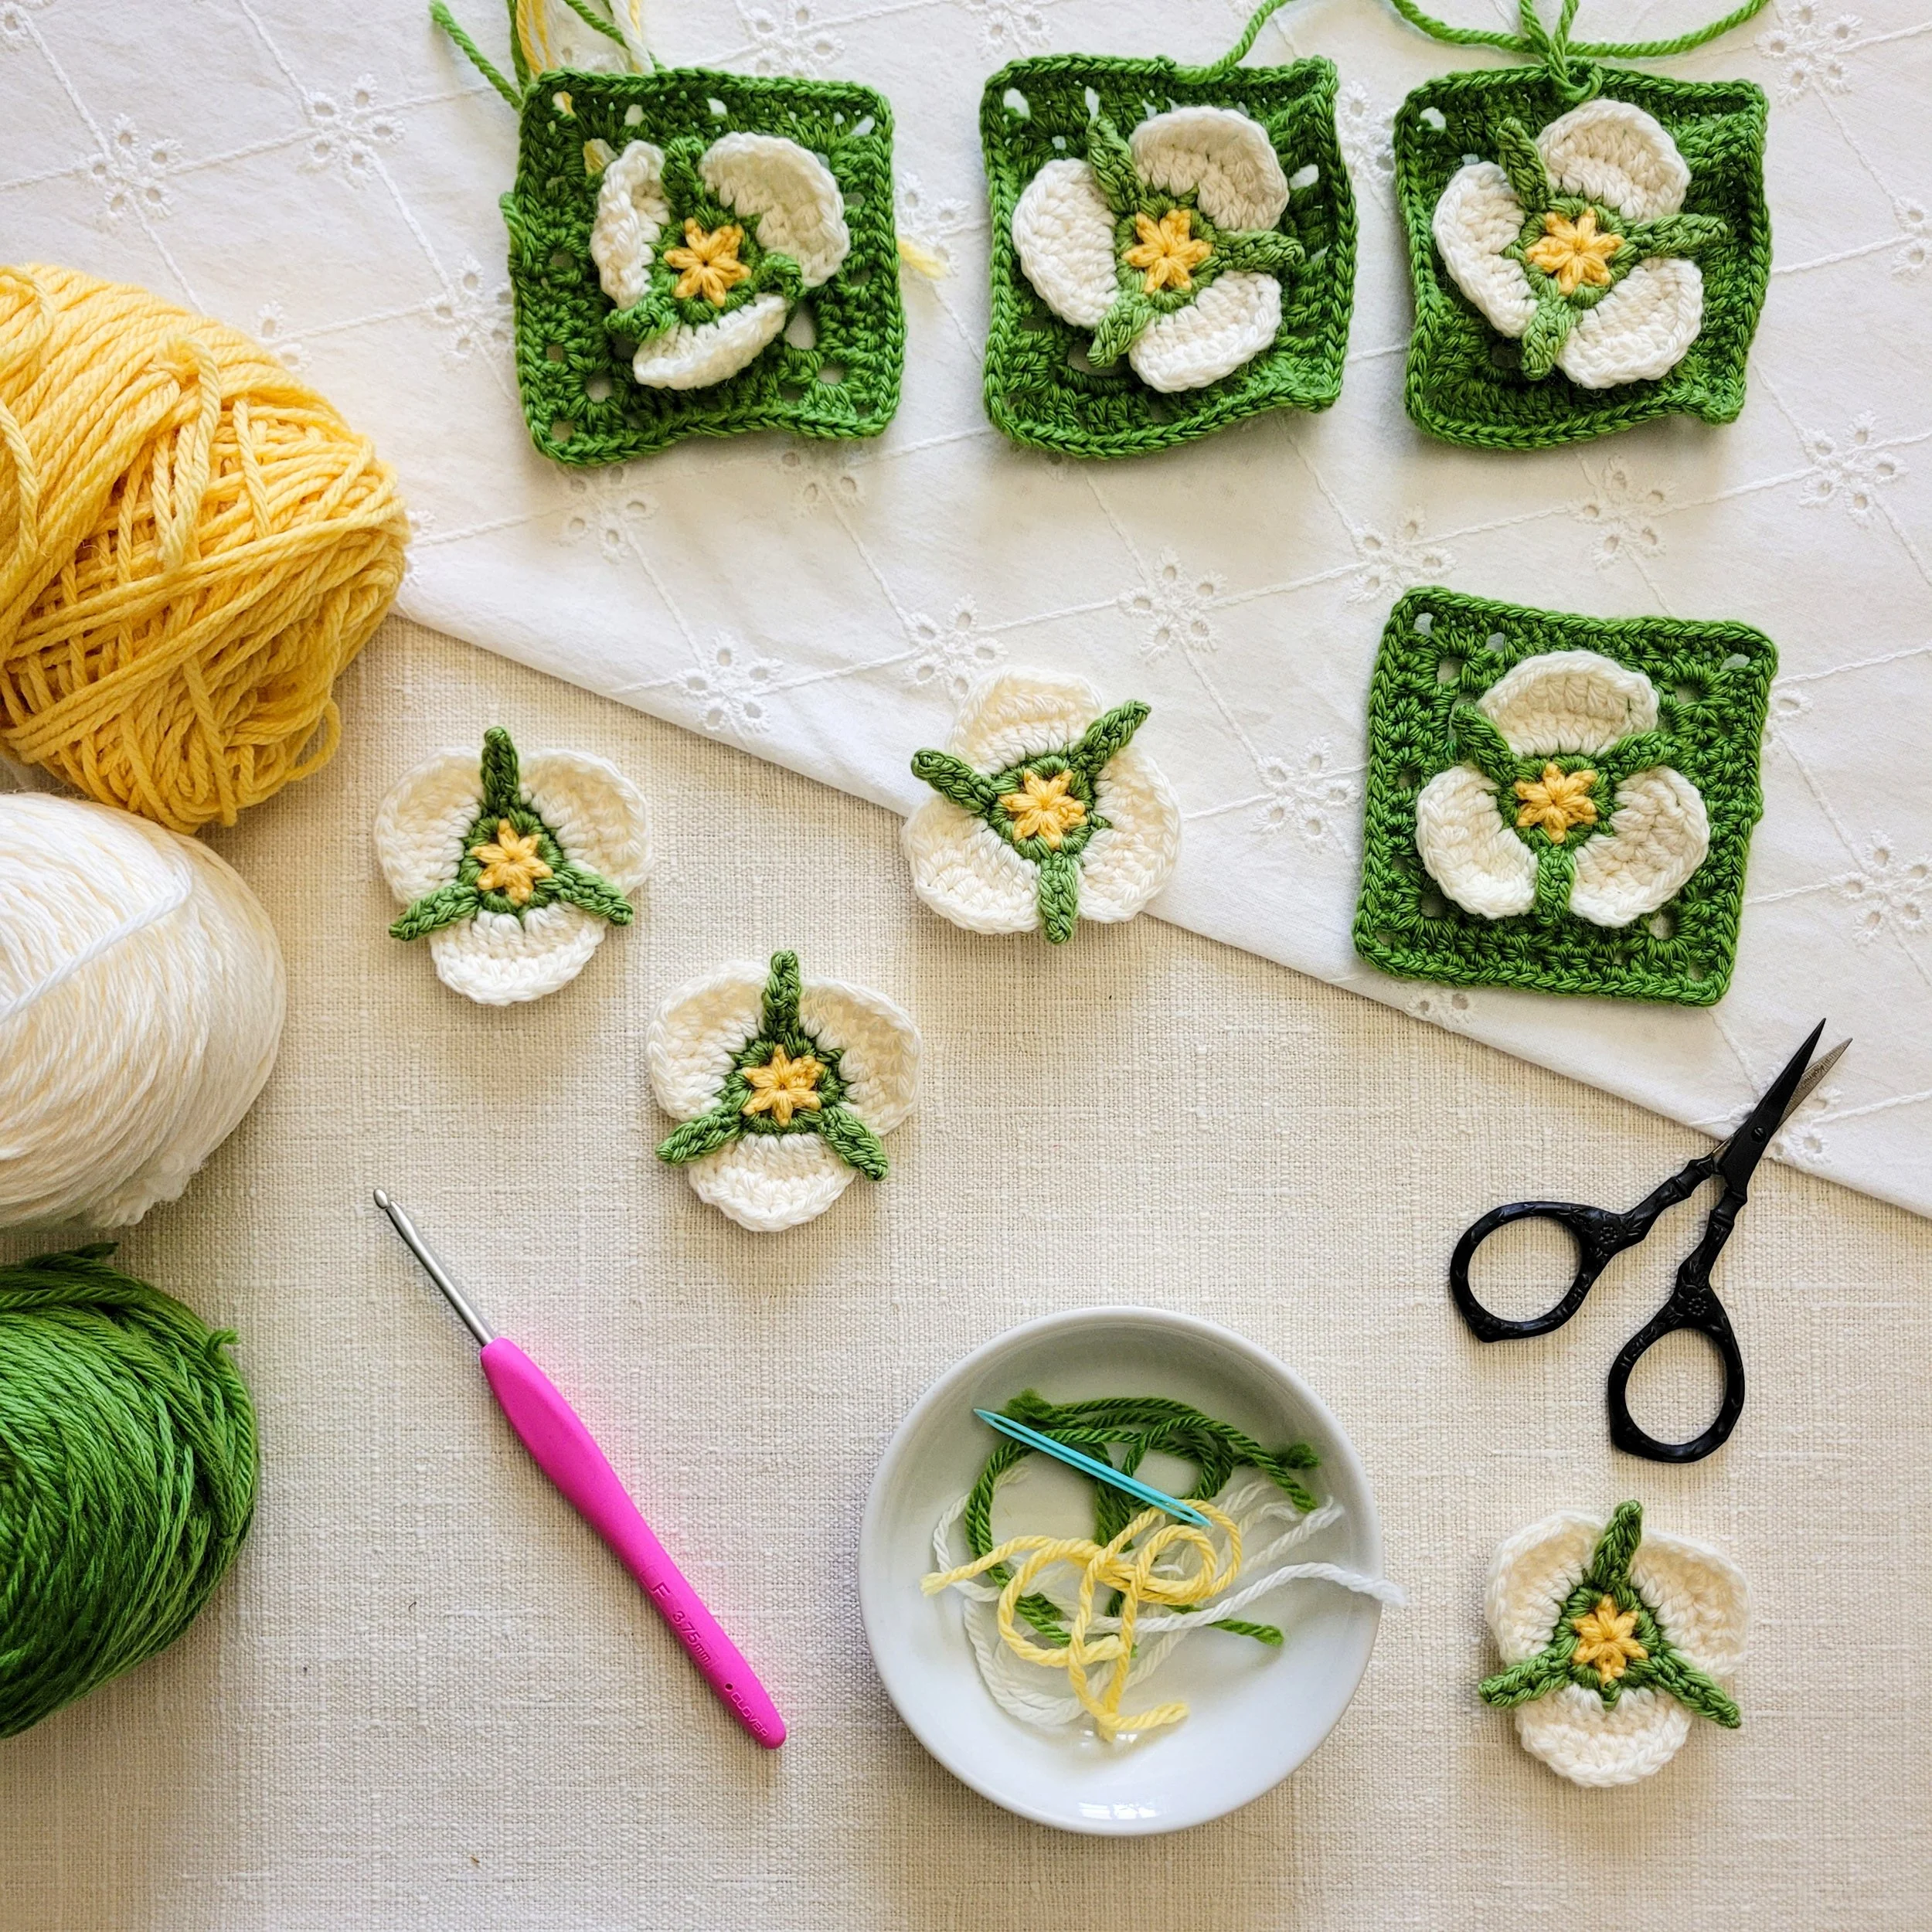
The Mariposa Lily has three distinctive white petals that curve together to form a little cup. Before I knew the flower by name, I used to call them teacups whenever I spotted them while hiking. I wanted to preserve that delicate shape in the crochet version, along with the three green sepals that stand out between the petals.
The applique begins with a small star of single crochets and chains at the center. From there, the green sepals take shape, and the white petals are built up in two rounds, creating a simple but effective layered design.
Turning this three-petaled flower into a square was a different kind of puzzle. I worked outward from the chain spaces behind the green sepals, using three strategically placed V-stitches to establish the background. In the next round, I worked into the spaces and distributed the stitches to build out the square.
The arrangement looks a little unconventional when written out in pattern instructions, but it works beautifully!
October 14, 2026
I first designed the Mariposa Lily in 2022, but when I returned to it for the Wildflower Field Guide, I discovered that I’d left myself very little to work with. I had two old pattern files and a handful of notes, many of which were more puzzling than helpful!
Rather than trying to reconstruct every decision I made four years ago, I used the opportunity to look at the flower with fresh eyes. I refined the original design to better capture the distinctive shape of the three white petals and the prominent green sepals, then updated the pattern instructions to make the construction easier to follow.
Thankfully, I’ve learned a lot about designing crochet wildflowers since 2022, and that experience made a real difference. I had a much better understanding of how to translate the details of a flower into stitches while keeping the finished design practical to crochet. It’s been fun to rediscover a design I once thought was finished and find ways to make it even better.
October 8, 2026
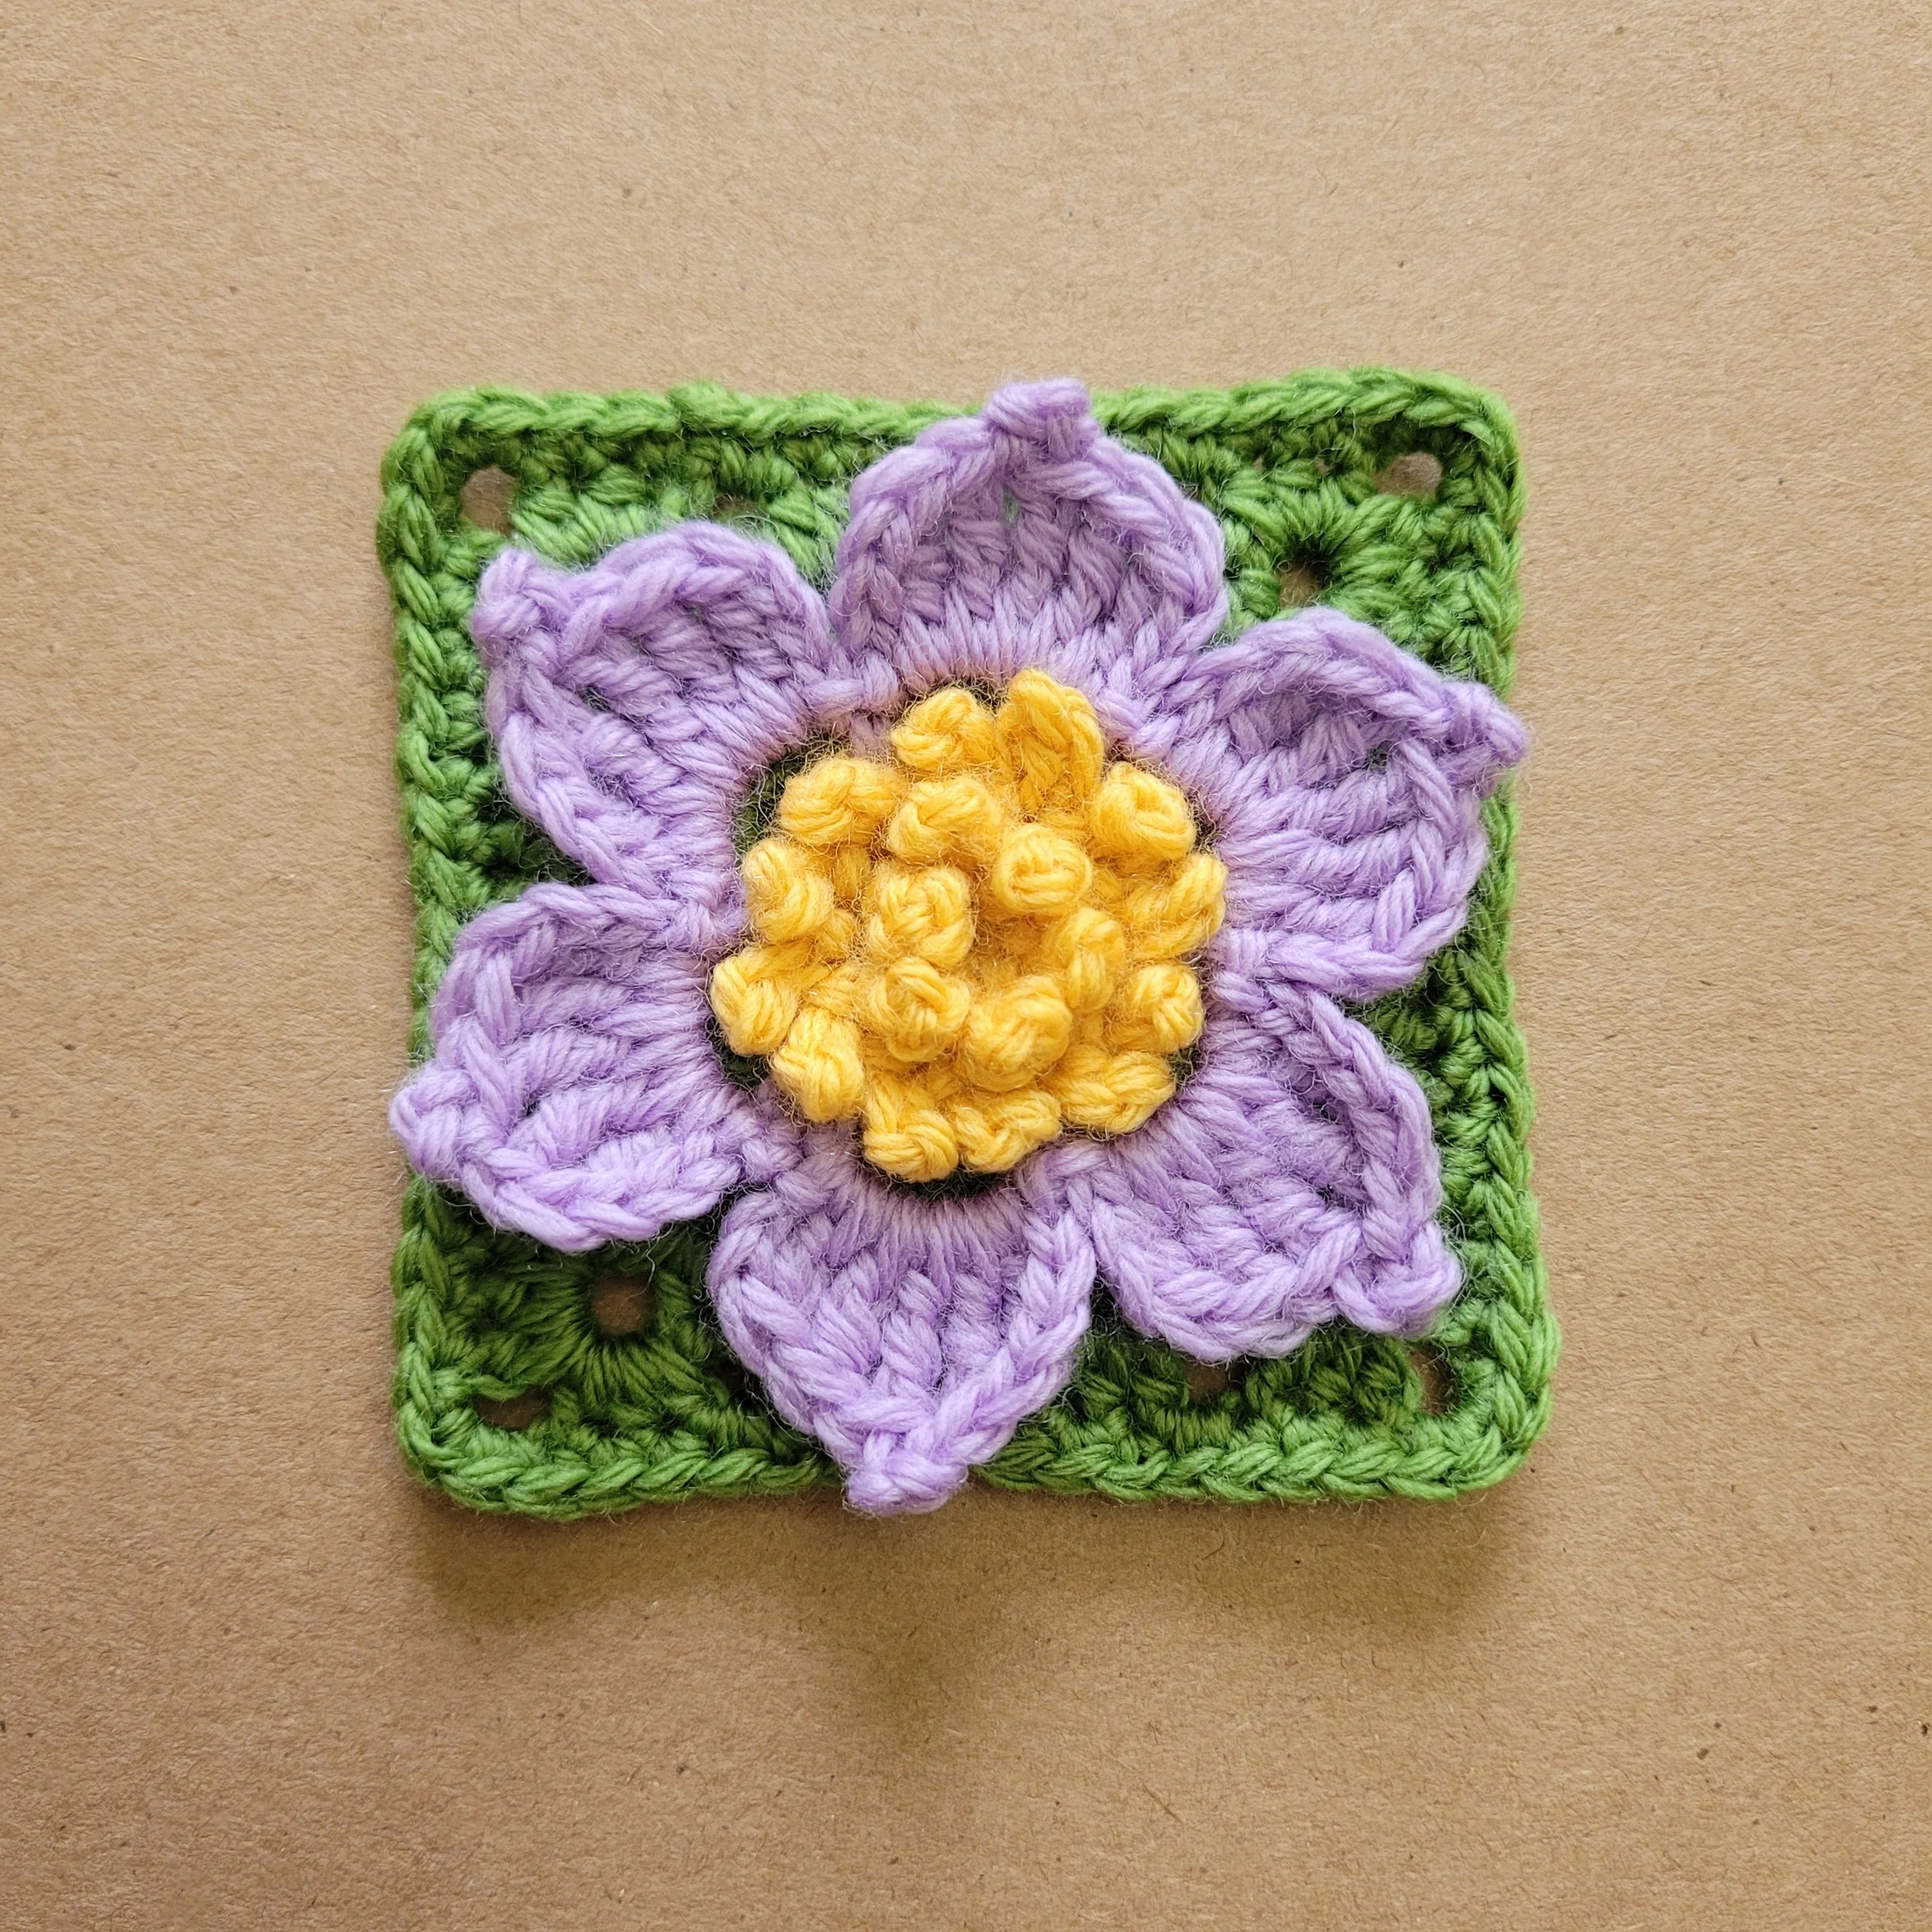
The finished Pasque Flower is a good example of how much a few carefully chosen details can do. I wasn’t able to recreate every feature I loved about the real flower, but the lavender petals, pointed tips, and large textured center give the motif a recognizable Pasque Flower shape.
Once the flower was finished, I turned my attention to the background. My first attempt continued working around the center in a circle before transitioning into granny stitch to square up the motif. It worked, but I realized the design would be simpler and more intuitive if I could begin the granny stitch much earlier.
After a little finessing, I found a way to begin the motif section with granny stitch in the second round. I’m especially pleased with how naturally the flower and square come together now.
And this little motif ended up having another purpose, too. I decided to turn it into a universal pattern called Anemone, which I can use for the maroon Cutleaf Anemone (Windflower) in the red section of the blanket.
October 8, 2026
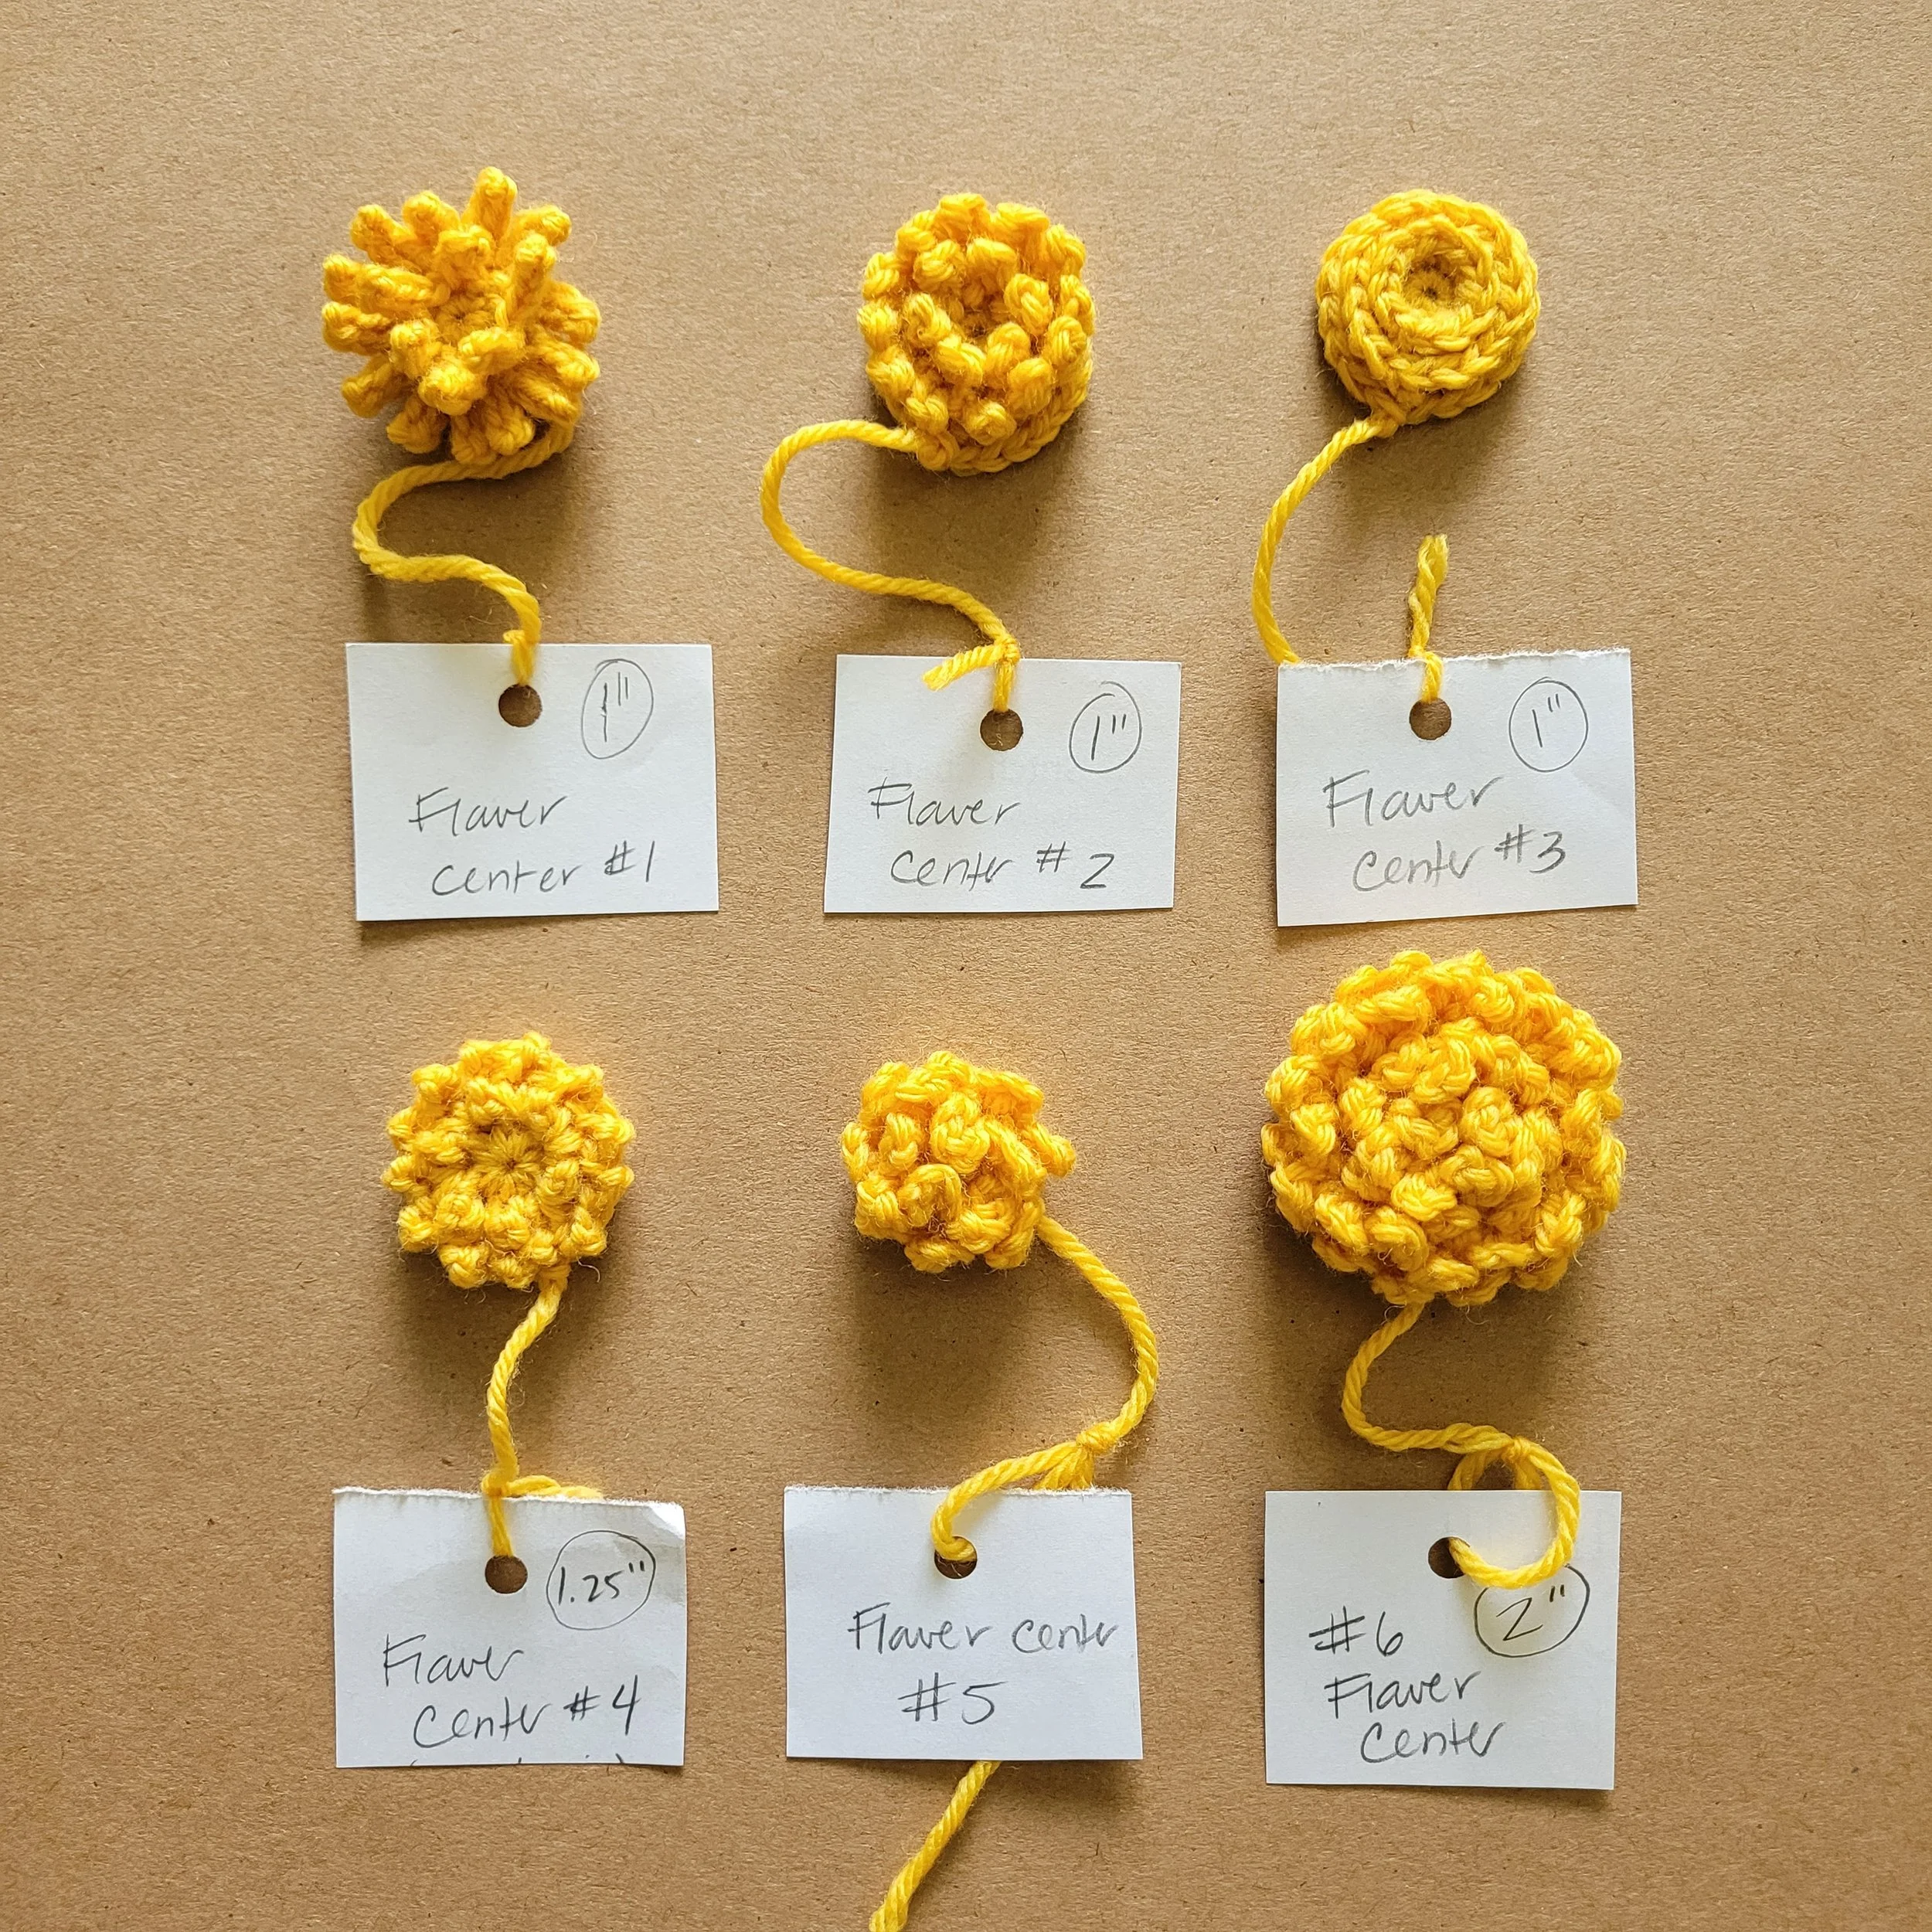
The large, fluffy center is one of the things that makes the Pasque Flower so distinctive, so I knew I wanted to give it some attention in the crochet design. The challenge was figuring out how to translate all that wonderful texture into something that would still work at a very small scale.
I made six different versions, experimenting with working into chains, working in the front and back loops, making different kinds of picots, and using simple chains and slip stitches. Some were more stalk-like, some were nubby, and others had a softer, puffier texture. I even made one enormous center just to see what would happen if I kept going.
In the end, I chose the nubby version with tall picots for the Pasque Flower (Flower Center #2 in the photo). It had the texture I was looking for without overwhelming the rest of the flower. The other five weren’t wasted, though. I’m already thinking about which other wildflowers might make good use of them.
October 8, 2026
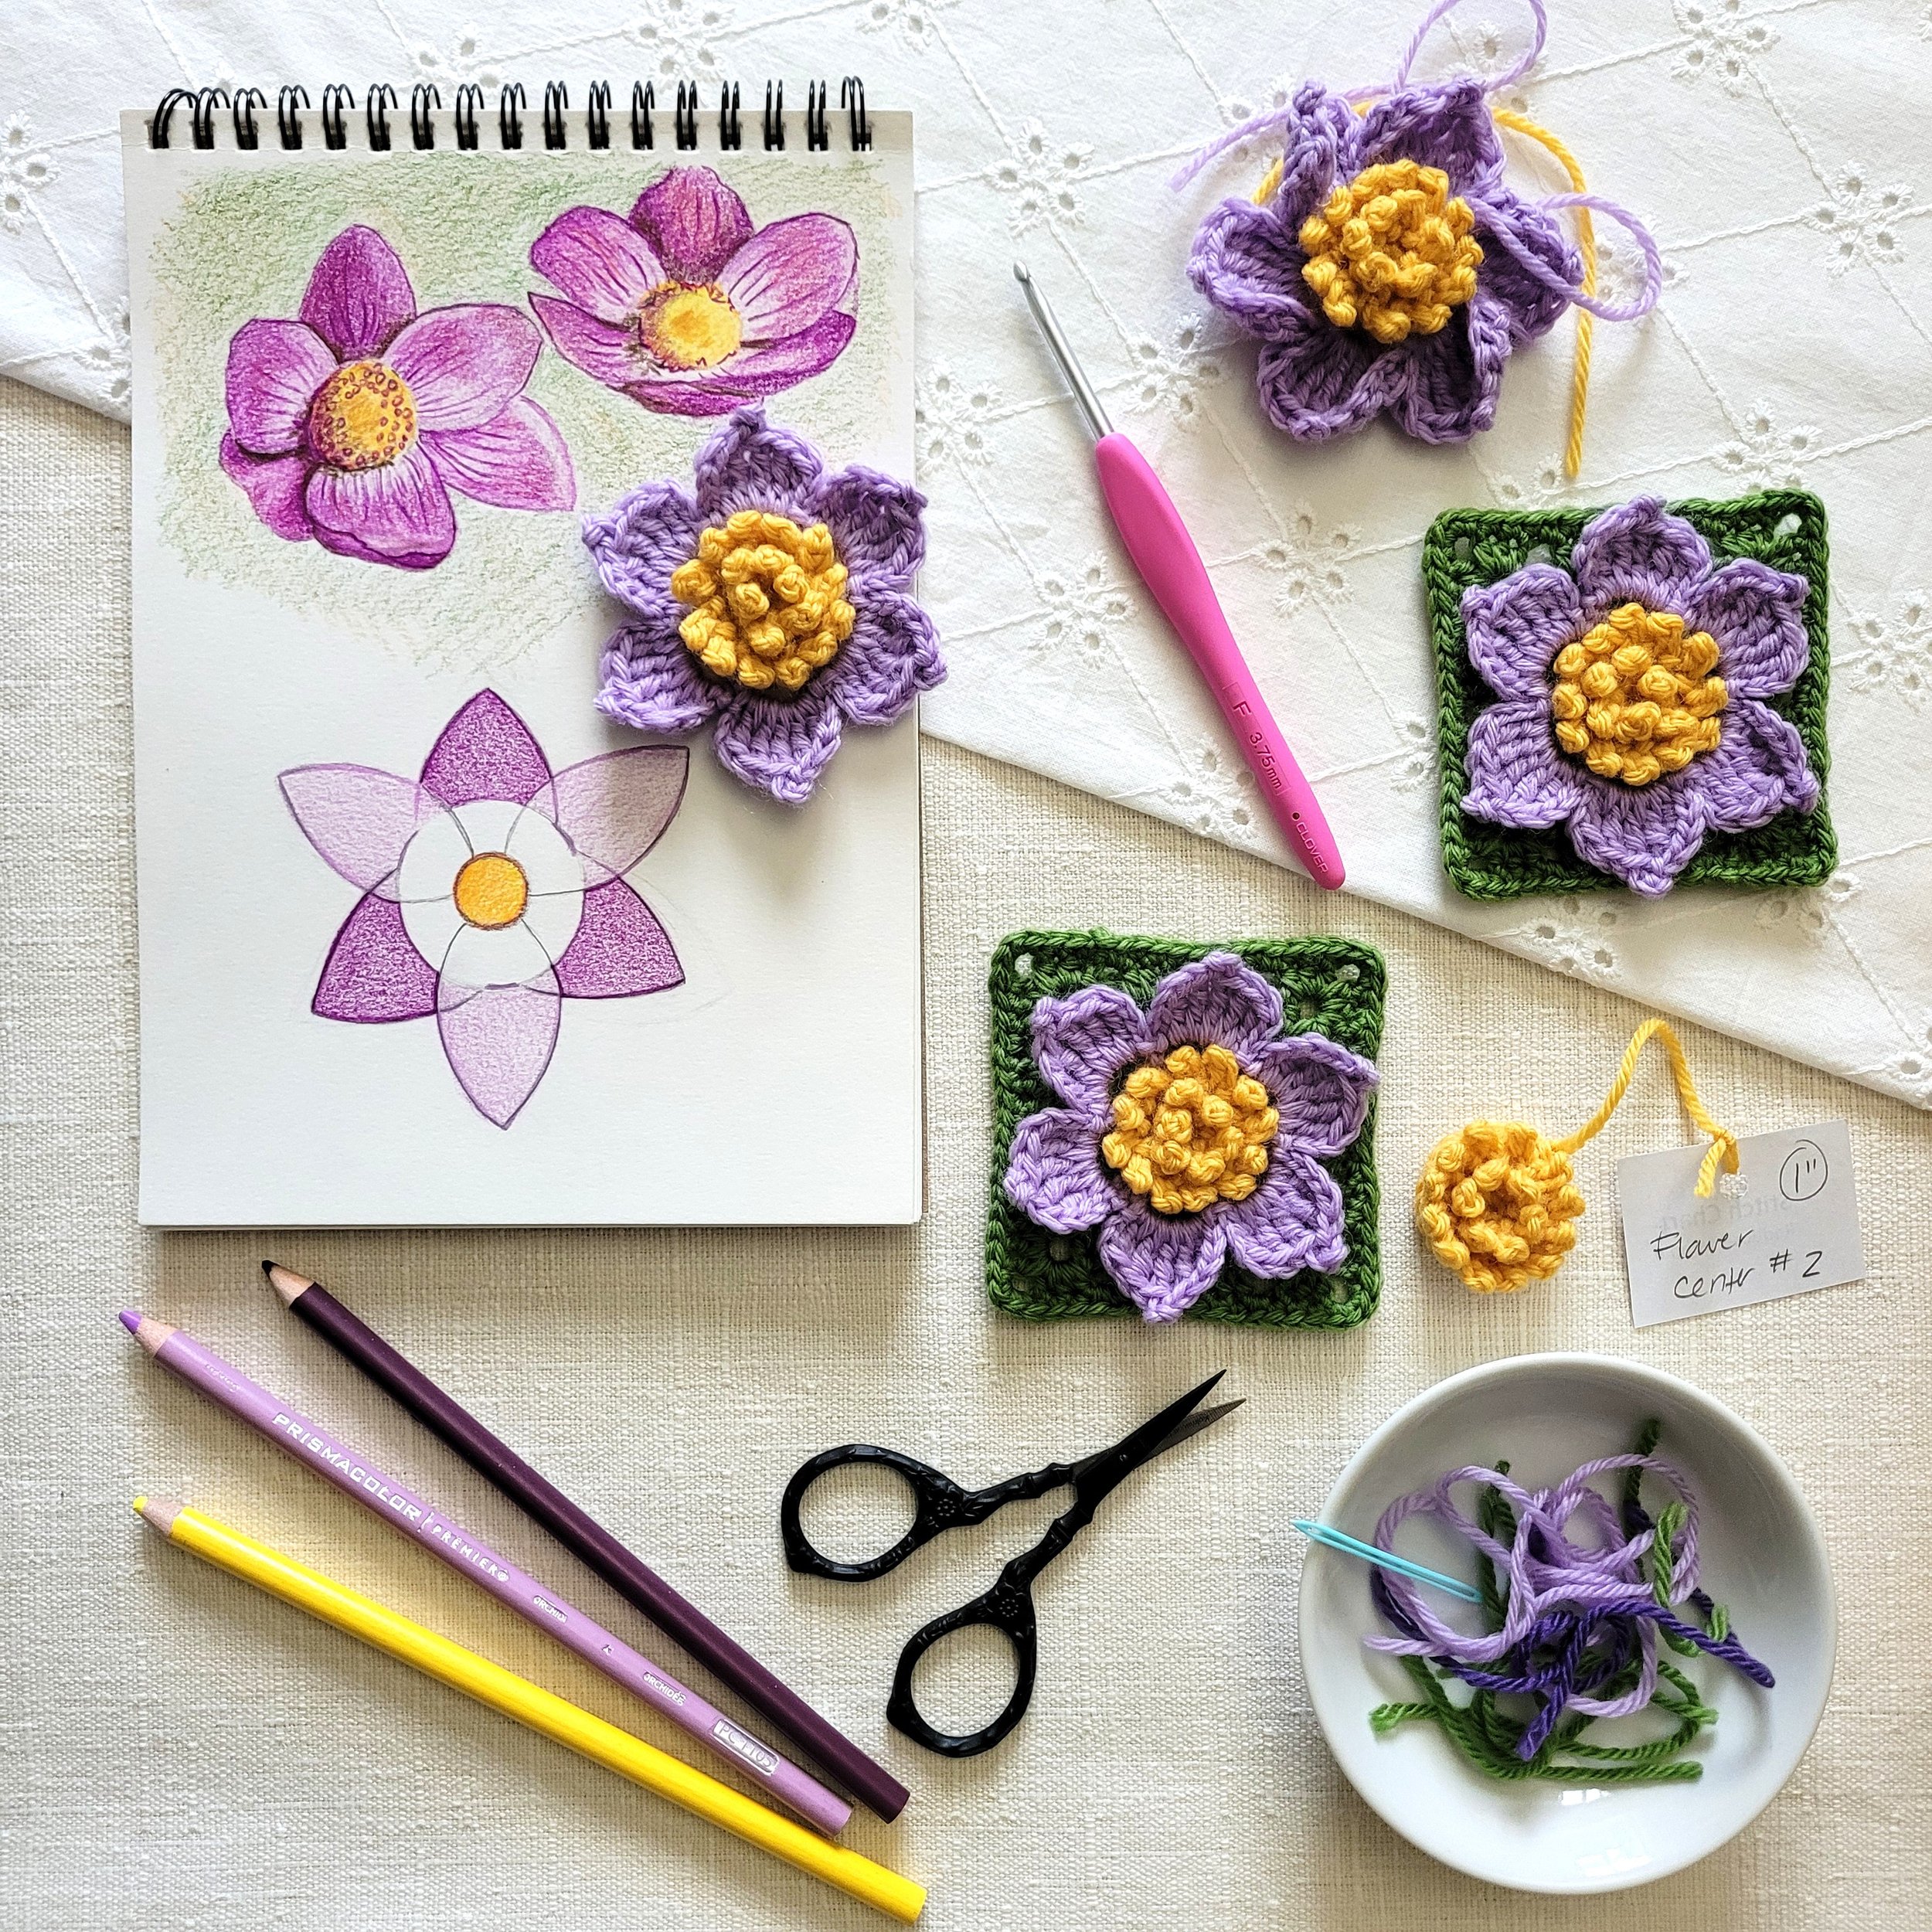
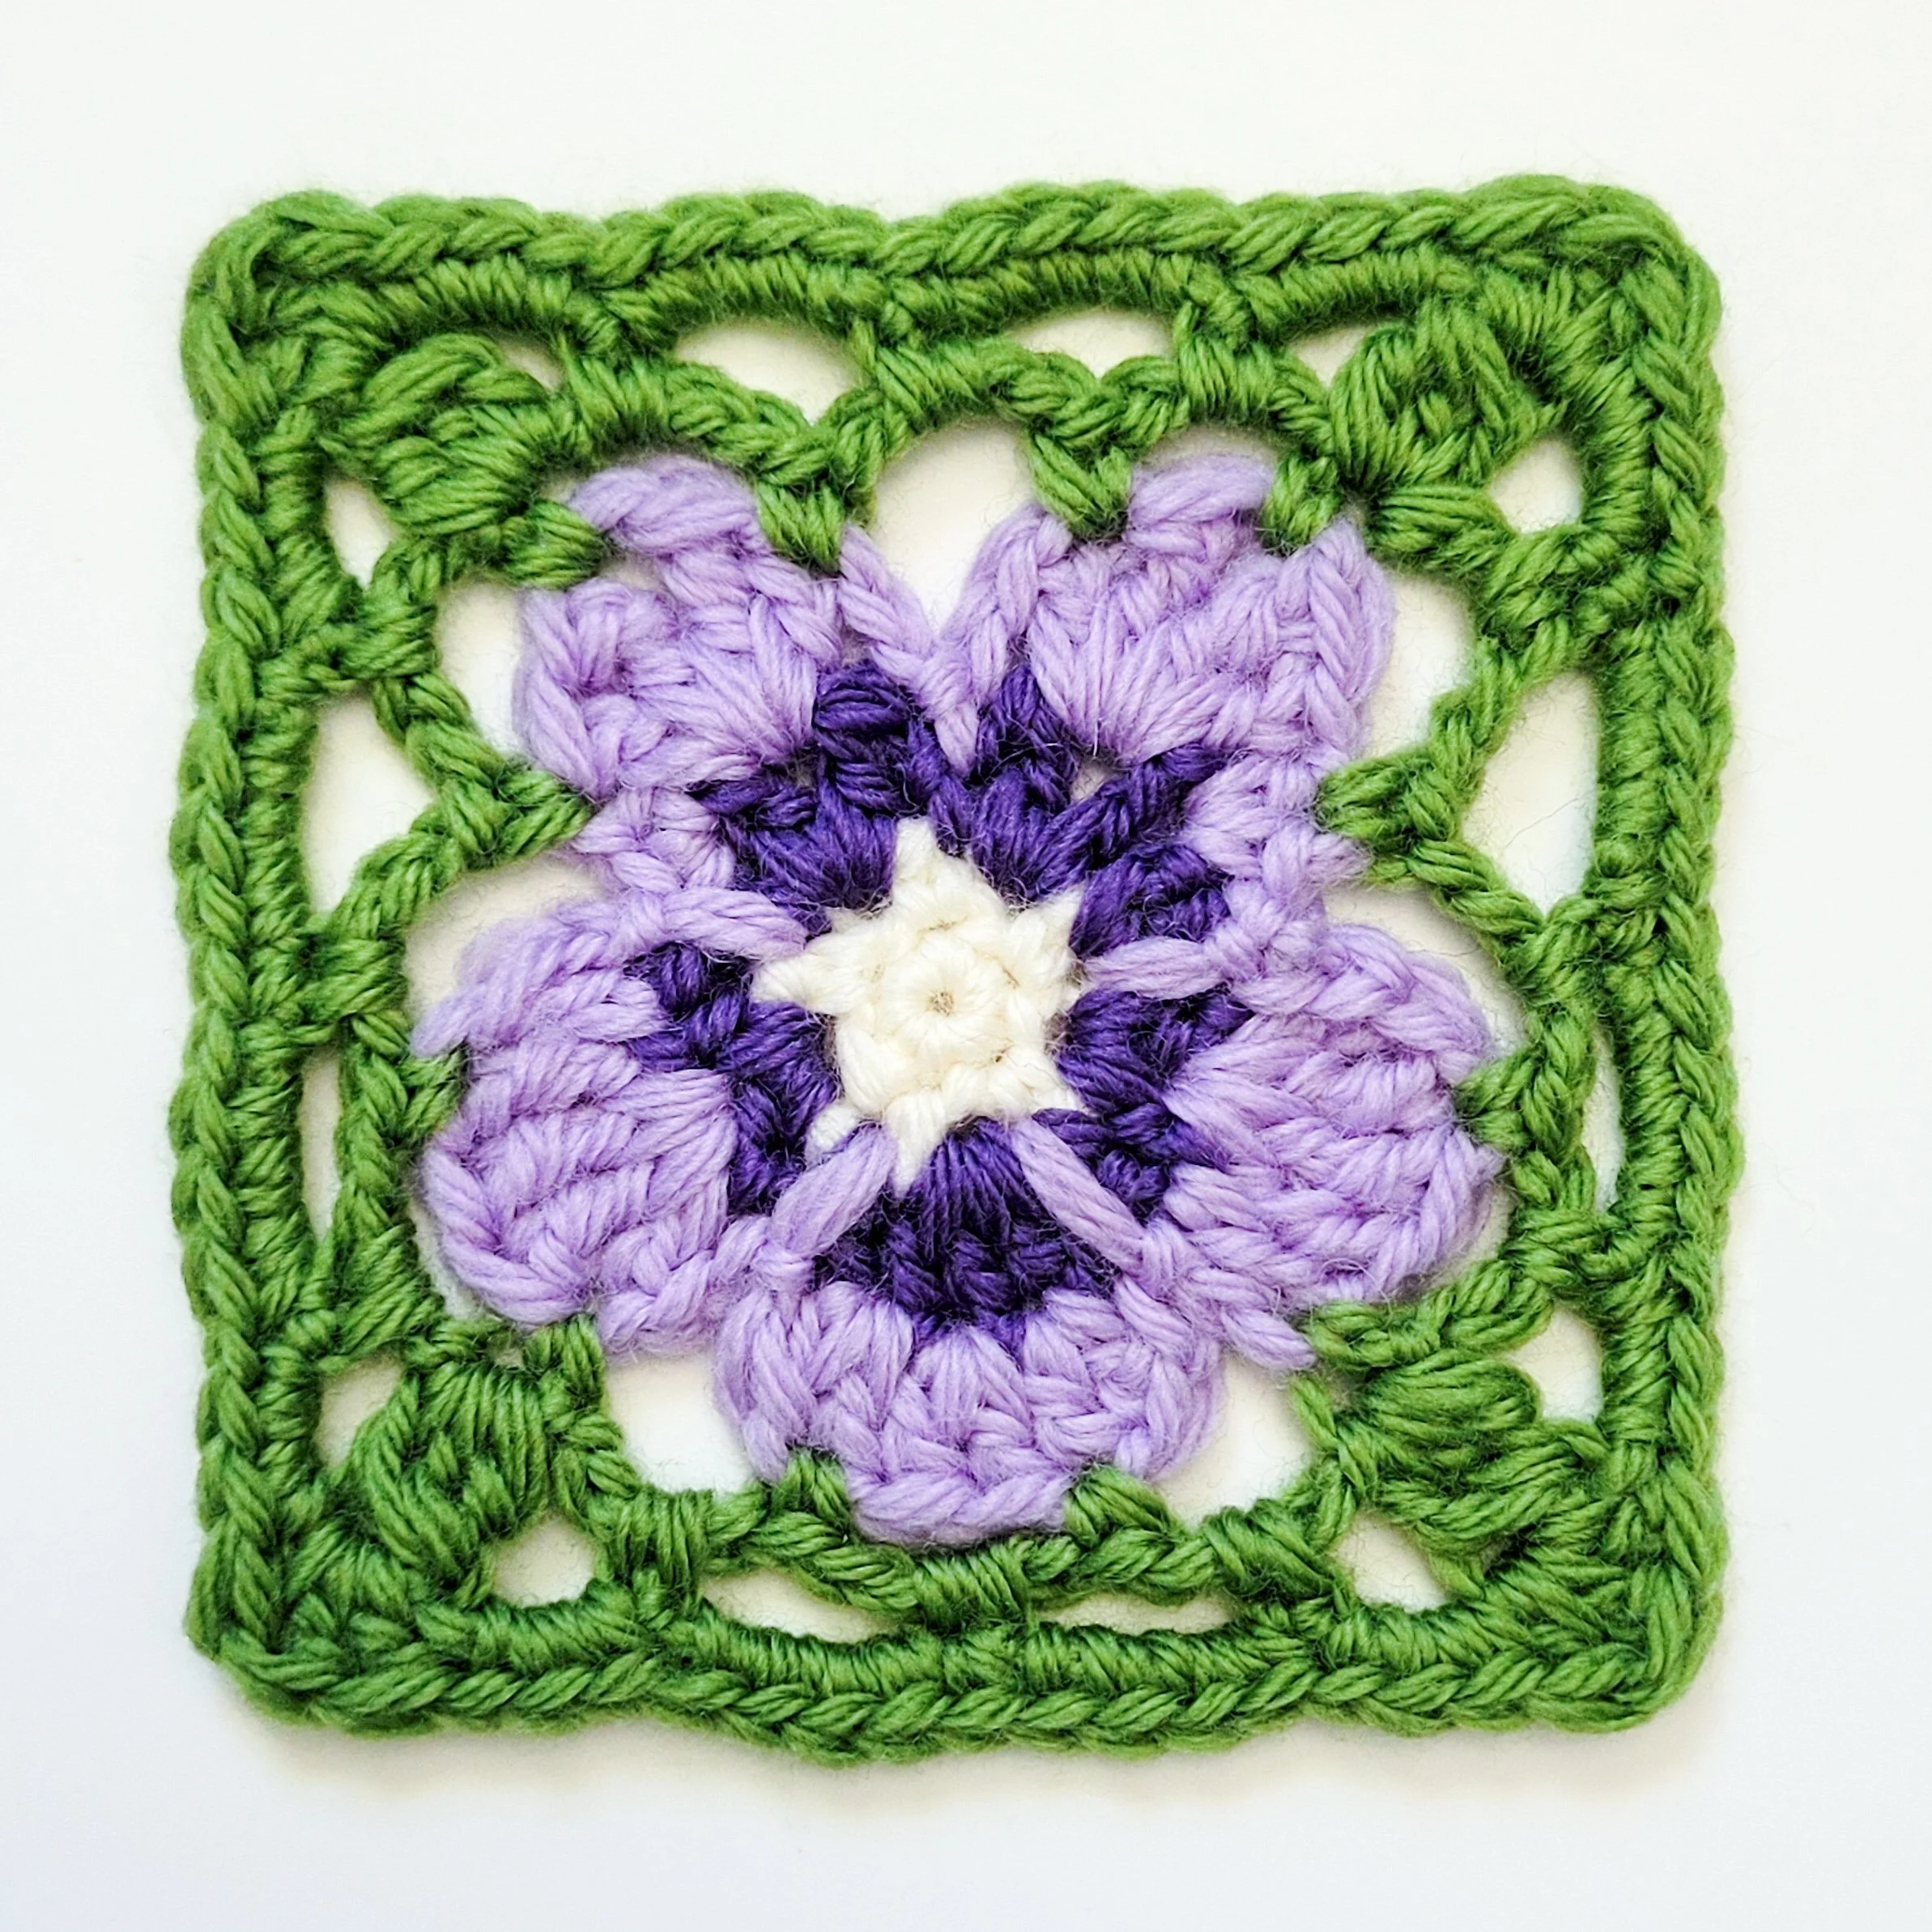
The Pasque Flower was another design that required me to carefully consider which details were important enough to keep in a 3-inch motif. I began by sketching the flower to better understand its shape and distinctive features, especially its six overlapping petals and large, fluffy center.
I originally hoped to recreate the overlapping petals, with three petals worked in front and three behind, but there simply wasn’t enough room on a 3-inch square. Instead, I simplified the flower to six petals worked in two rounds, using groups of tall stitches and pointed picots to give each petal its shape.
September 30, 2026
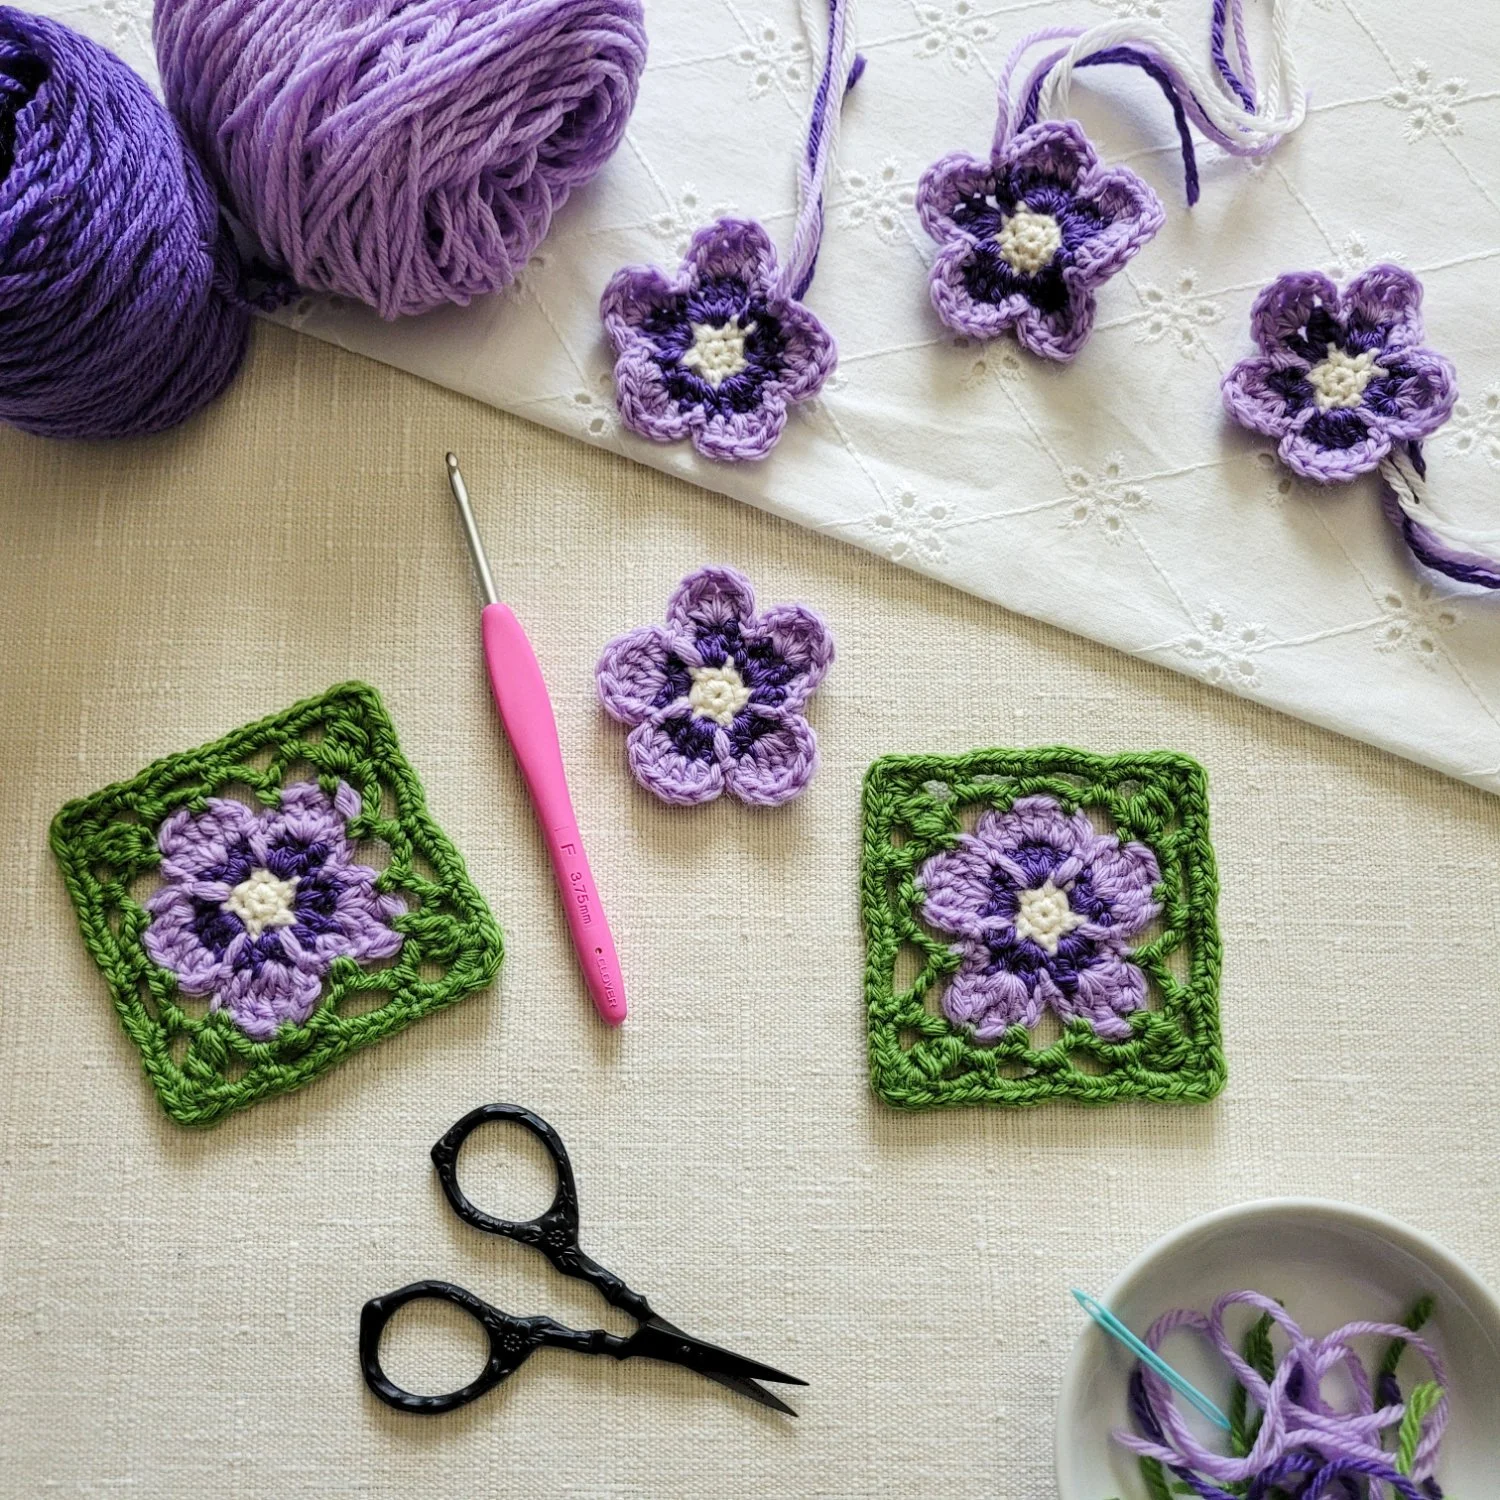
Turning the five-petaled violet into a square was the more challenging part of this design. I traced the flower onto graph paper and drew a 3-inch square around it, which immediately showed me that a lace mesh background would work best with its shape.
My first attempt used 10 single crochet stitches and 10 chain-4 spaces around the flower. The spacing worked fairly well, but left an awkward gap between the top two petals. I also tried three clusters in each corner, but that made the motif too large.
For the final version, I switched to 12 stitches and 12 chain spaces, which divided much more naturally around a square. I used slightly more stitches around the elongated top petals to eliminate the awkward spacing and added a single cluster in each corner. I’m really pleased with the balance of the finished motif.
September 30, 2026
The Mountain Blue Violet was one of the most effortless flower designs in this project so far. Its distinctive five-petaled shape gave me a clear starting point, but it still took a few attempts to get the proportions right. My first version was decidedly wonky, with too many stitches in the petals and an oversized dark purple center. For the second attempt, I reduced the stitches, but the top two petals were still too large while the side and bottom petals had become too small.
For the third version, I used V-stitches to give the elongated top petals more height without adding bulk. I also added V-stitches to the side petals and spike stitches around the outer edge for definition. A few final adjustments to the petal proportions brought me to the finished design.
September 17, 2026
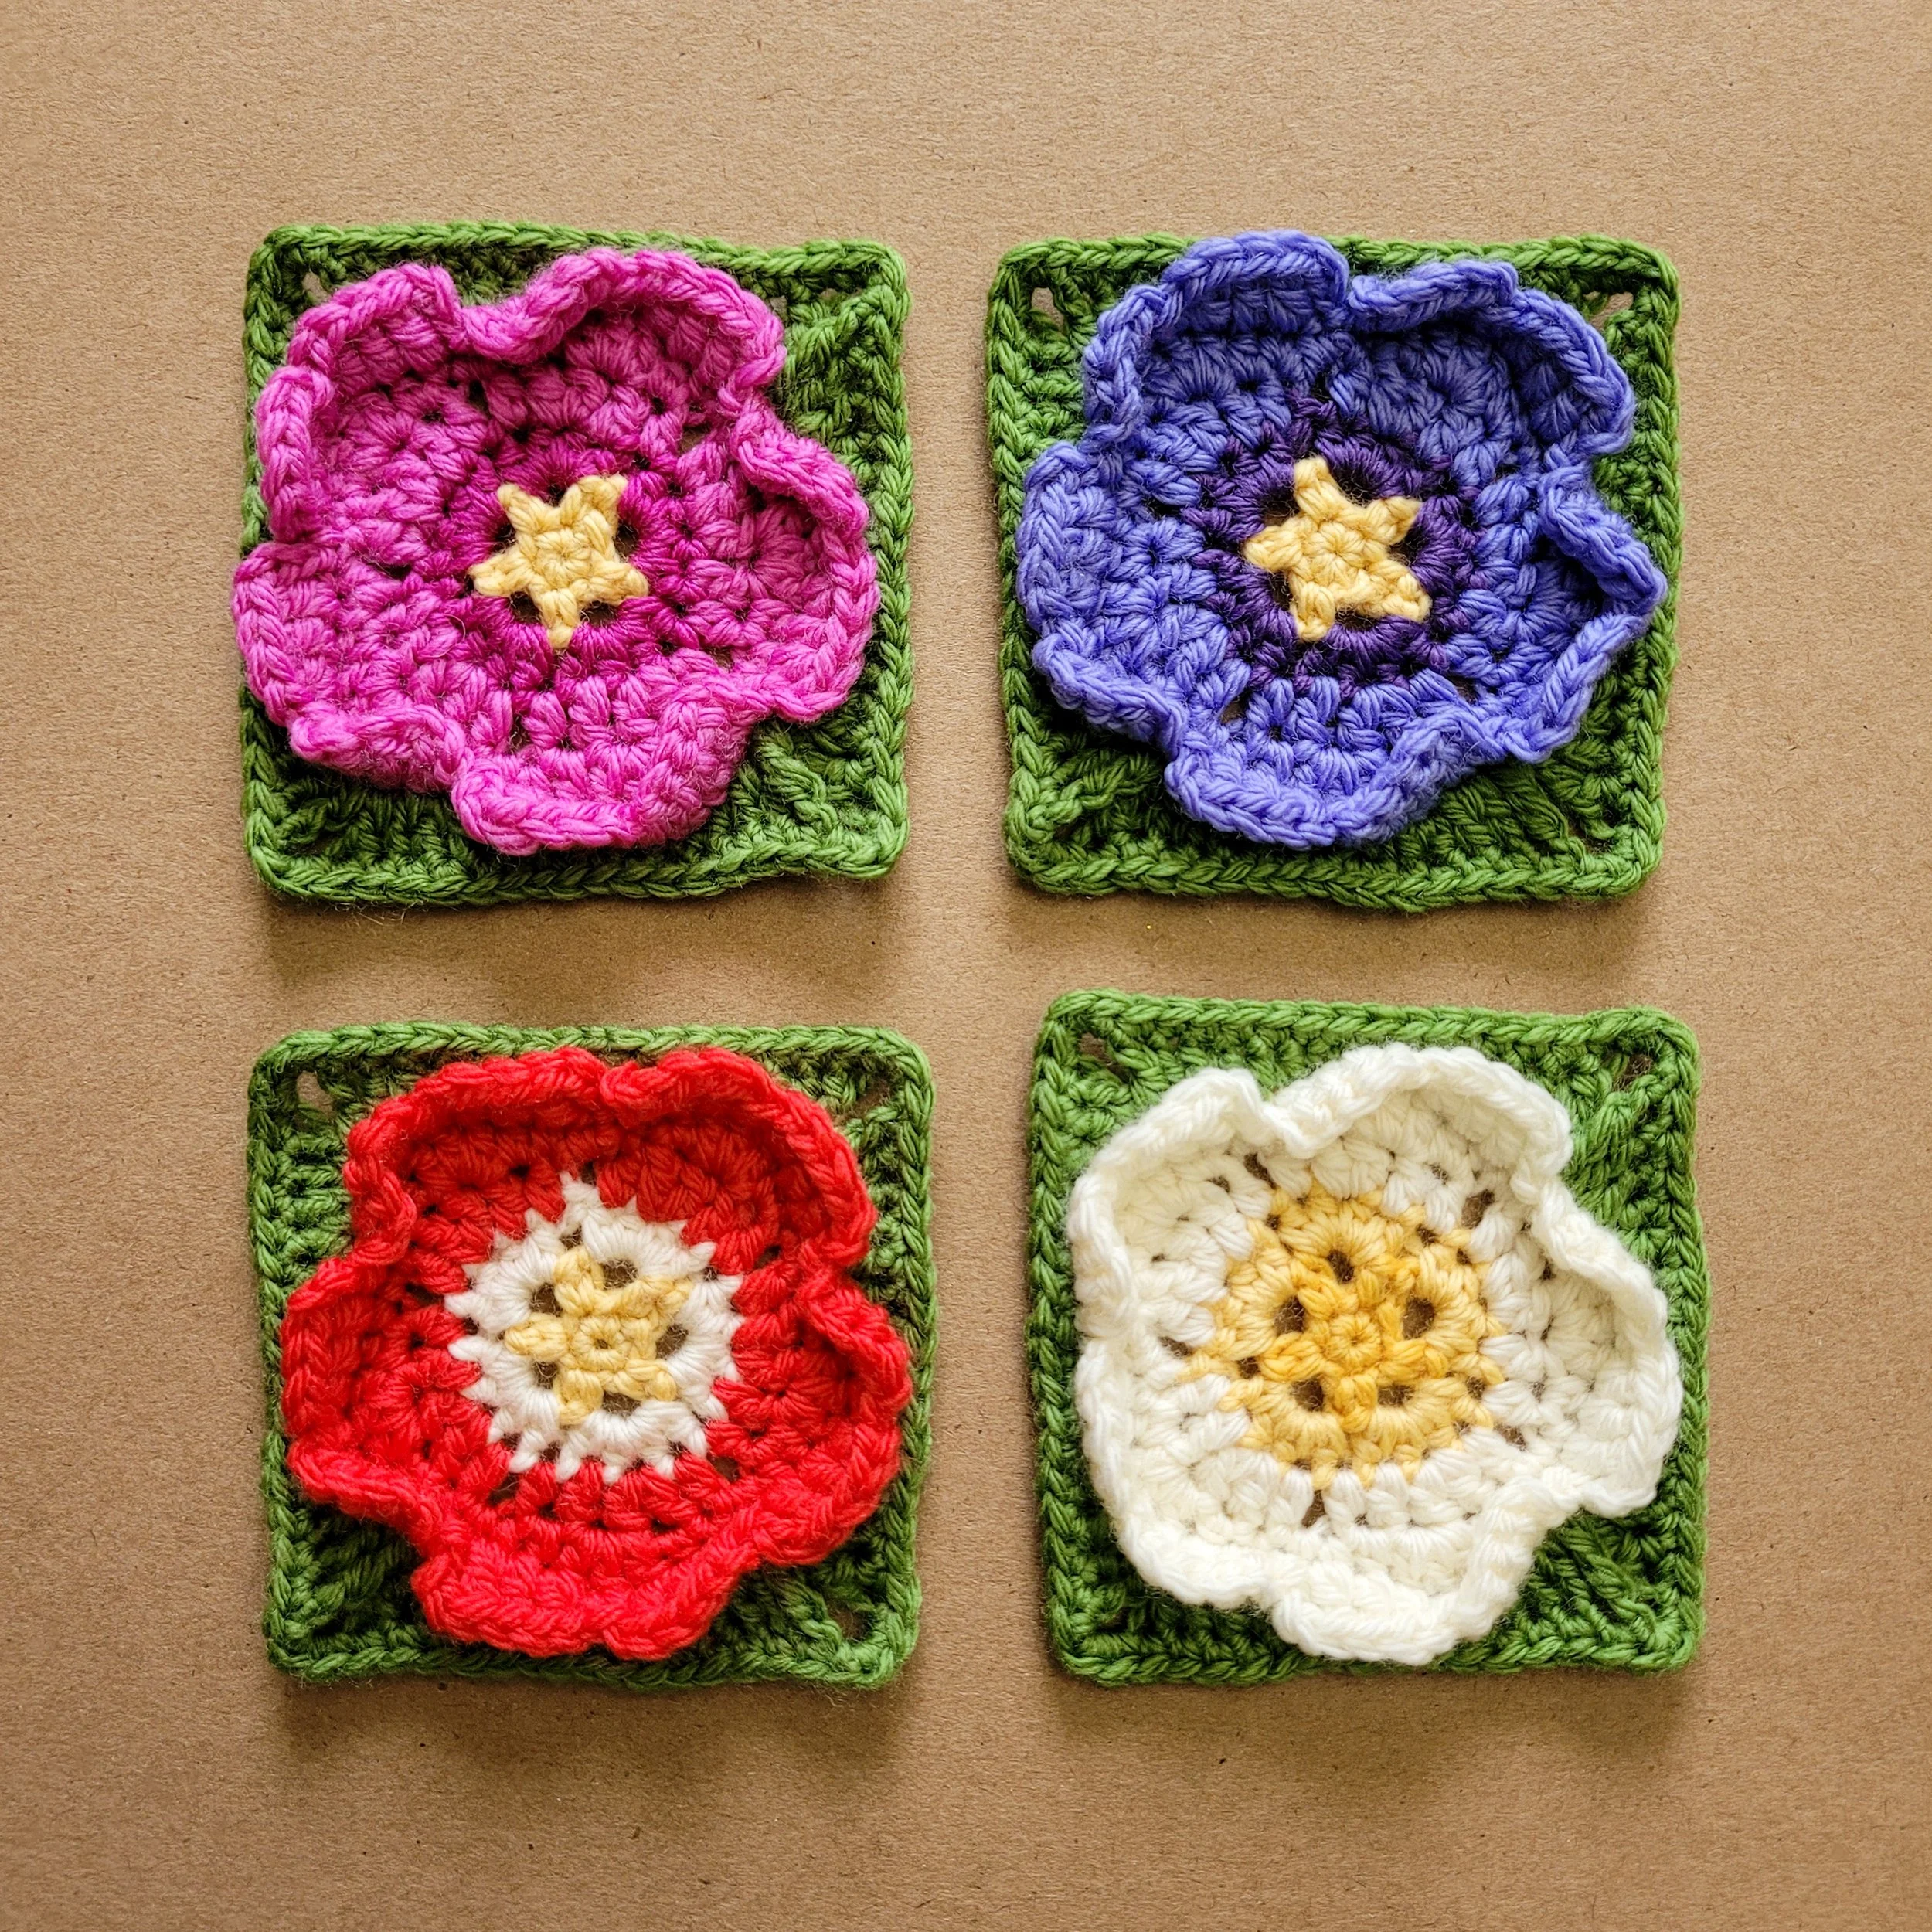
The final Rosette motif is one of the four “universal patterns” in my Wildflower Field Guide collection. Each universal pattern is designed to create several different wildflower varieties, and this one will give makers four flowers to choose from (shown clockwise from top left): Woods’ Rose, Prairie Flax, American Globeflower, and Scarlet Globemallow.
The flower itself stays essentially the same, while changes in color transform it into four distinctly different wildflowers.
I love the idea of getting more than one flower from a single pattern. It also means that once you’ve learned how to make the Rosette motif, you can use that same basic pattern to build several different flowers for your blanket. Four wildflowers, one little 3-inch motif!
September 16, 2026
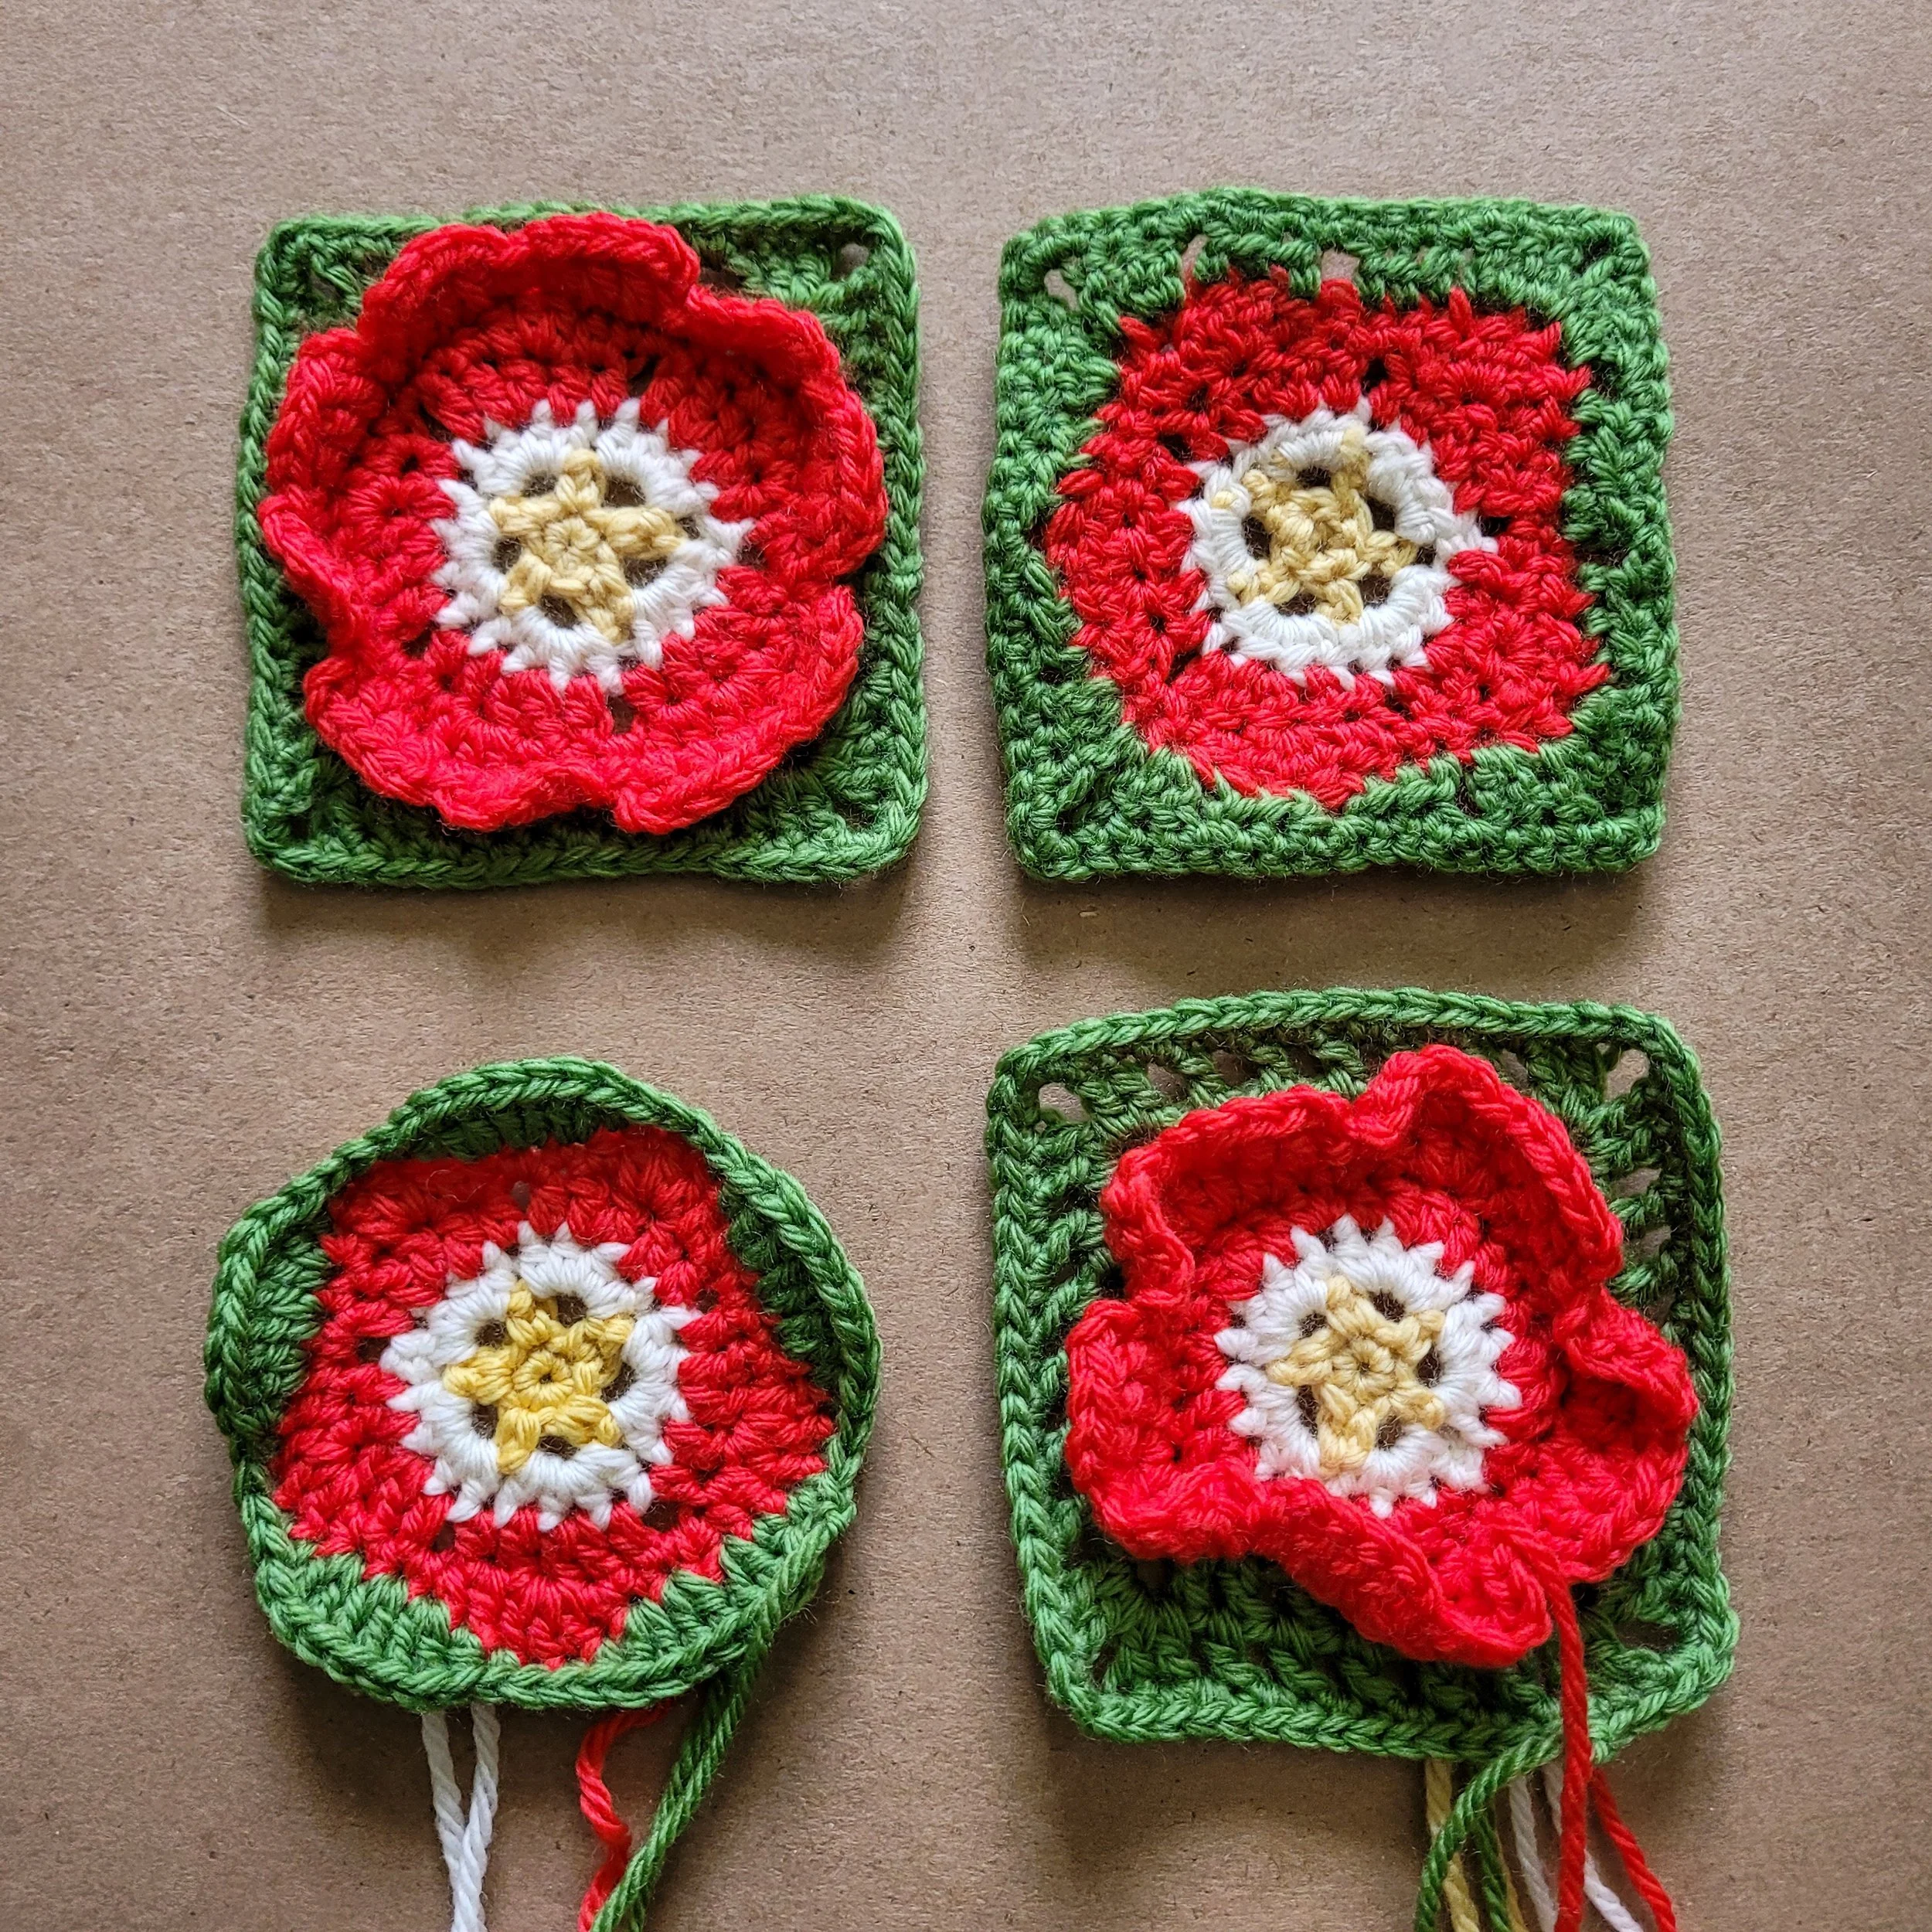
Turning a five-petaled flower into a square turned out to be quite a puzzle! I tried several different approaches. Some worked beautifully from the front but put too much stress on the back loops. Others distributed the stitches more evenly but didn’t account for the fact that a pentagon can’t be easily divided into four the way a circle can. I even considered turning the pentagon into a circle first, then turning the circle into a square. But I simply didn’t have enough room to make that work.
After four attempts, I finally went back to my original idea and mapped out every stitch, corner, and increase using a sketch of a pentagon inside a square.
I think I learned something important from designing this flower. As much as I would like for the easiest or most elegant solution to always be the best one, sometimes you just have to put the crochet hook down and accept that the best solution is simply the one that works.
September 14, 2026
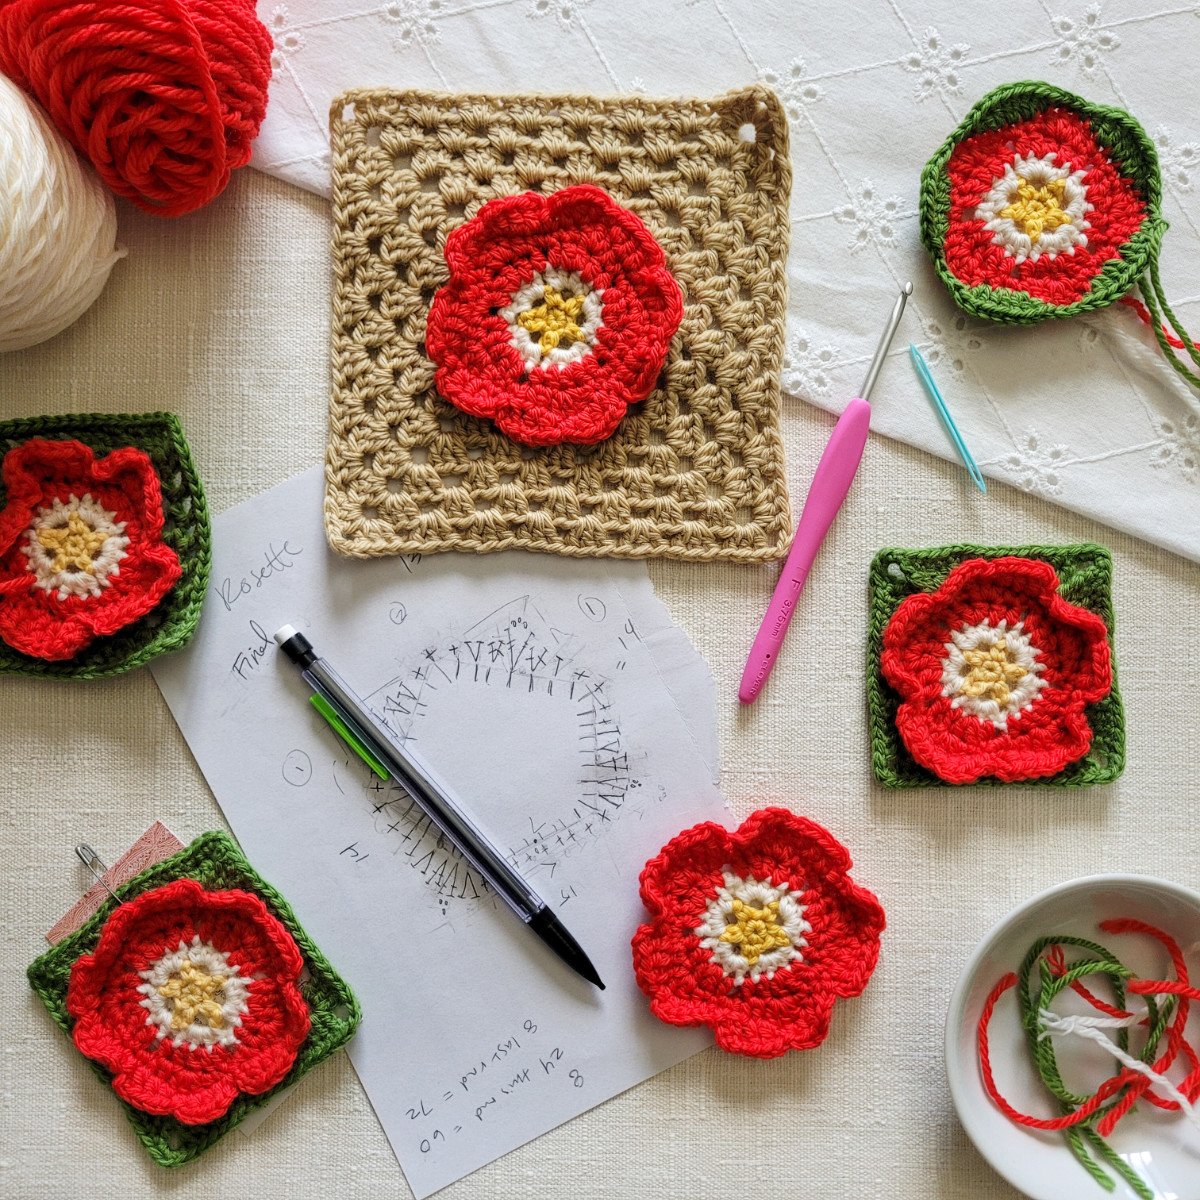
I originally designed the five-petaled Rosette flower back in 2022 and even turned it into a granny square. But I wasn’t happy with the result. The flower looked flat and lifeless surrounded by so much granny stitch.
When I revisited the design for my Wildflower Field Guide, I knew I wanted something different. I decided to place the flower in the smaller 3-inch square motif so that it would reach all the way to the edges with very little background showing. I also wanted to work the background from the back loops of a later petal round so the petals would stay raised.
That created a whole new puzzle: how do you turn a five-sided flower into a four-sided square in just two rounds? As you can see, it took plenty of experimenting!
September 9, 2026
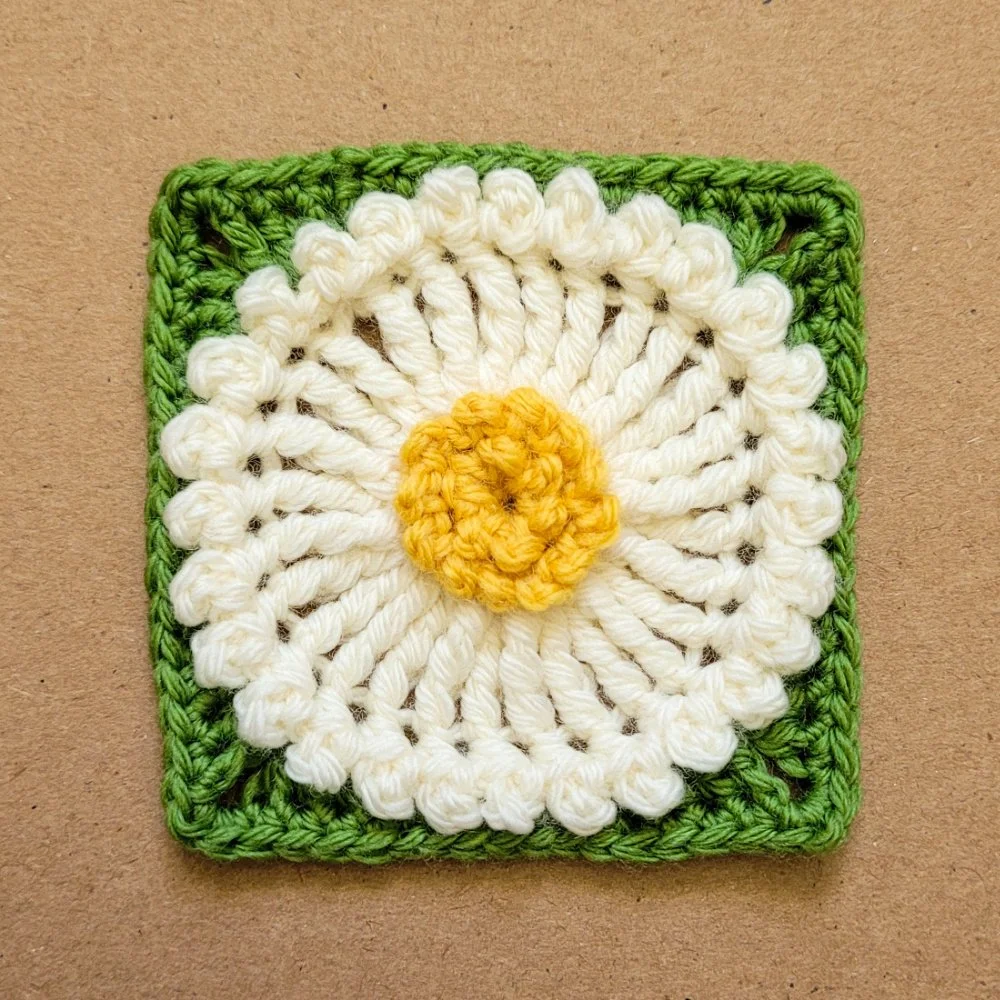
I was getting close, but my first attempts still weren’t quite right. The breakthrough came when I changed the decorative stitch from a front-post slip stitch to a front-post single crochet, and replaced the chain 4 between stitches with a little picot. And suddenly, I had my daisy!
The picots create just enough texture to suggest petals without actually making individual petals. Even better, working front-post stitches above the third loop leaves the top loops of the double treble crochets available for the motif border. Exactly what I needed.
I love how different this flower is from my original Daisy. Instead of 12 clearly defined petals, the new design is much more of a suggestion: a circle of tall stitches and little picots that somehow manages to say daisy without spelling it out.
September 7, 2026
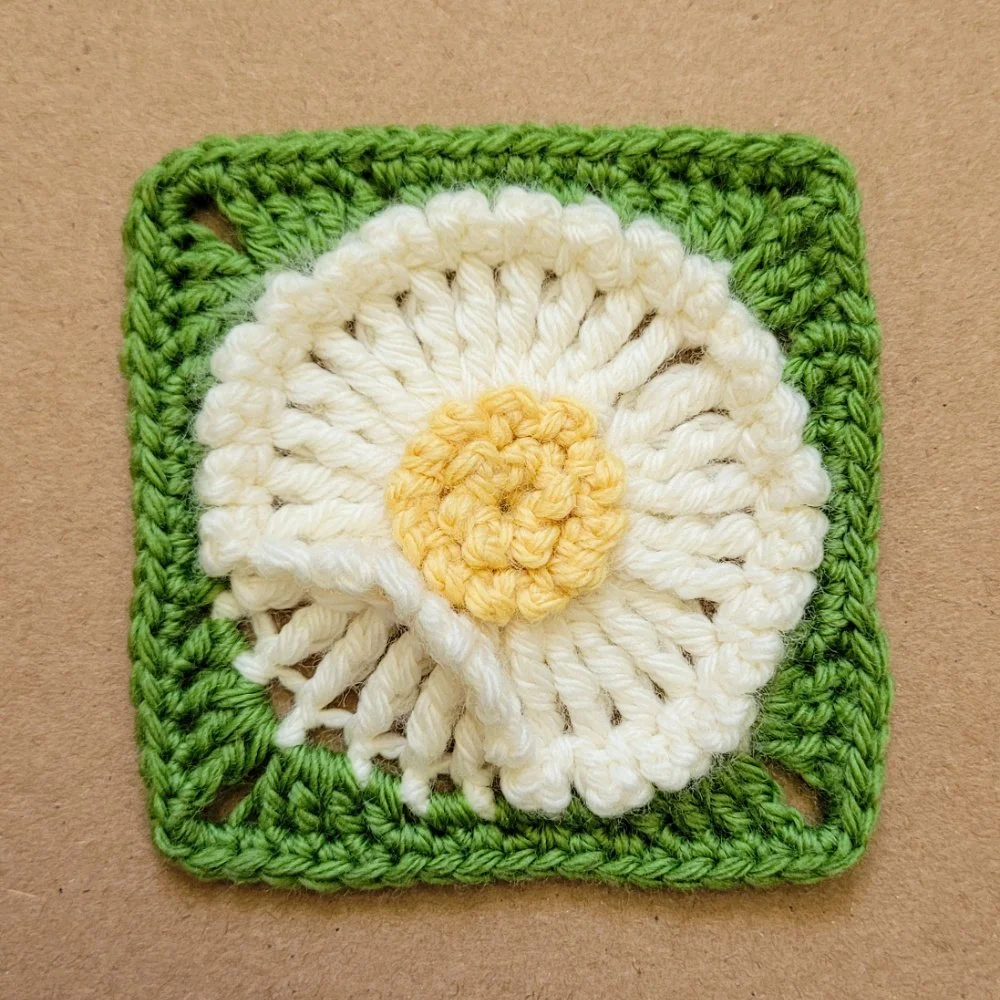
My tall-stitch idea is looking promising! I experimented with several variations using double treble crochets around the center, followed by a decorative stitch to suggest the ends of the petals. I really liked the texture this created. But then I discovered a problem.
Because the decorative stitches were worked around the posts of the double treble crochets, there was nothing anchoring them in place. You could actually pull the little stitches down the posts. That might be okay for a decorative flower that won’t get handled much, but these motifs are going to become a blanket. I immediately imagined someone pulling their blanket out of the wash and finding all the little daisy petals misshapen. Nope. I wouldn’t do that to you!
So I went back to the drawing board and took a closer look at those double treble crochets. That’s when I noticed the third loop at the top of the stitch, just below the two loops we normally work into. What if I worked my decorative stitch around the post above that third loop? That might just solve the problem.
September 6, 2026
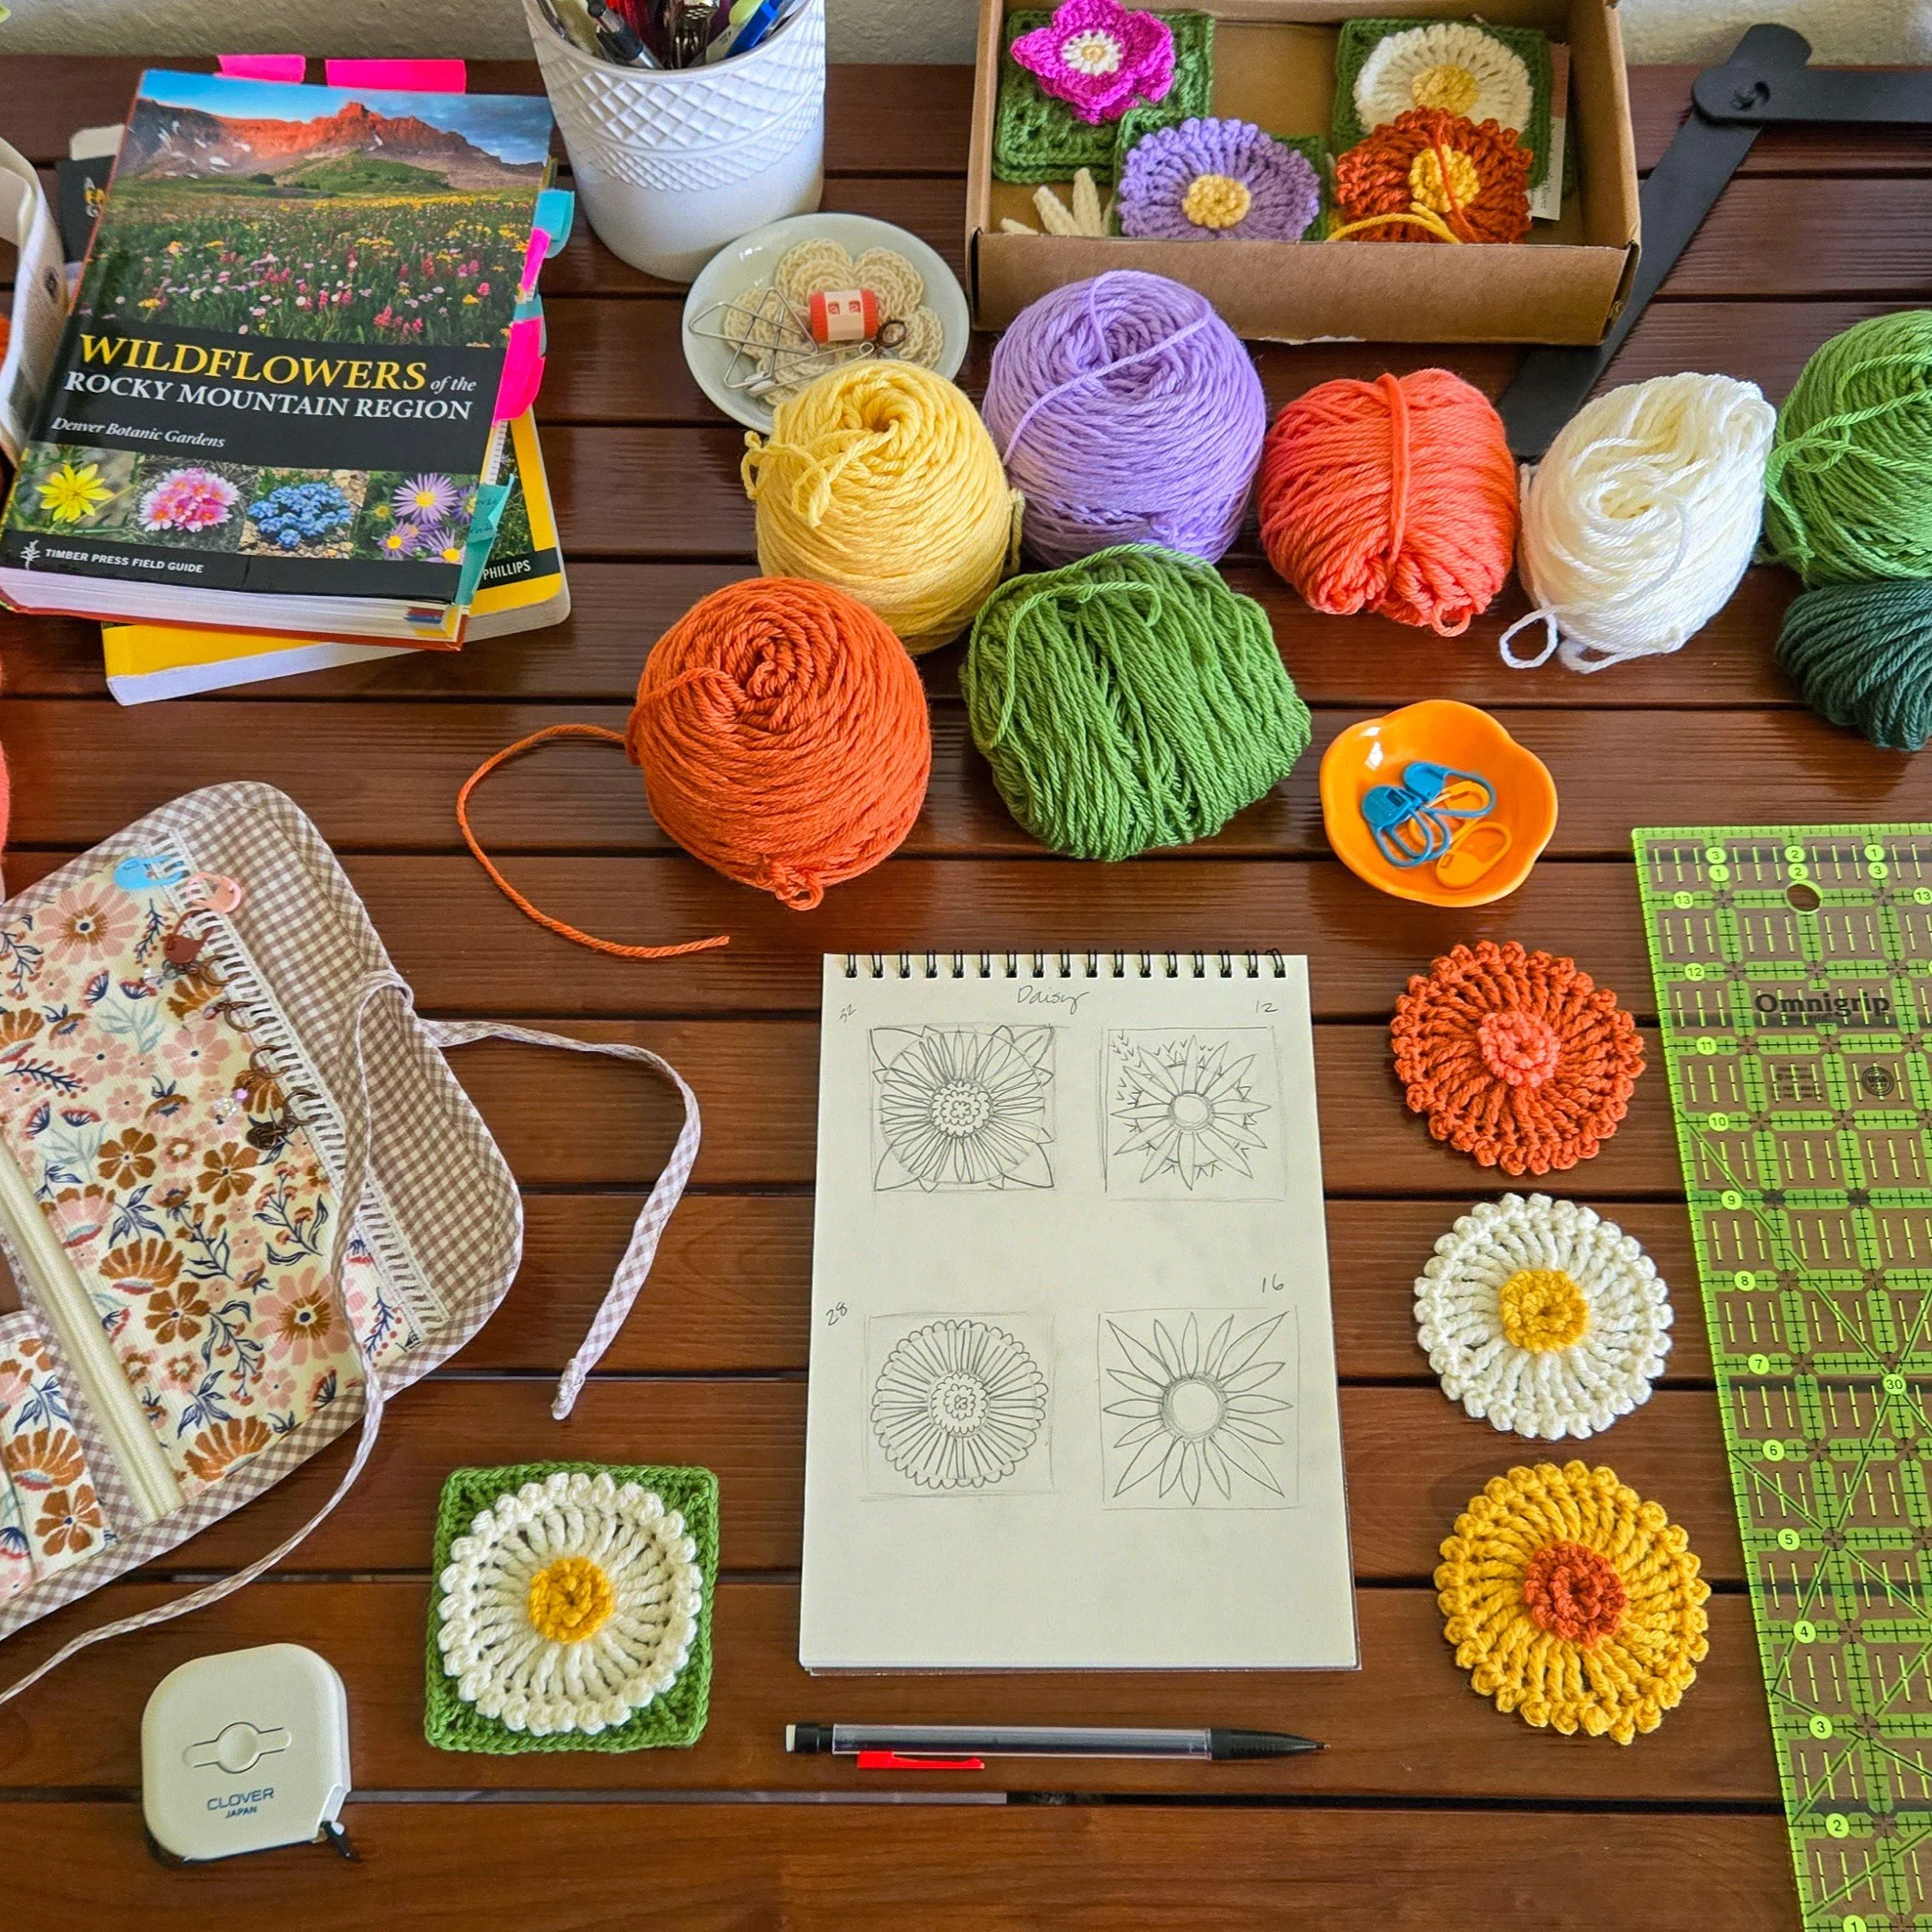
Pondering how to turn my 12-petaled daisies into square motifs the other day, I had a little eureka moment. A daisy doesn’t have to have distinct petals. The original flower was unmistakably a daisy, but I could create a flower with just the suggestion of petals. That opened up a whole new direction.
I pulled out my sketchbook and started exploring. I considered two approaches: making loops from long chains around the center, or using very tall stitches with a decorative stitch at the top to suggest petals. The second idea intrigued me. It seemed like it might give me exactly the look I wanted while being much easier to turn into a small square motif. Time to crochet and find out!
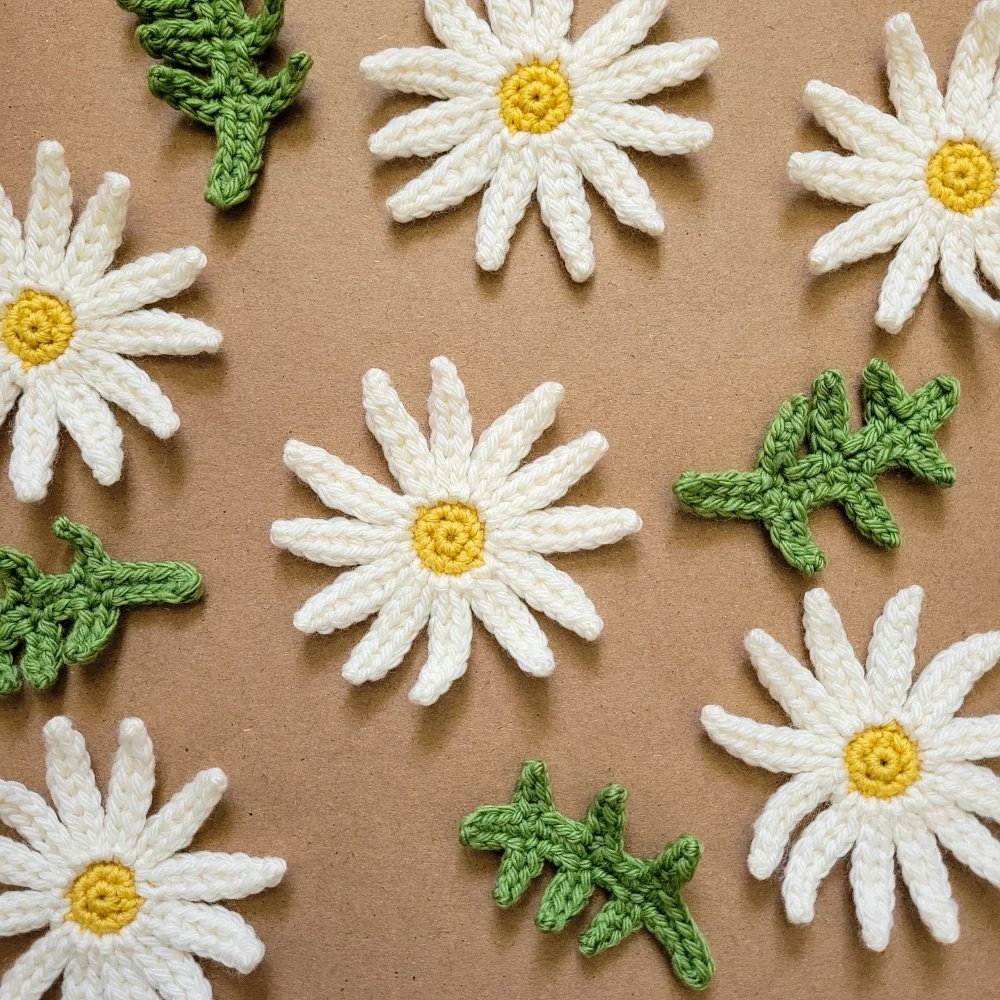
September 4, 2026
When I began revisiting my original Daisy design, my first thought was to figure out how to turn those 12 distinct petals into a square motif. I could join the petals together with chains, then build the motif outward from the spaces between them. But the more I thought about it, the more complicated it seemed. Where should I join each petal? How would I keep the petals from becoming floppy or creating loops that could catch on things? And how would I square it off?
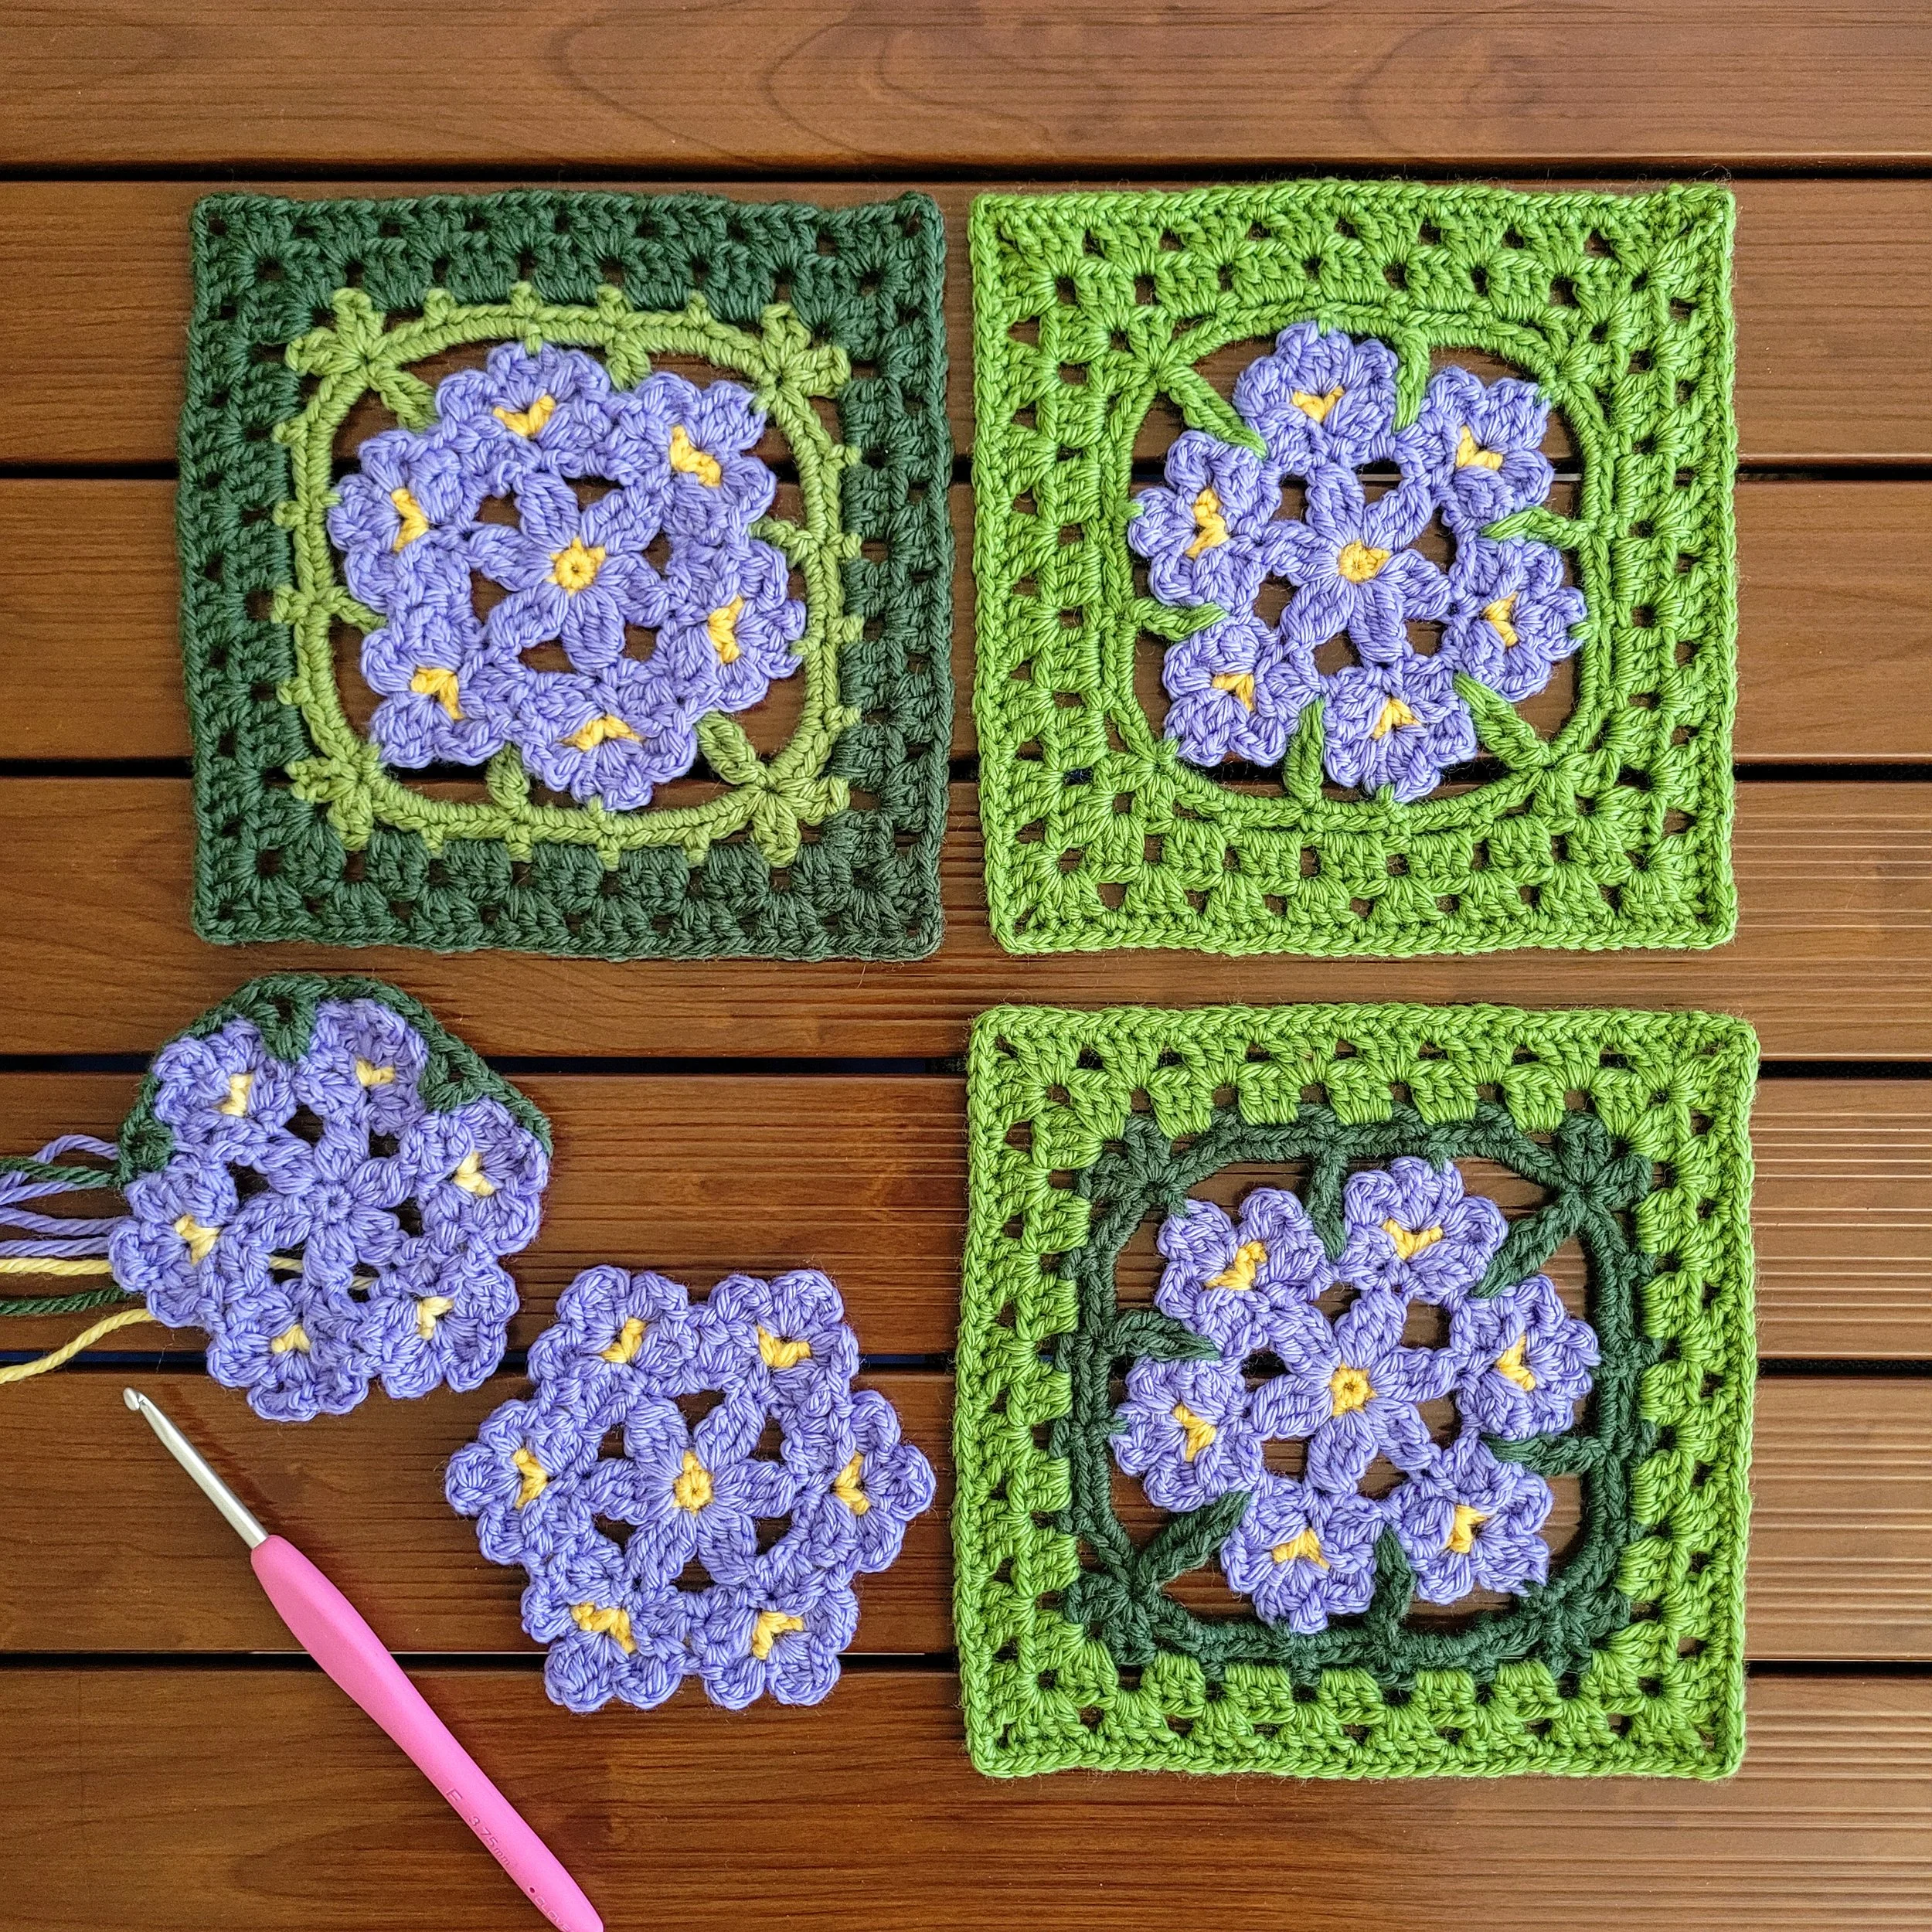
August 20, 2026 (finalizing colors)
When I returned to this motif this year, I had to rethink the colors. Back in 2024, I used light green for the leaves between the flowers and the first few rounds of the border, with the rest of the background worked in dark green. I really liked the contrast, but since then I’ve decided to use light green for the background for all the flower motifs in the blanket.
I tried making the entire motif light green, but the flowers lost some of the depth I liked in my 2024 version. In the end, I decided to use dark green around the leaves and light green for the rest of the background. I love how this helps define each flower and makes the petals pop while still keeping the overall background light and cohesive.
I think the dark green will also give me some fun possibilities for future motifs. I could even design some leaf appliques that could be added to the finished blanket as three-dimensional accents!
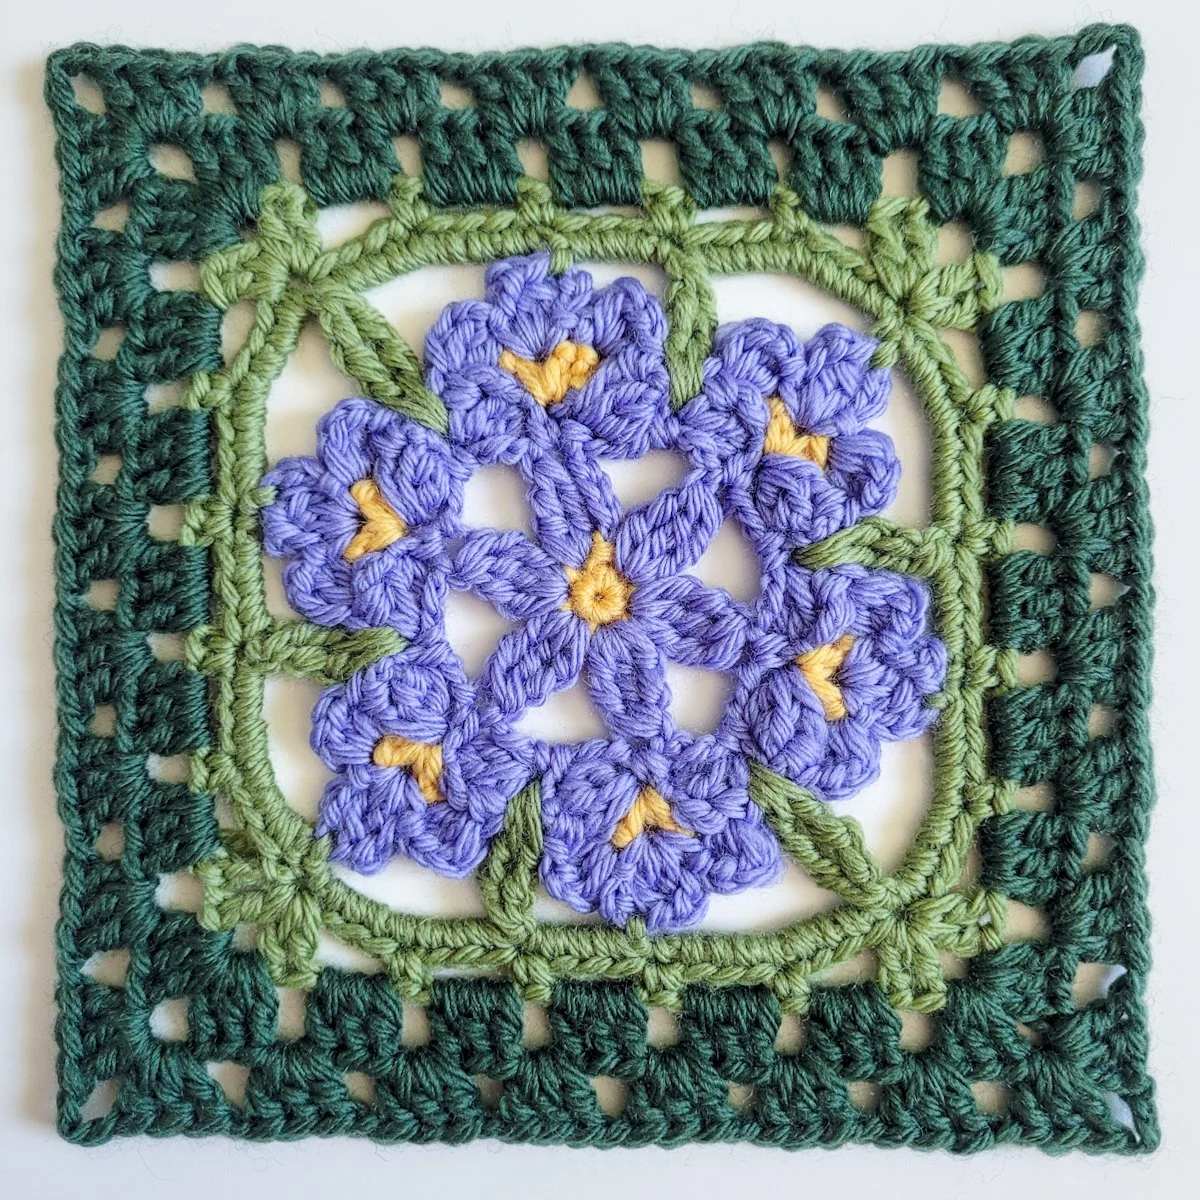
August 20, 2026 (2024 final motif design)
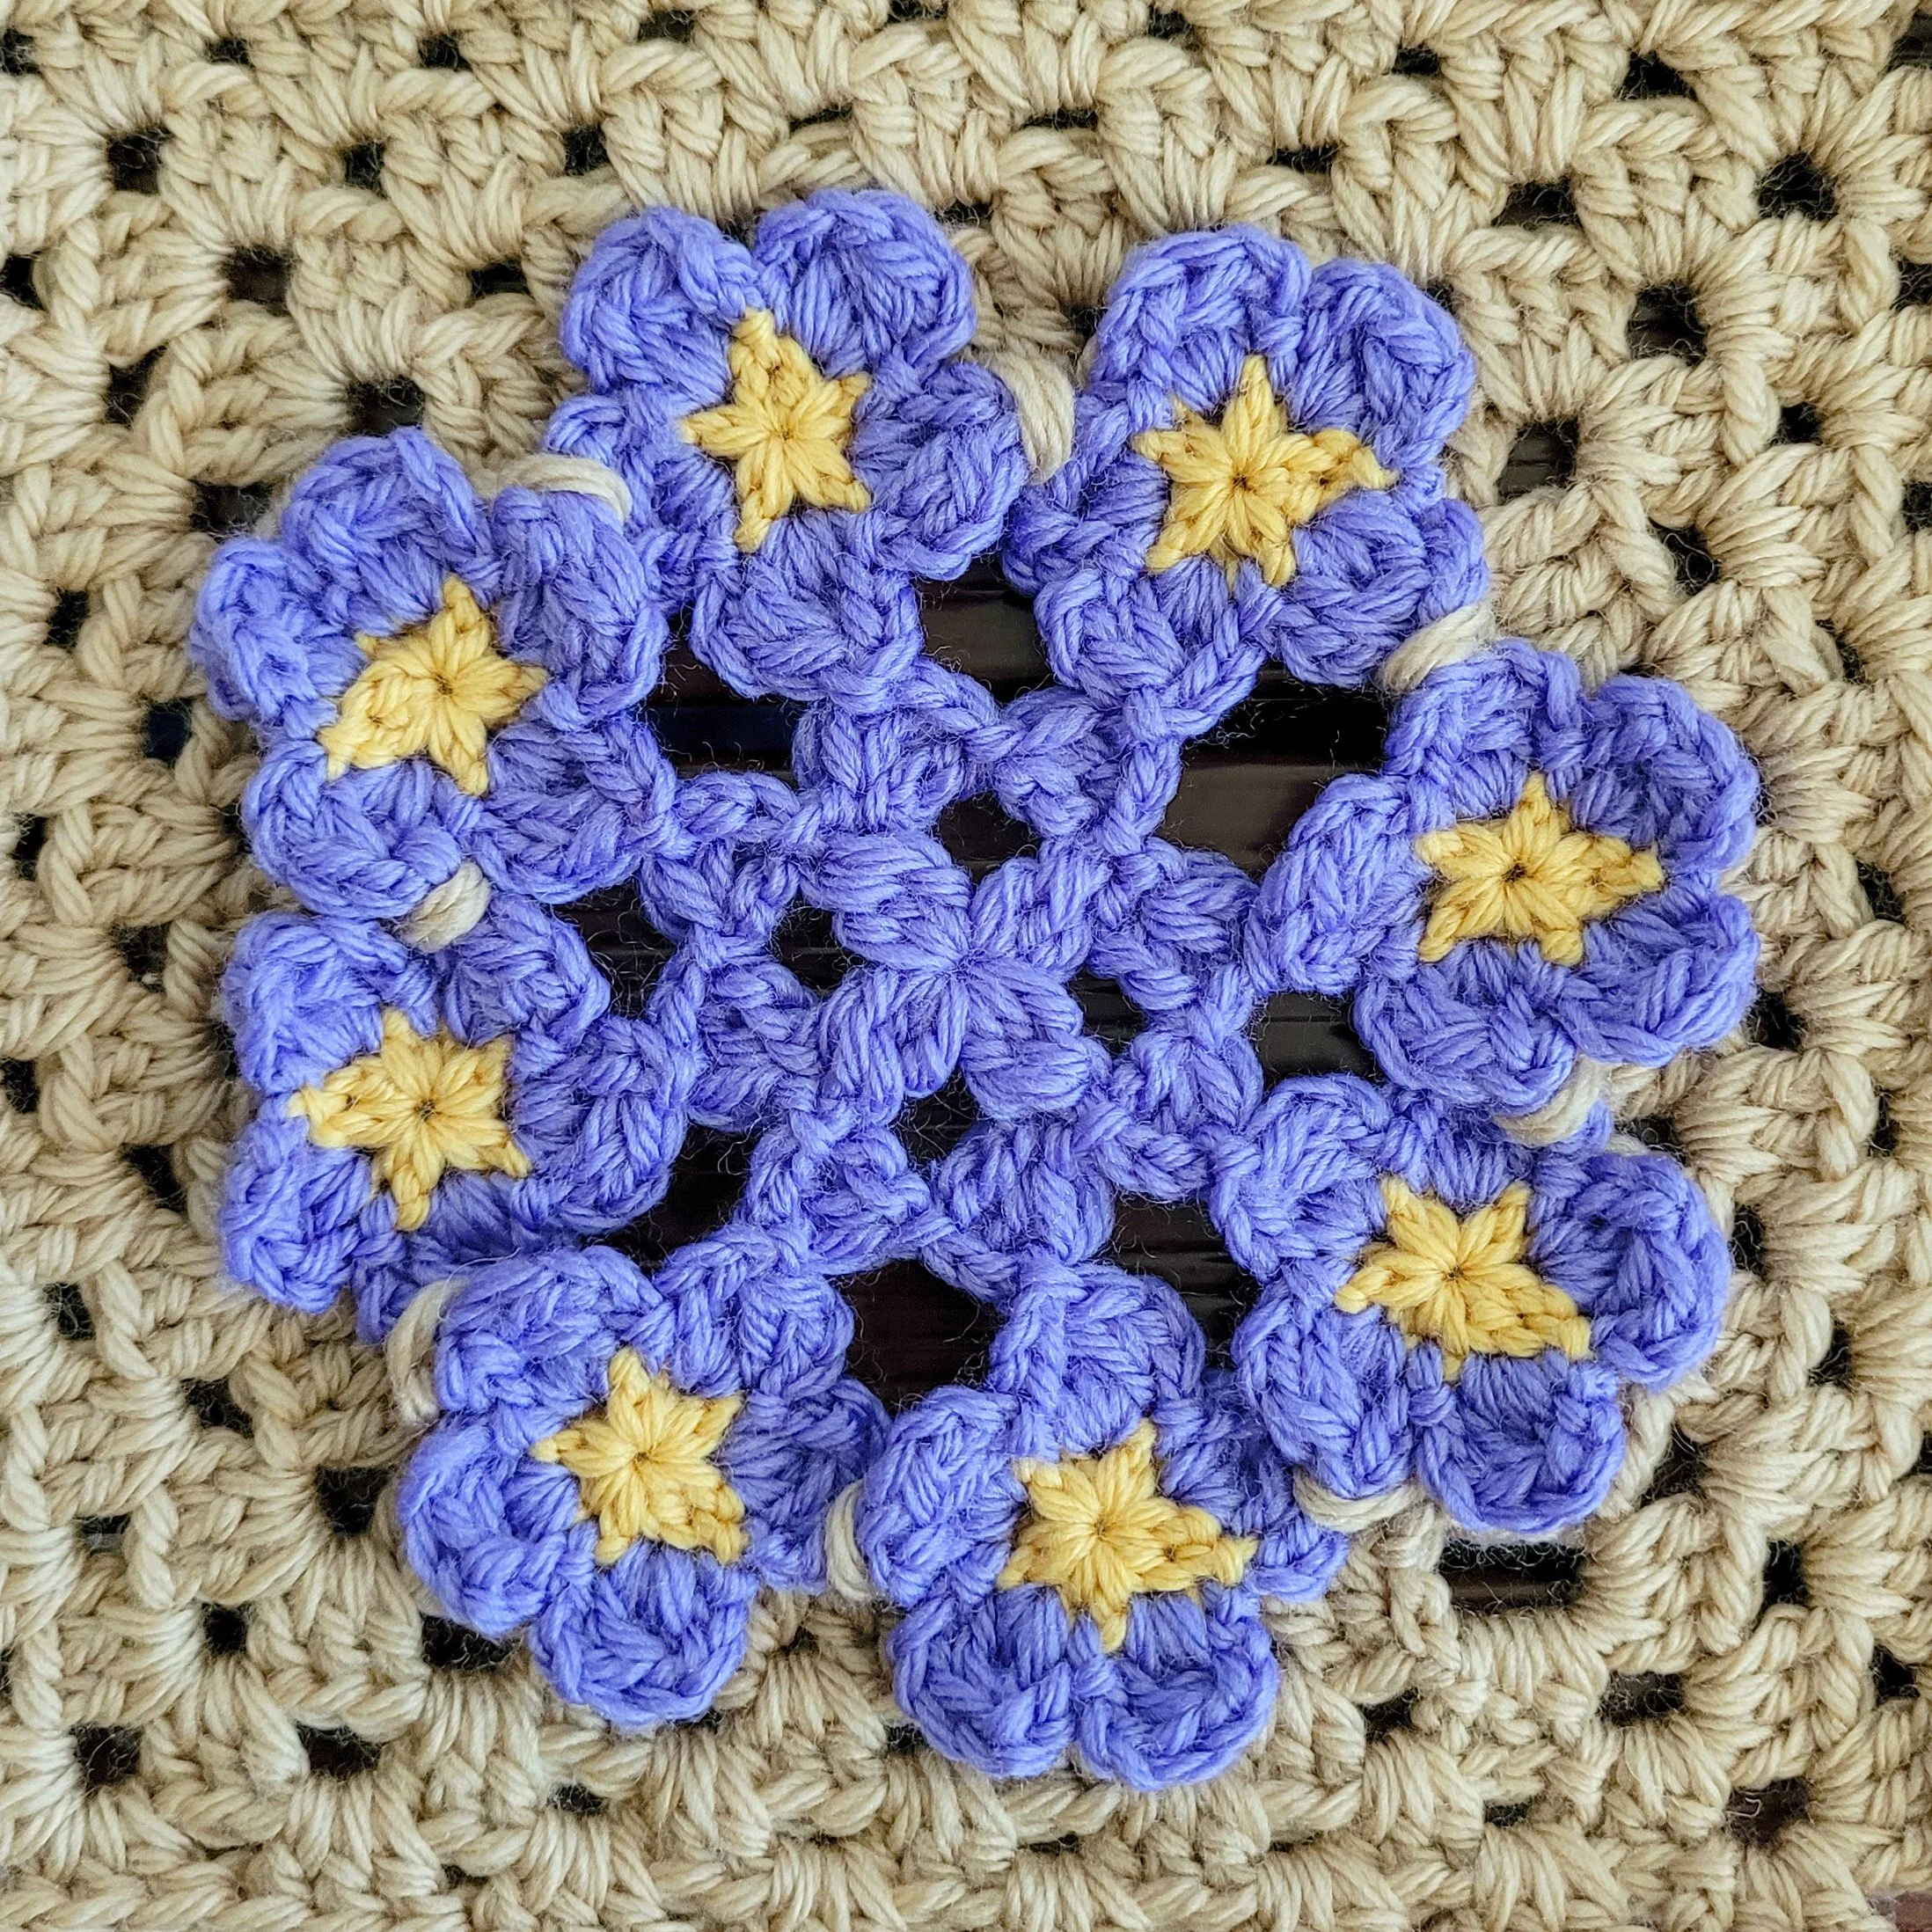
One of the trickiest parts of turning the flower cluster into a square motif was figuring out how to build out the background without losing the pretty scalloped edges of the petals. I experimented with several approaches before settling on using tall cluster stitches between the flowers separated by chain spaces to create the beginning of the motif. From there, I could work into the chain spaces in the next round, and then gradually expand and square off the design while keeping the petal shapes intact.
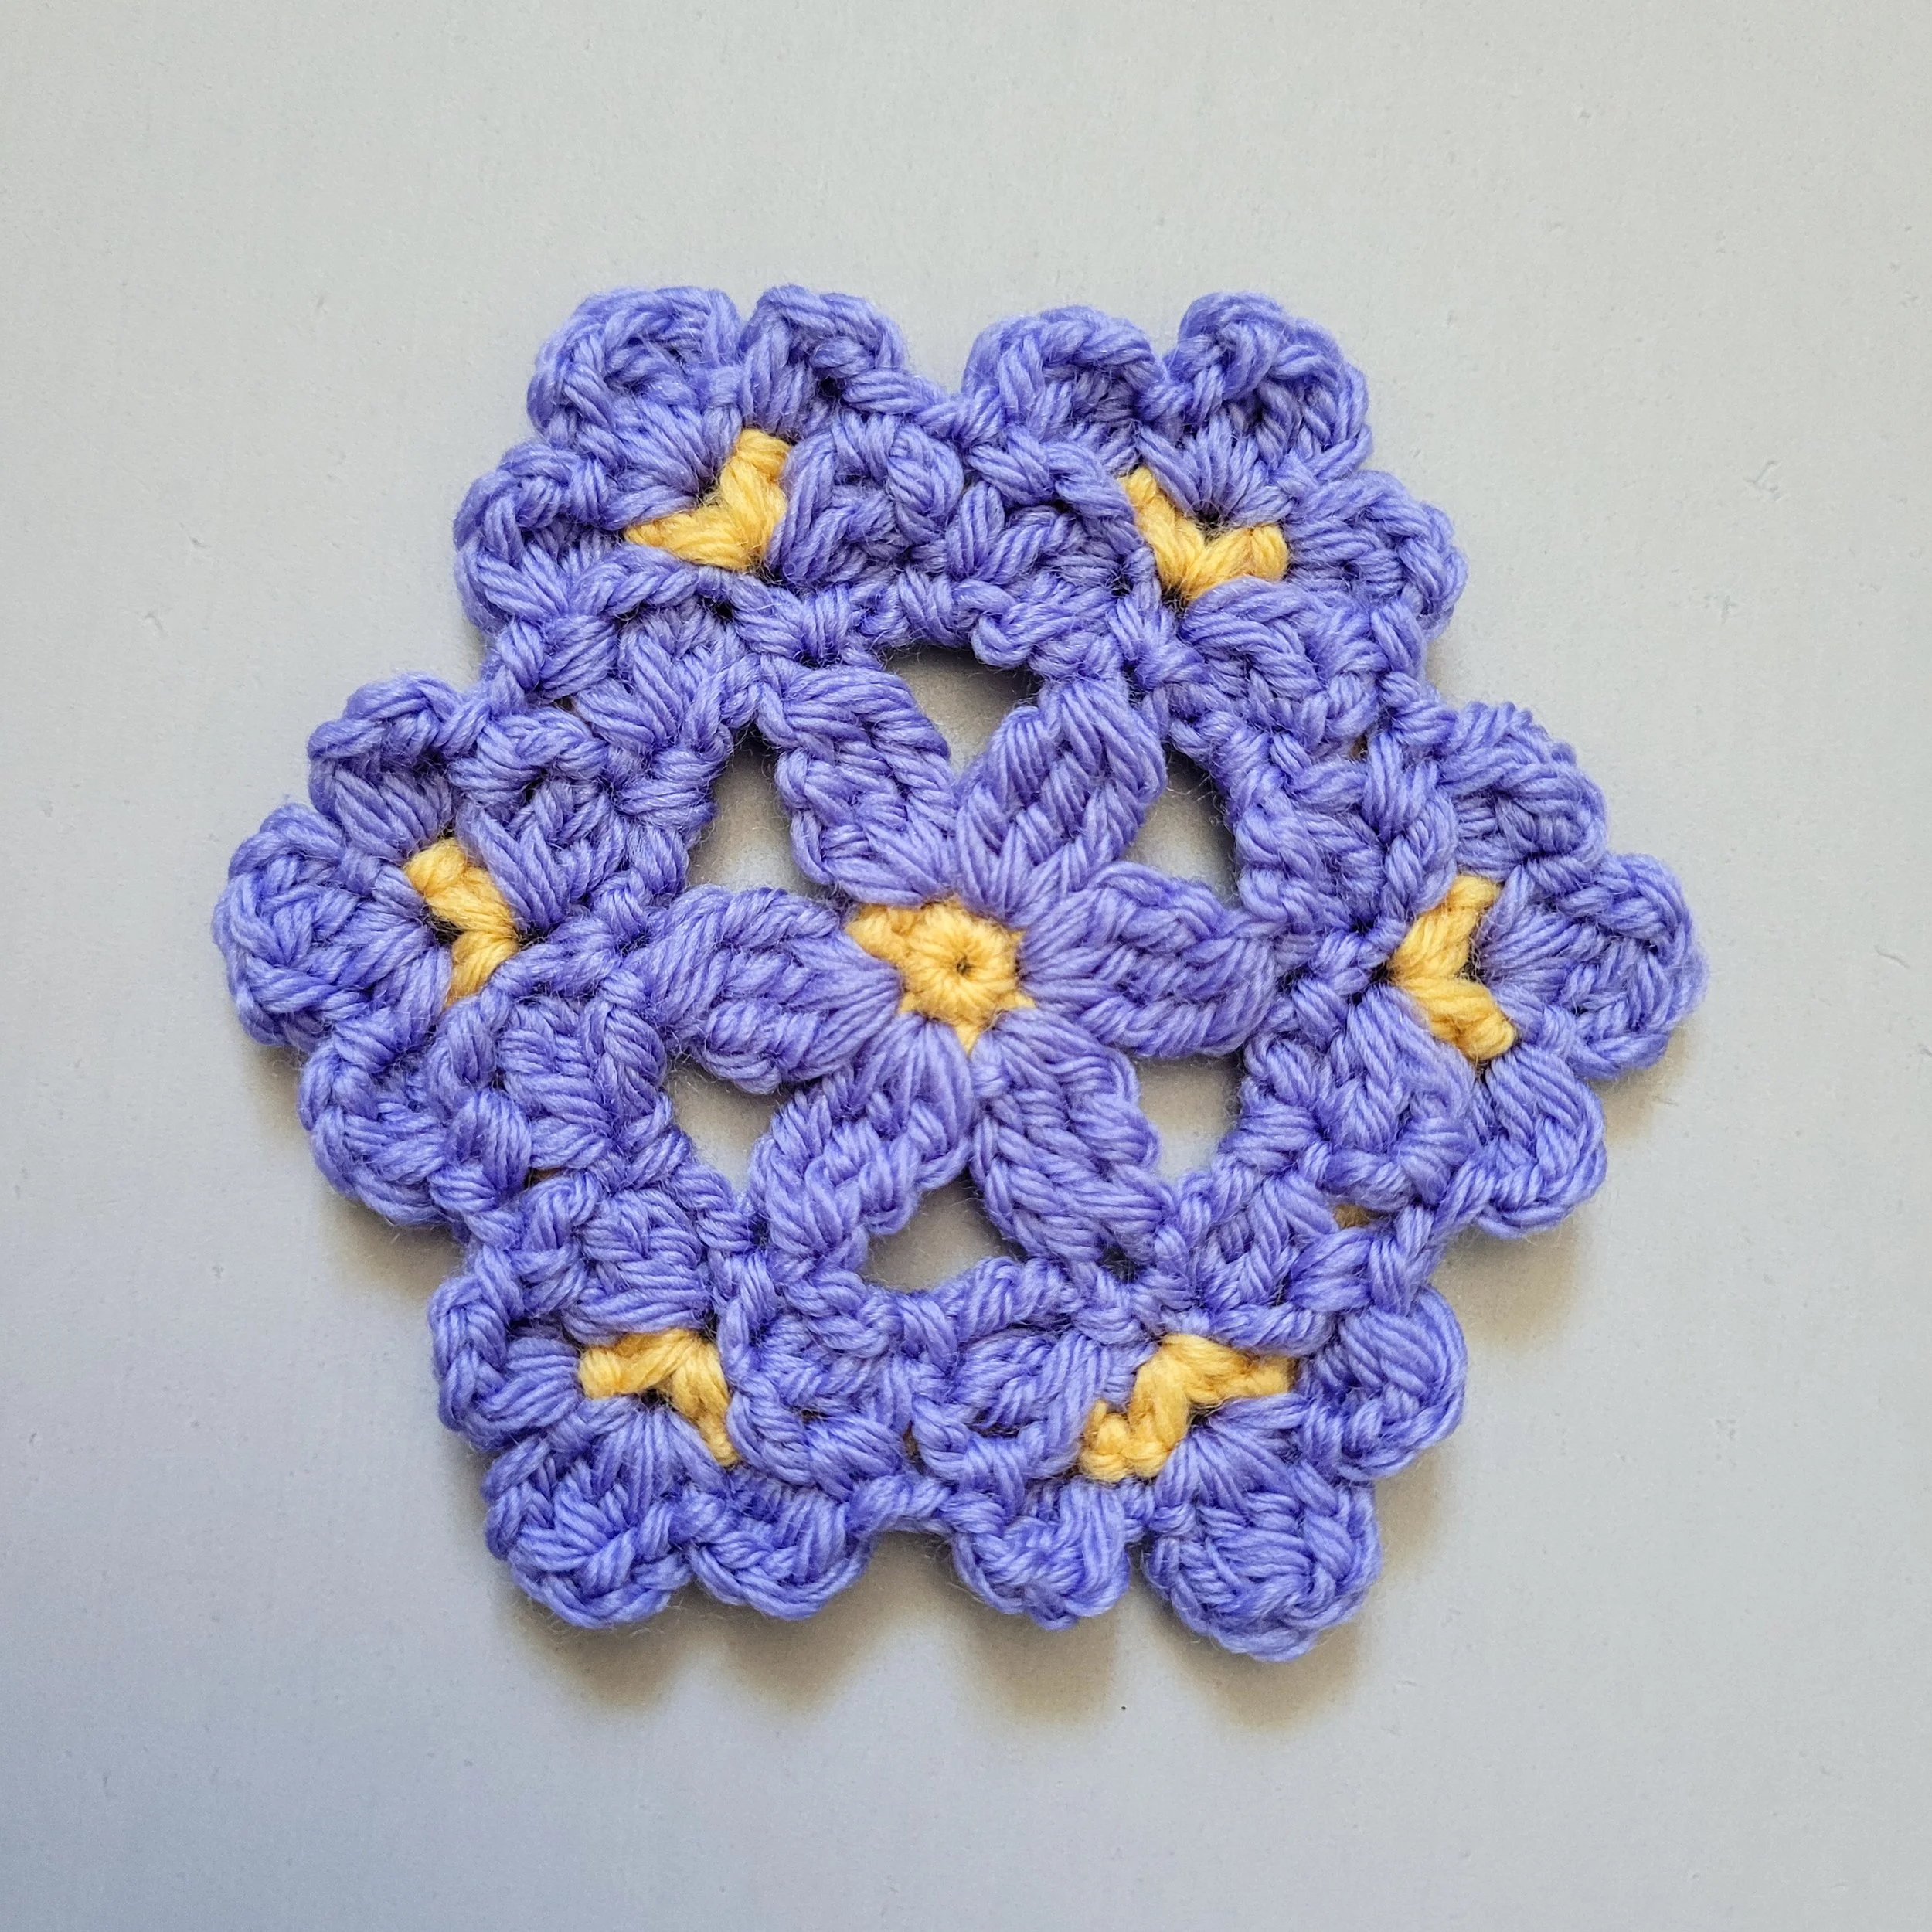
August 20, 2026 (2024 cluster redesign)
In 2024, I spent about a week working and reworking the design before I finally found a solution: instead of making the flowers separately, I could work the entire flower cluster in the round using strategically placed cluster stitches.
This changed everything. The flowers could still have the dimensional, clustered look I wanted, but now the entire motif could be built as one piece rather than assembled from eight individual flowers. And best of all, I reduced the number of ends to weave in from 34 to just 4! It was a much more elegant solution, and one I knew would make this motif significantly more enjoyable to crochet.
I’ll save the details of exactly how it works for the pattern, but I was pretty excited when I finally got this version just right!
August 20, 2026 (2022 final design)
When I first designed the applique blanket, it was meant to be a fun experiment just for me. But once I decided to turn the blanket into a pattern, I had to take a much closer look at some of my design choices, and the Sky Pilot motif was one of them.
The original motif was made up of eight small flowers, each worked separately and then joined to a central flower and to one another using join-as-you-go in the final round. It was a clever way to build the flower cluster, but there was one rather significant downside: 34 ends to weave in for every motif!
I didn’t want to weave in that many ends myself, much less ask someone else to do it as part of a pattern. So I challenged myself to find a completely different way to construct the motif: one that would preserve the flower cluster I loved while dramatically reducing the amount of finishing work.
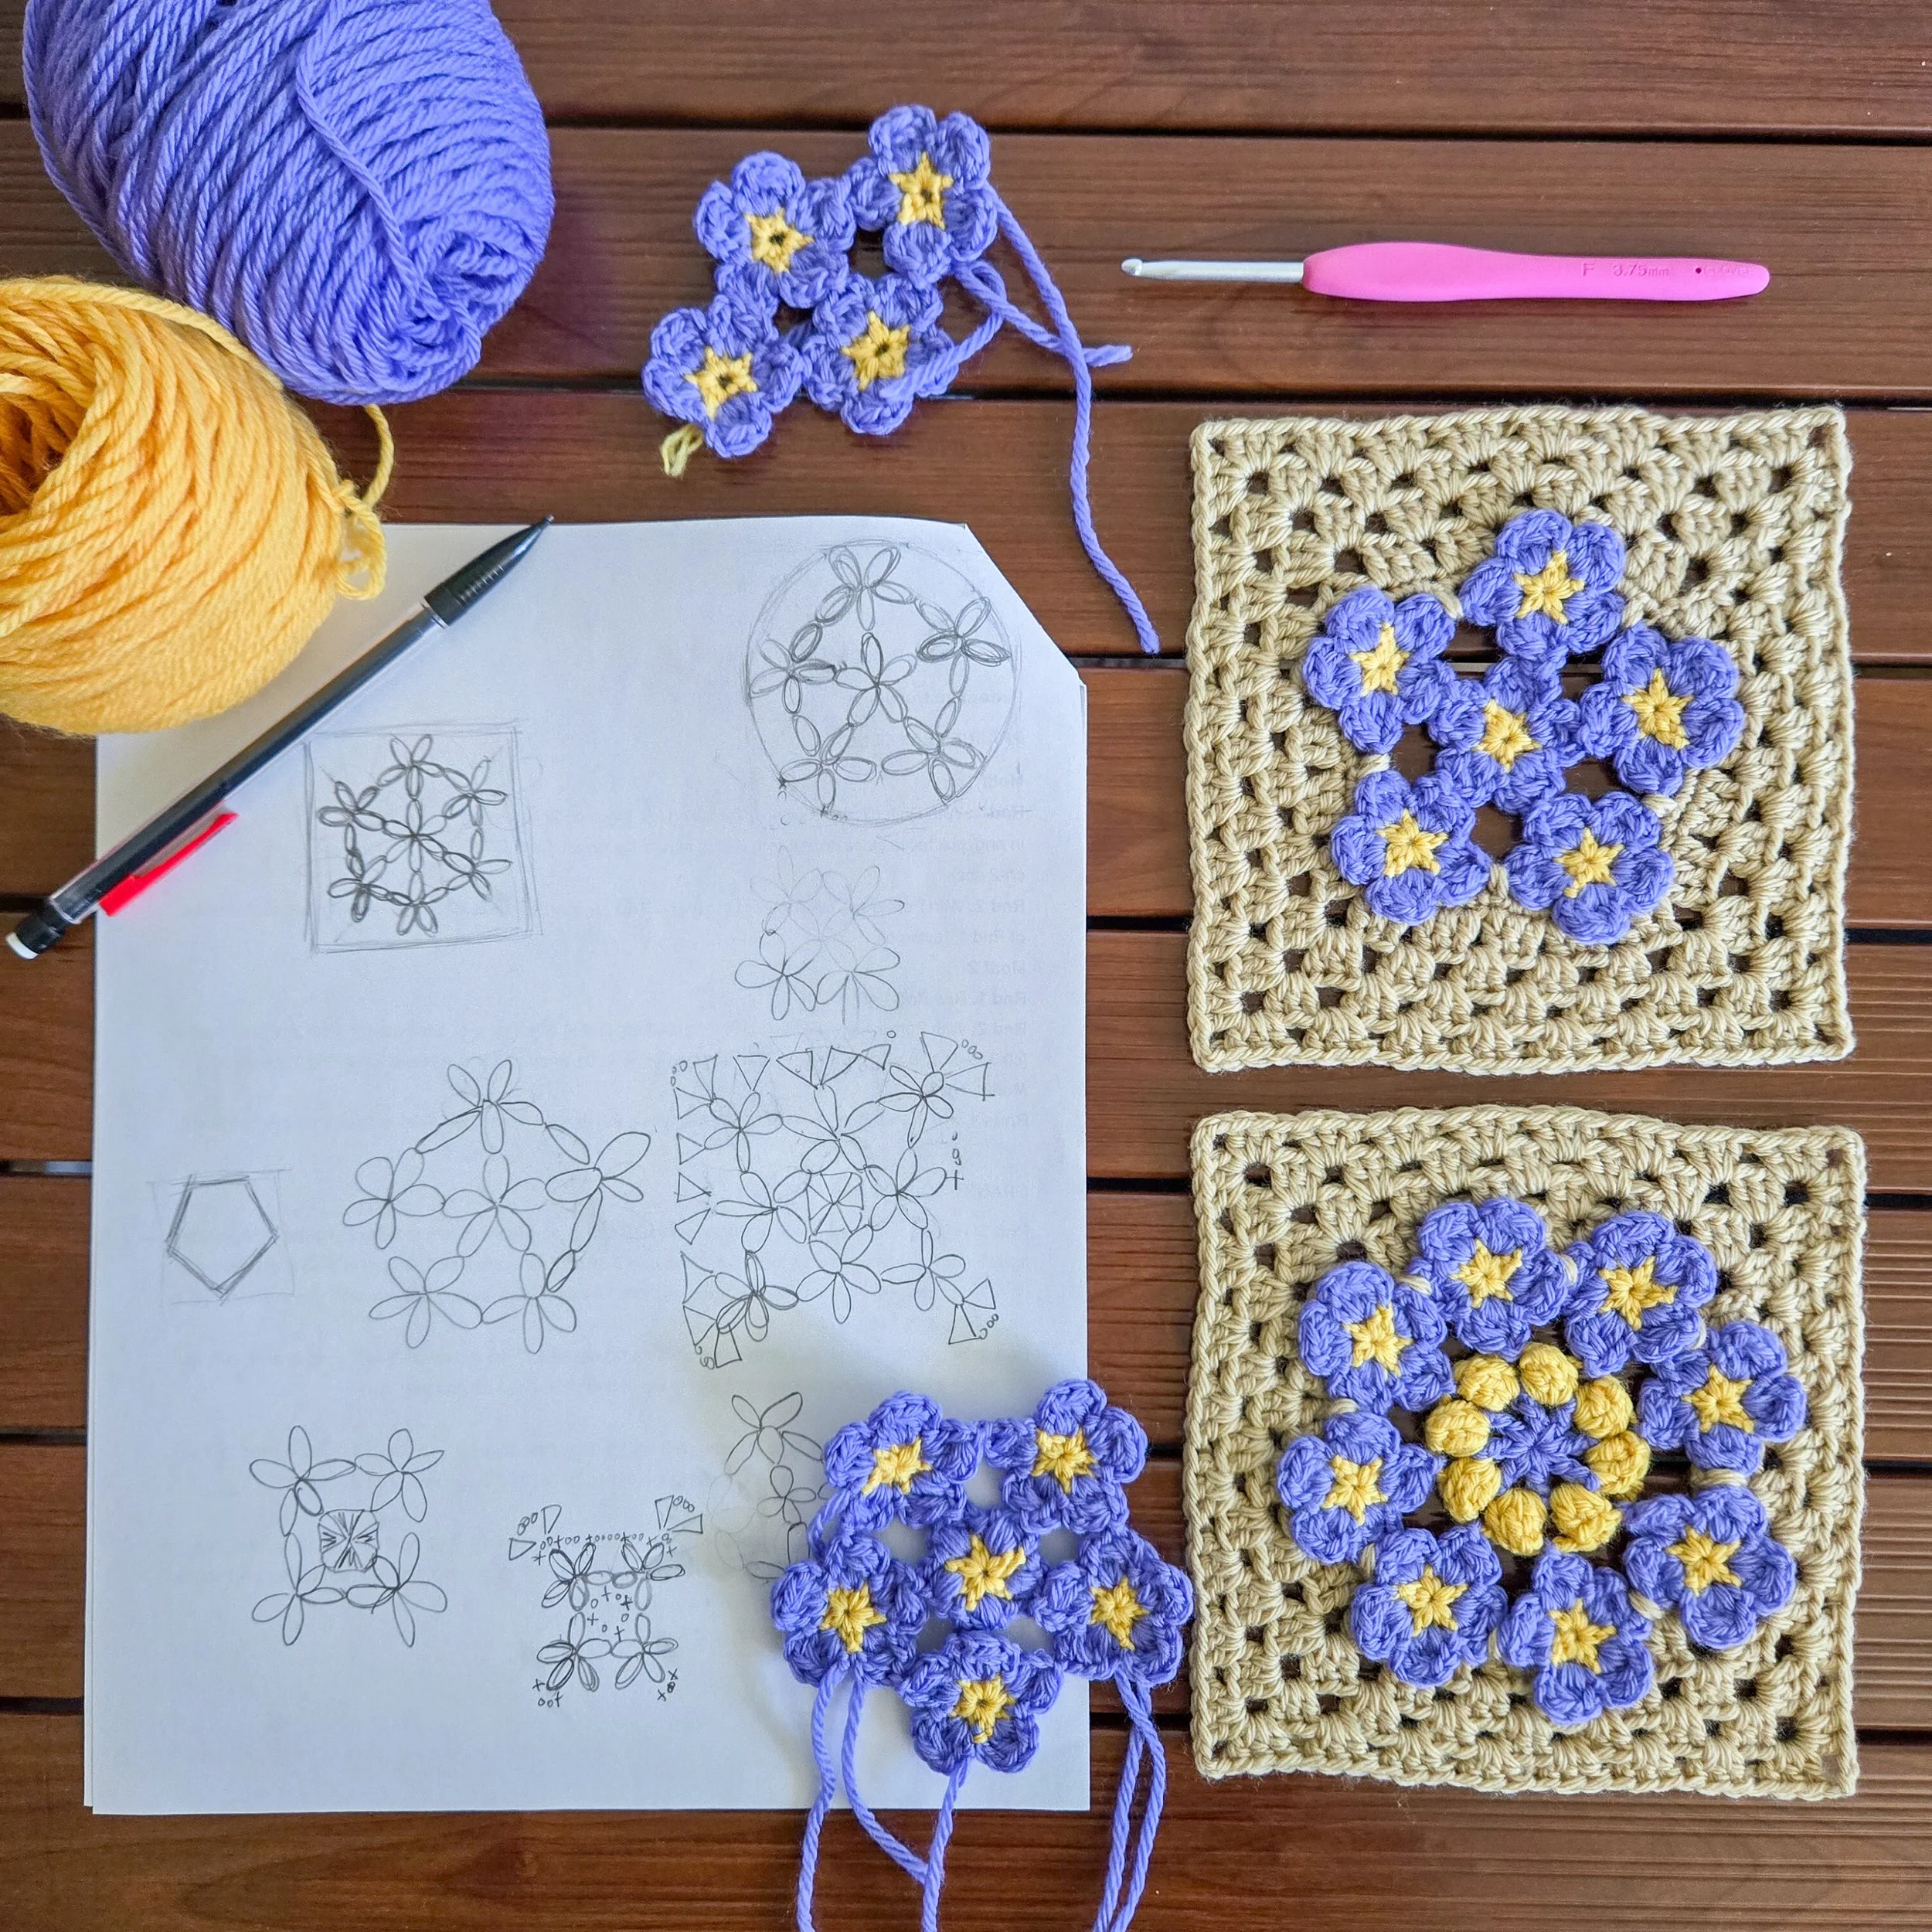
August 20, 2026 (2022 experiments)
As I’ve been working on the Sky Pilot design to get it ready for the tech editor, I came across a box of old sketches and swatches from when I first started developing this motif back in 2022. It made me realize that I never shared these early experiments here in the journal.
Back then, this flower was called Prairie Flax. You can scroll down to read more about where that original idea came from. Looking back at these first sketches now, it’s fun to see just how much this little motif has changed over the years, and how much of the original idea is still there.
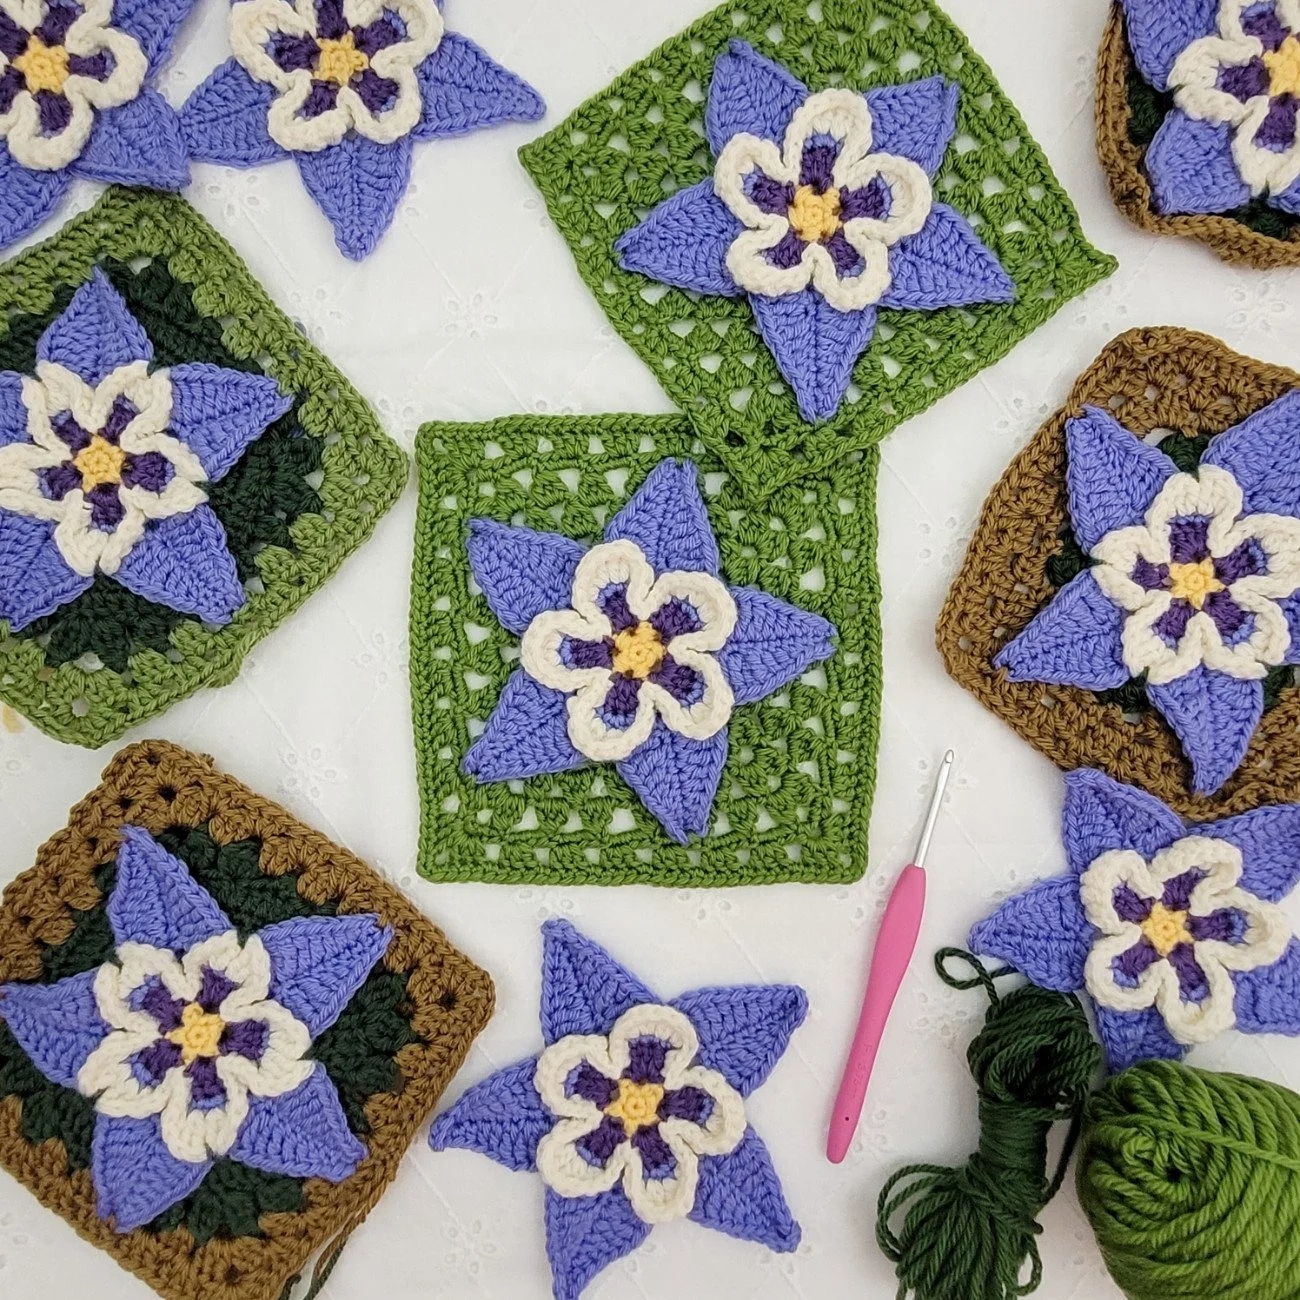
July 16, 2026
After taking tutorial photos for the columbine pattern this morning, I decided to pause and take a photo of all the iterations of the motif. It’s amazing to see how far it’s come.
In the earliest designs, when I was also experimenting with using dark green and brown, I began by working into the base of the large petals at the back of the appliqué. That meant starting with a circle and trying to square it off in just two or three rounds before reaching the outer edge of the motif.
Although that approach wasn’t the most successful, one element from those early experiments did make its way into the final design. I played with adding cluster stitches in the corners to create a leafy look. In the finished motif, shown at the center of this photo, I chose to carry those leafy clusters throughout the background instead. I think they add a lovely texture and bring the whole design together.
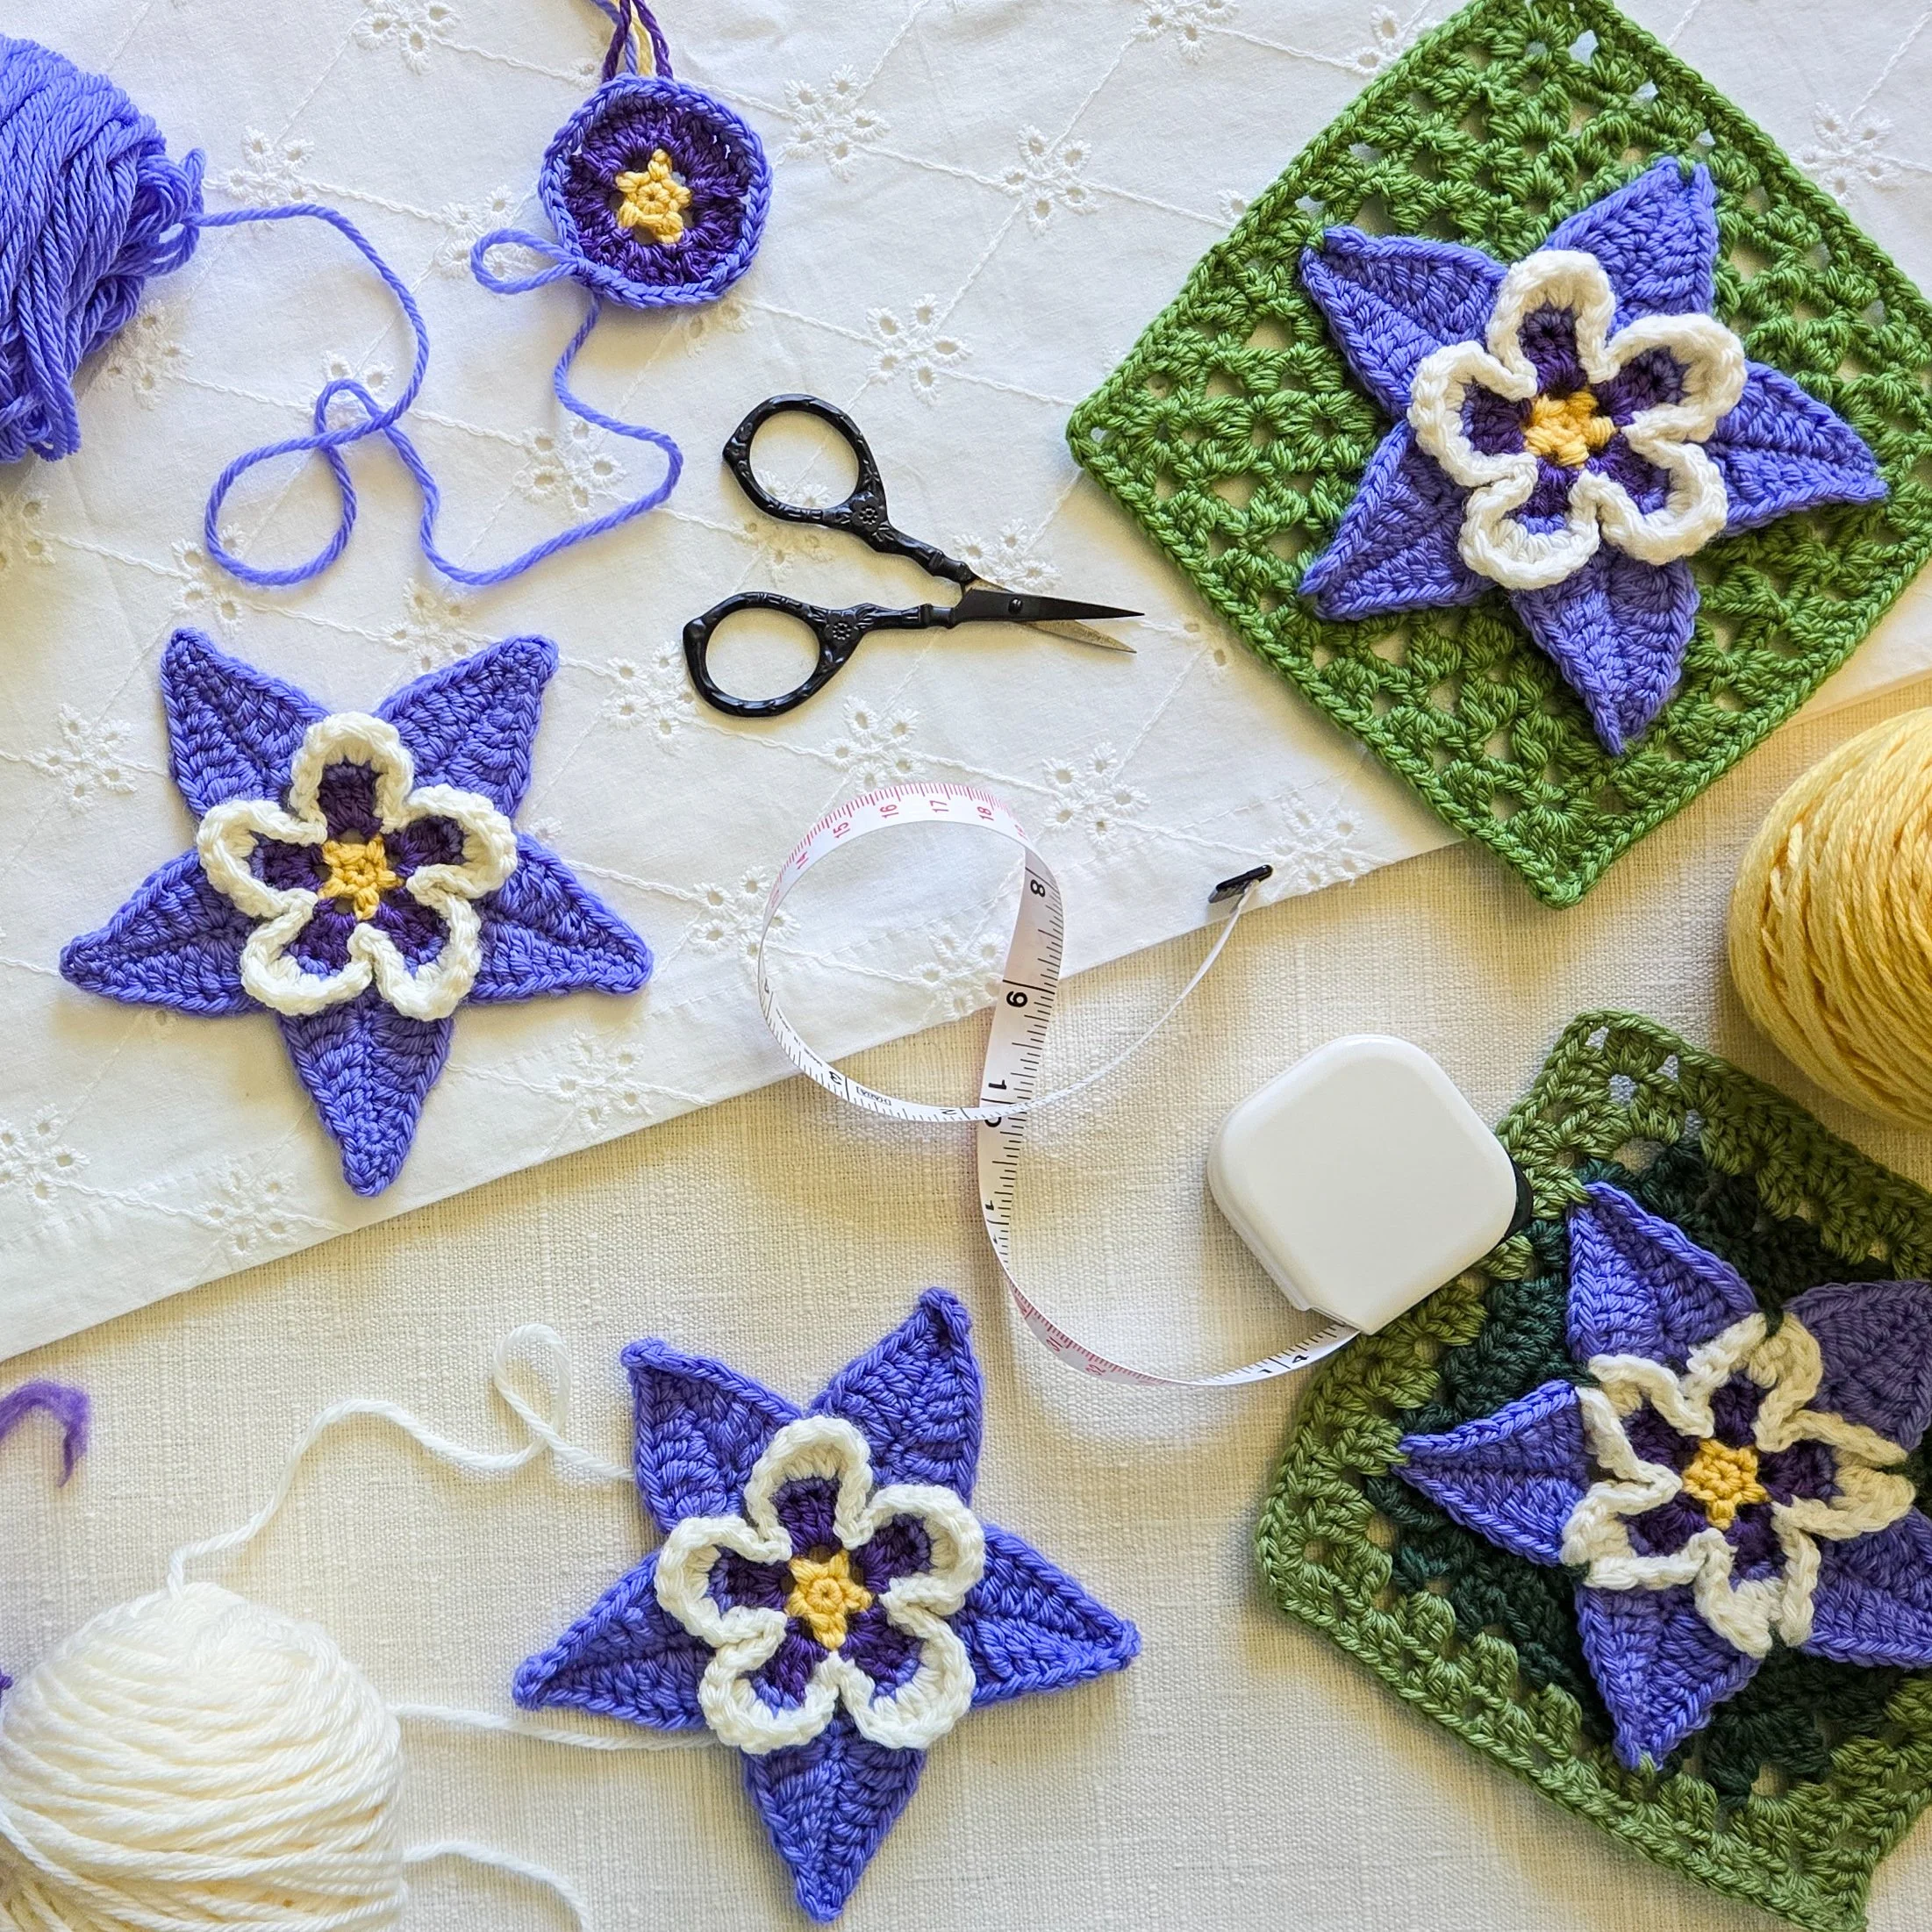
June 25, 2026
It’s been a little while, but I’m back at work on the Wildflower Collection. And I’m very excited to announce that, after probably a dozen fits and starts over the years, I’ve finally landed on a design for the columbine appliqué and motif that I’m truly happy with.
The columbine is one of my favorite wildflowers, so I was more than a little picky about getting everything just right. But in the end, I’m glad I persevered and continued tweaking all the little details until the design finally felt complete.
The pattern is back from tech editing and ready to move on to testing at the end of July!
April 30, 2026
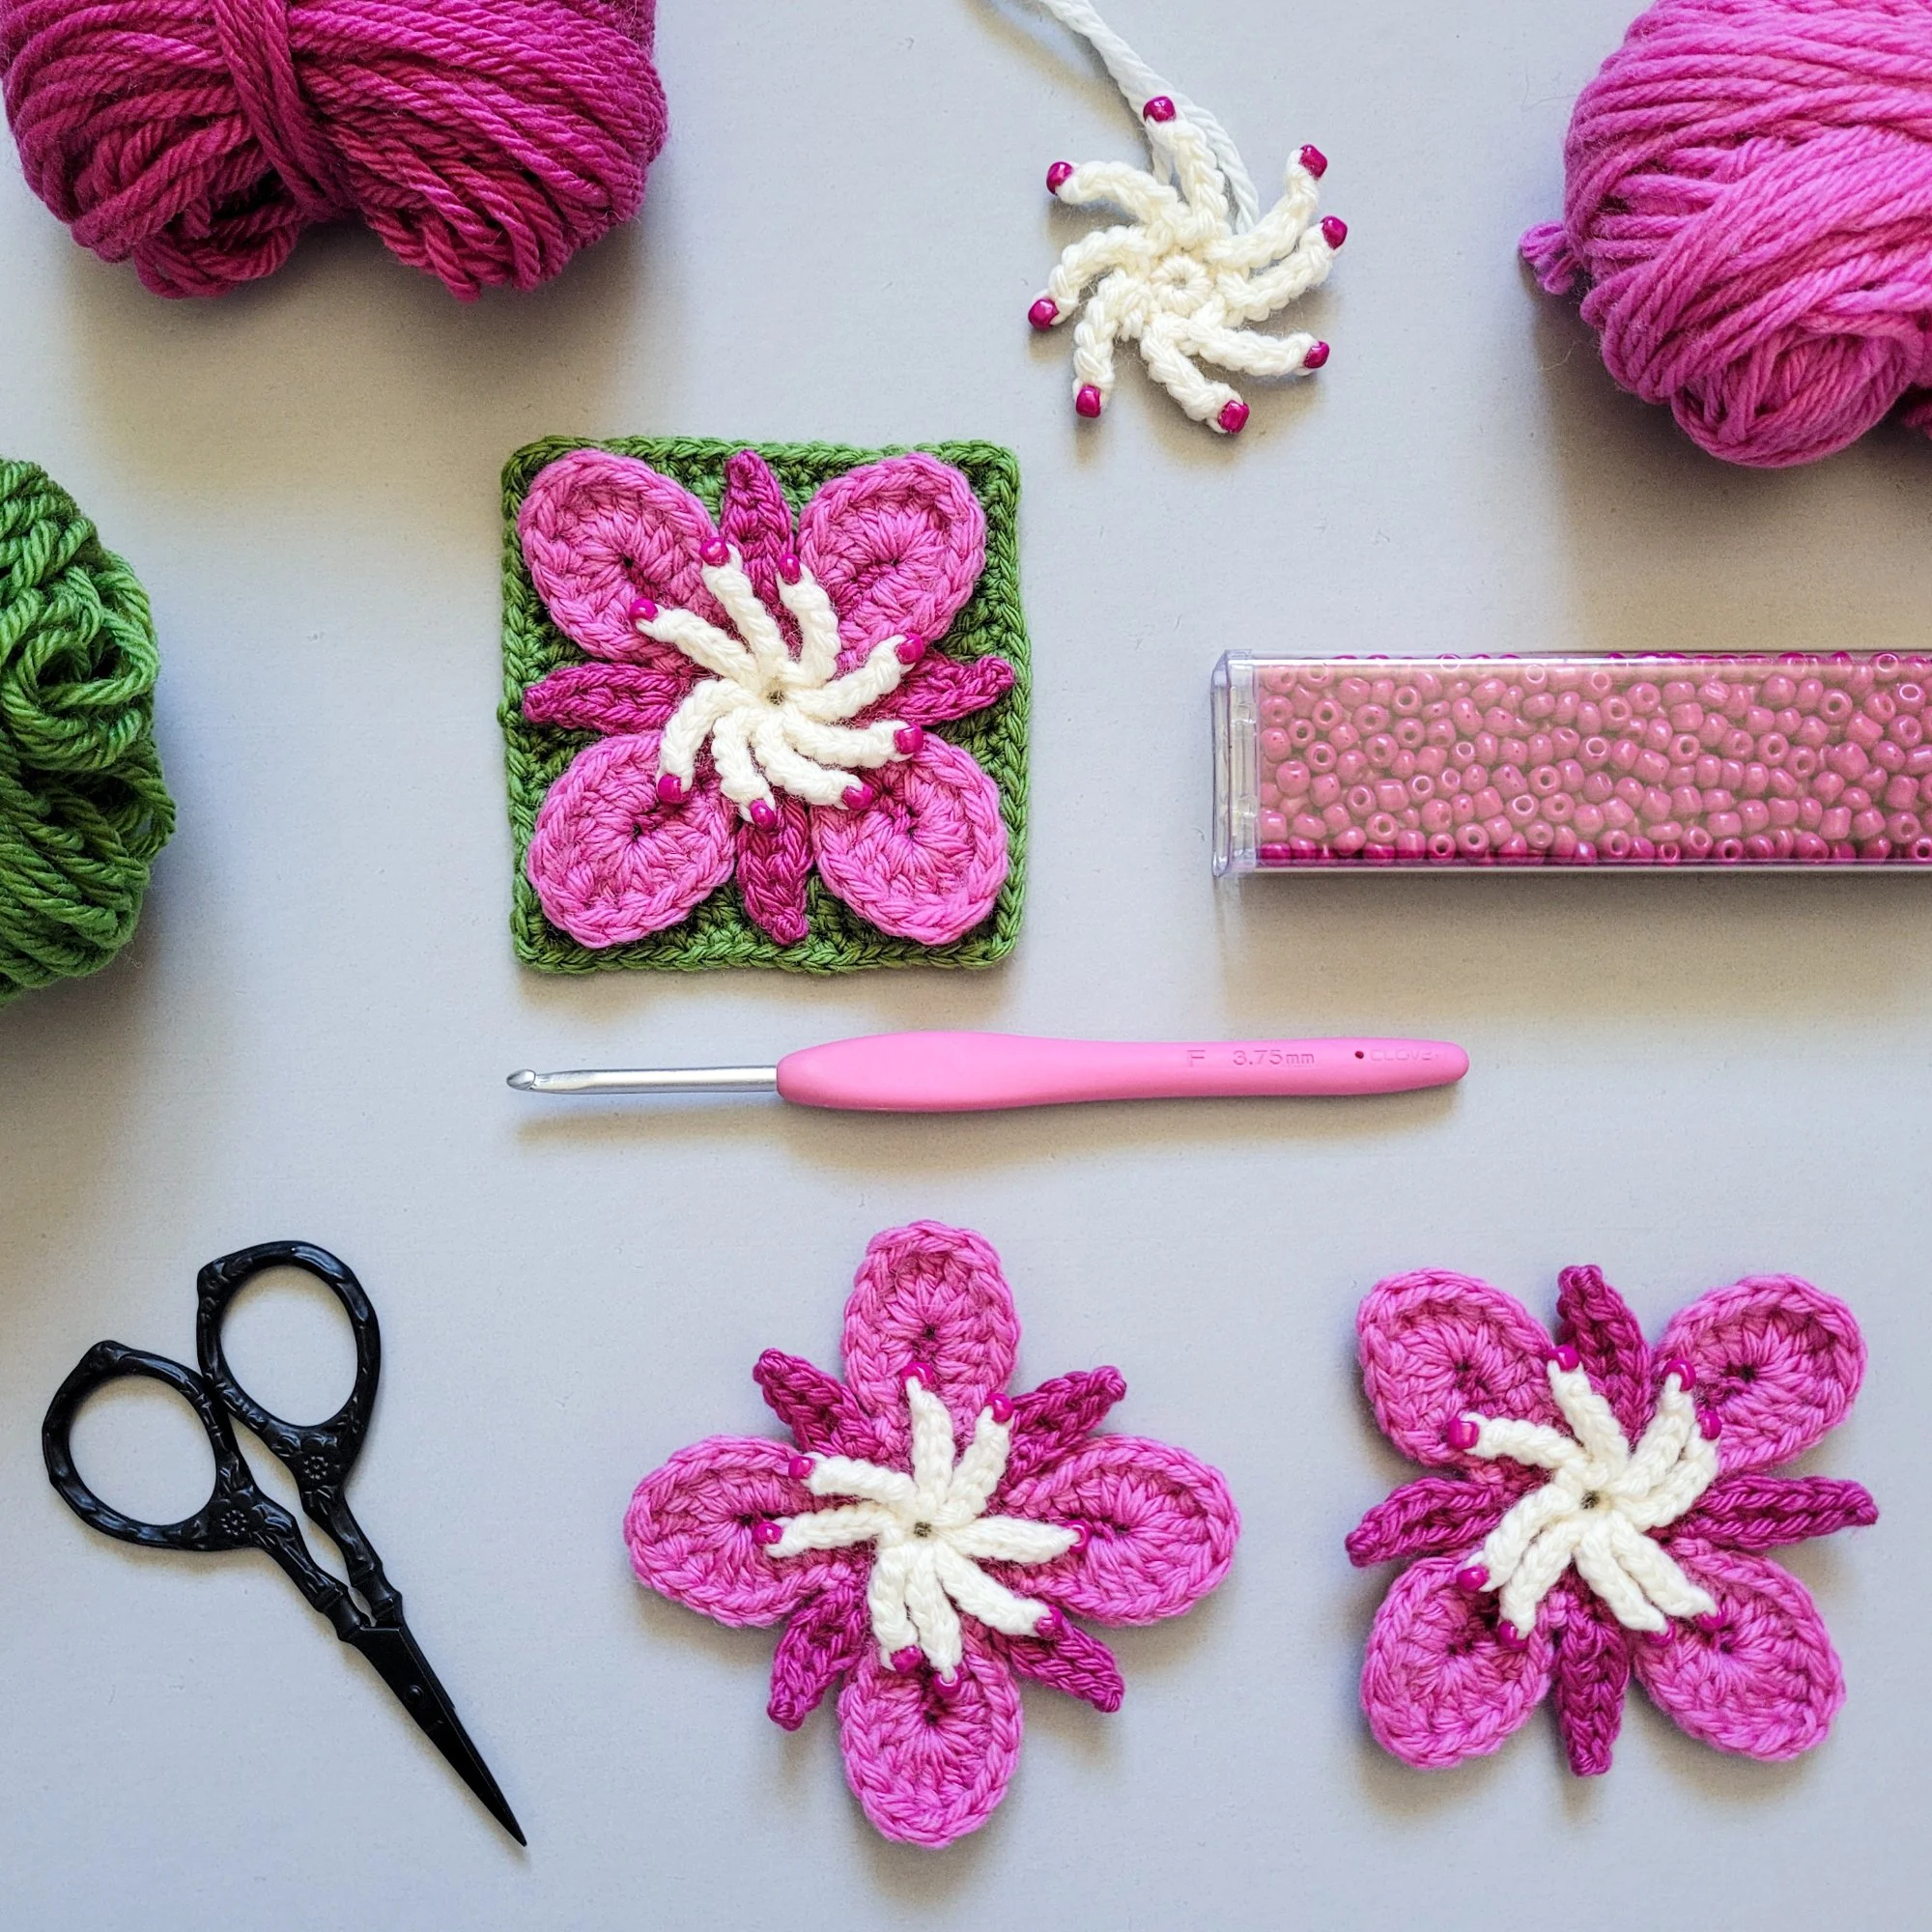
The Fireweed appliqué and motif pattern is back from tech editing, and I’m getting ready to send it out to testers. The response to this design, and to the Wildflower Blanket as a whole, has been so incredibly encouraging. The test hasn’t even started yet, and there’s already so much excitement around this flower.
Before it begins, I’m taking some time to prepare a few extra resources. This is one of the more intricate designs in the collection, so I’ll be creating a short photo tutorial to accompany the pattern, along with a step-by-step video walkthrough.
My goal is simple: I want everyone to enjoy these patterns as much as I have. With the right support in place, I hope each wildflower feels both approachable and satisfying to crochet.
April 7, 2026
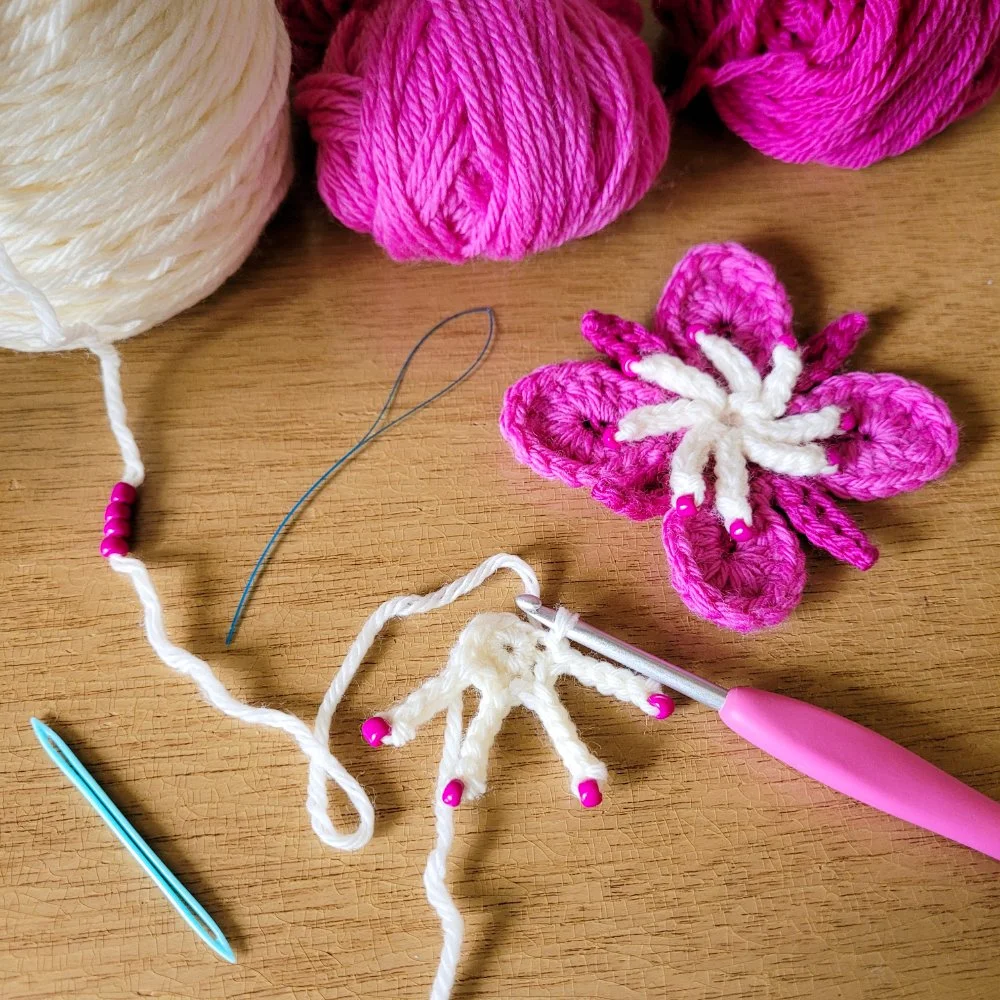
This week, I returned to the Fireweed motif to refine the design and begin translating it into a clear, approachable pattern.
When I first developed this flower design in 2022, my focus was on capturing the overall form. Now, I’m revisiting those decisions with fresh eyes and thinking carefully about how each element can be constructed in a way that’s both accurate and easy to replicate.
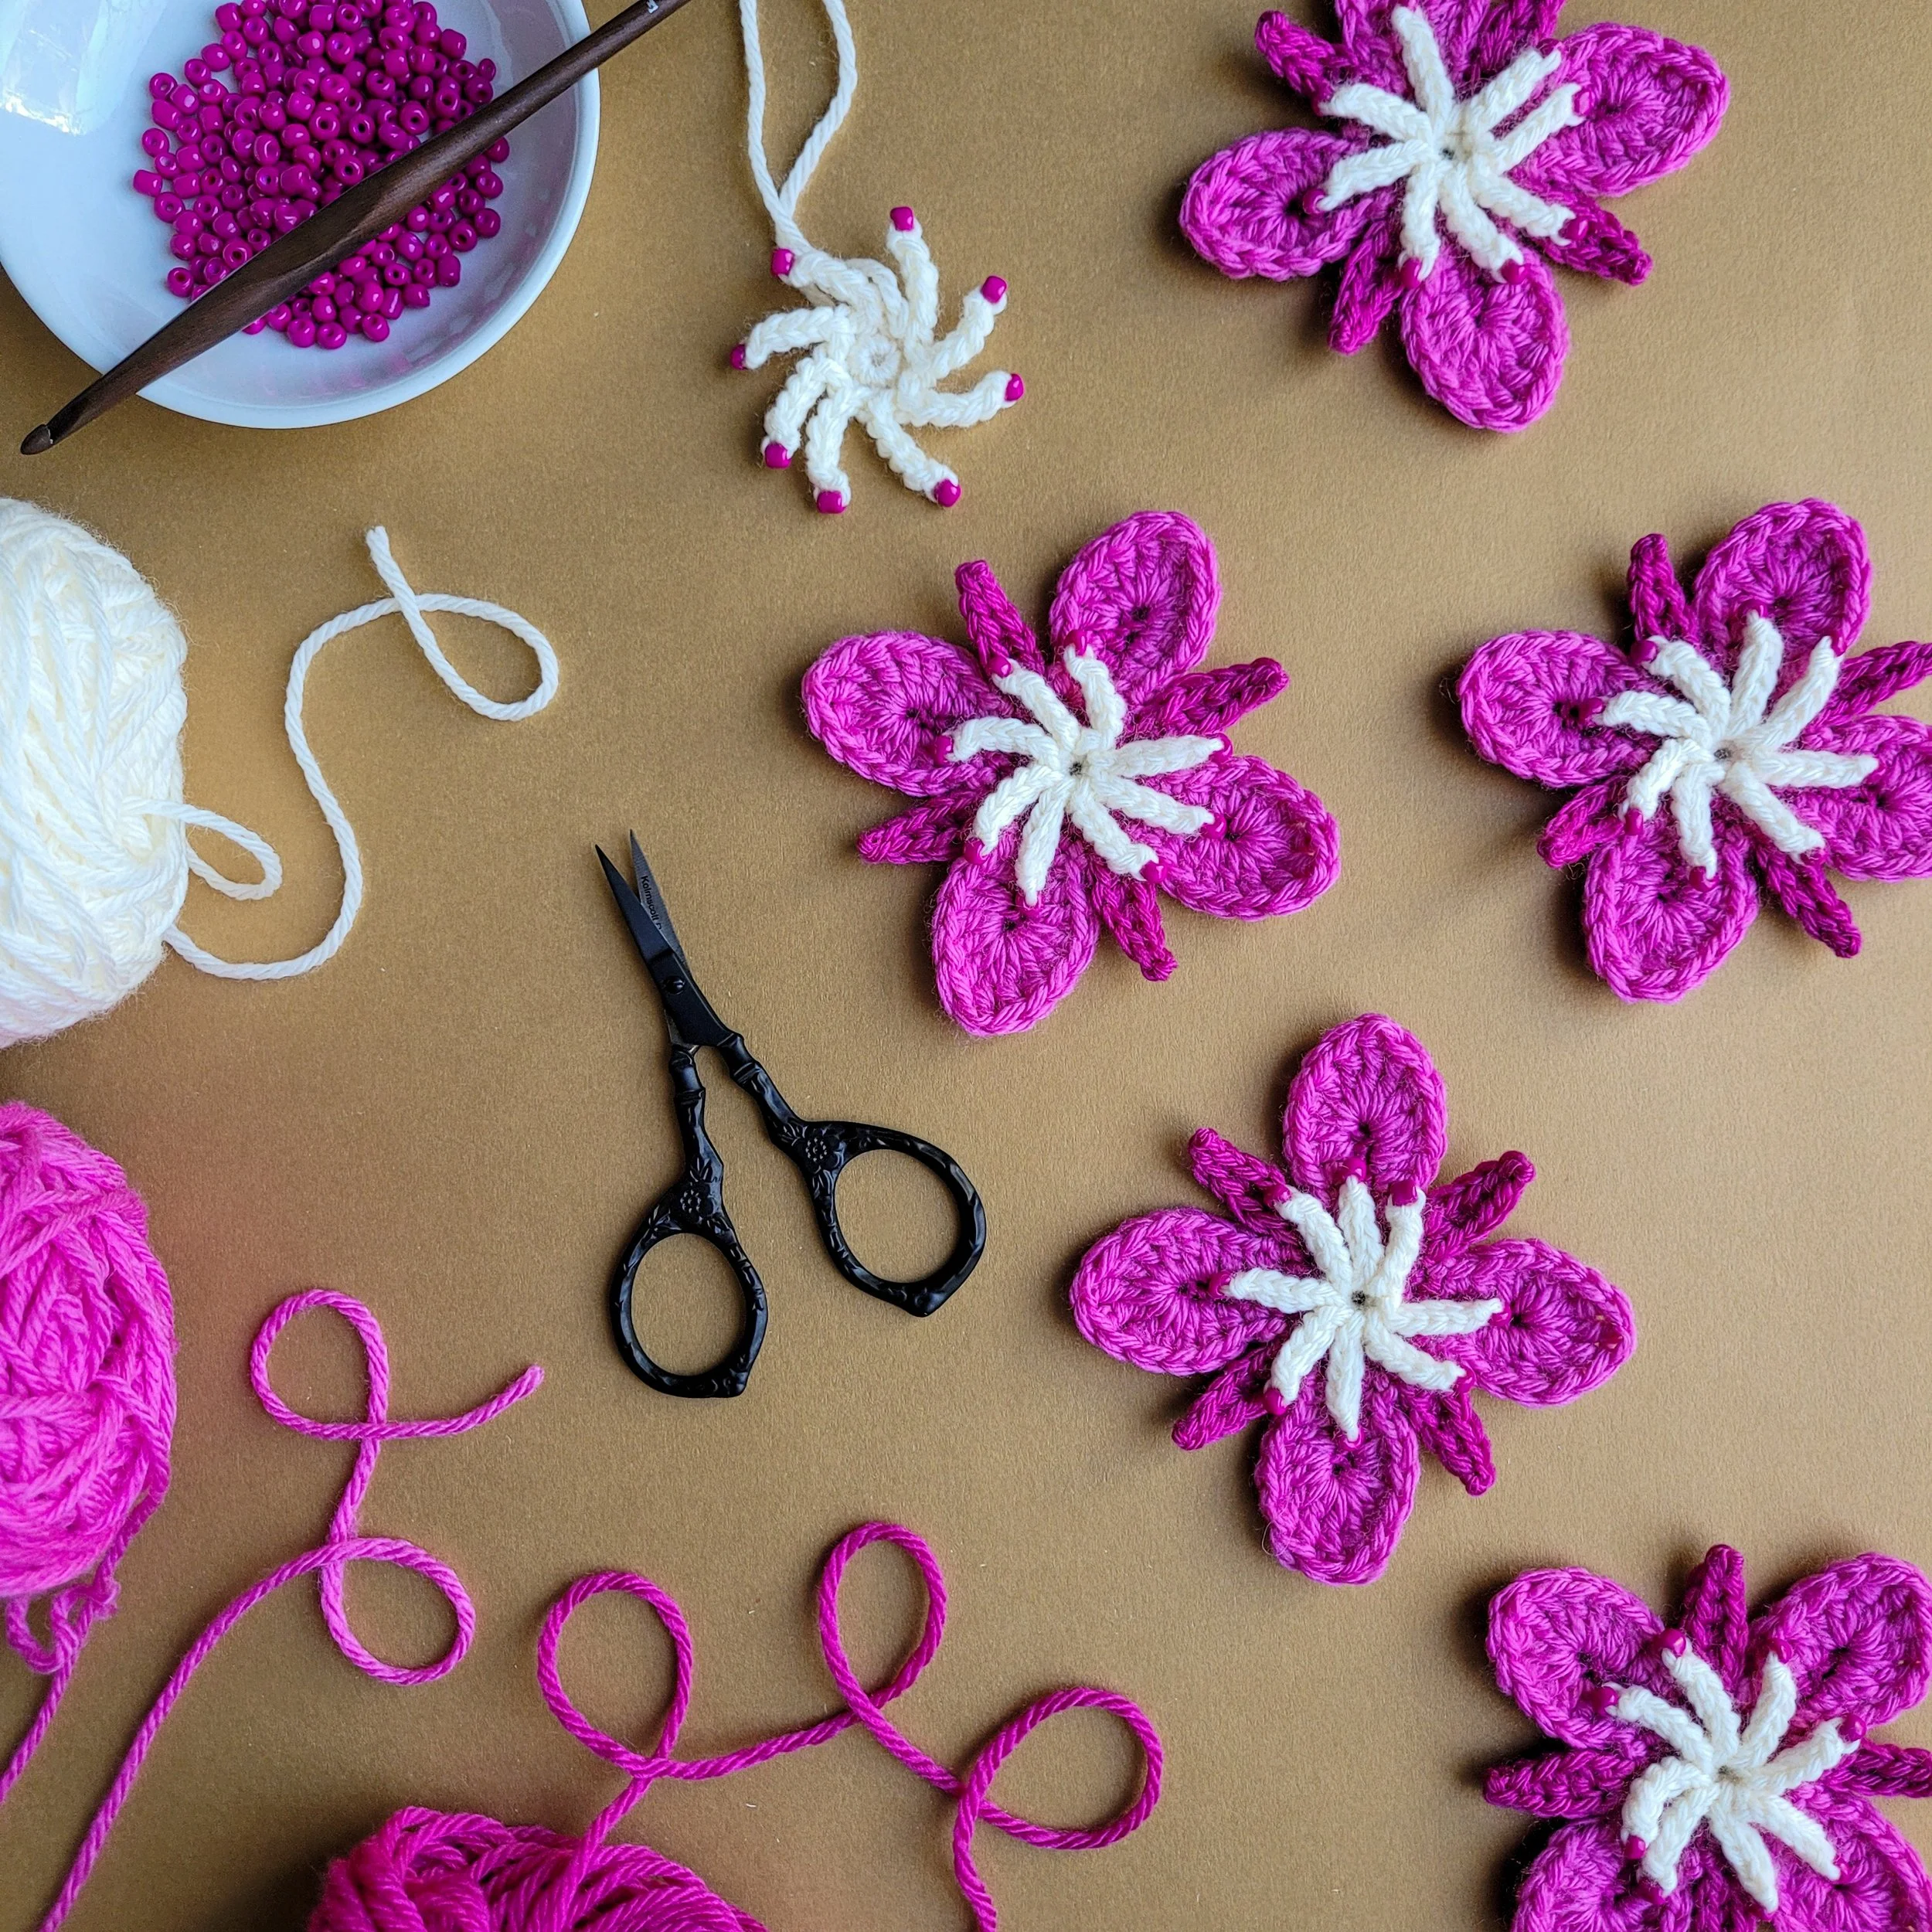
Much of my attention has been on the delicate stamens at the center of the flower. From the start, I wanted to reflect their long, arching shape and vivid anthers, which led me to experiment with incorporating seed beads directly into the stitches.
Each filament is formed with a long chain, finished with a bead at the end to represent the anther. Rather than adding beads afterward, I thread them onto the yarn in advance and work them into place as I crochet. This keeps the structure clean and allows the beads to sit naturally at the ends of the chains. It’s a slower, more deliberate process, but one that adds a level of dimension and realism I wasn’t able to achieve with yarn alone.
February 26, 2026
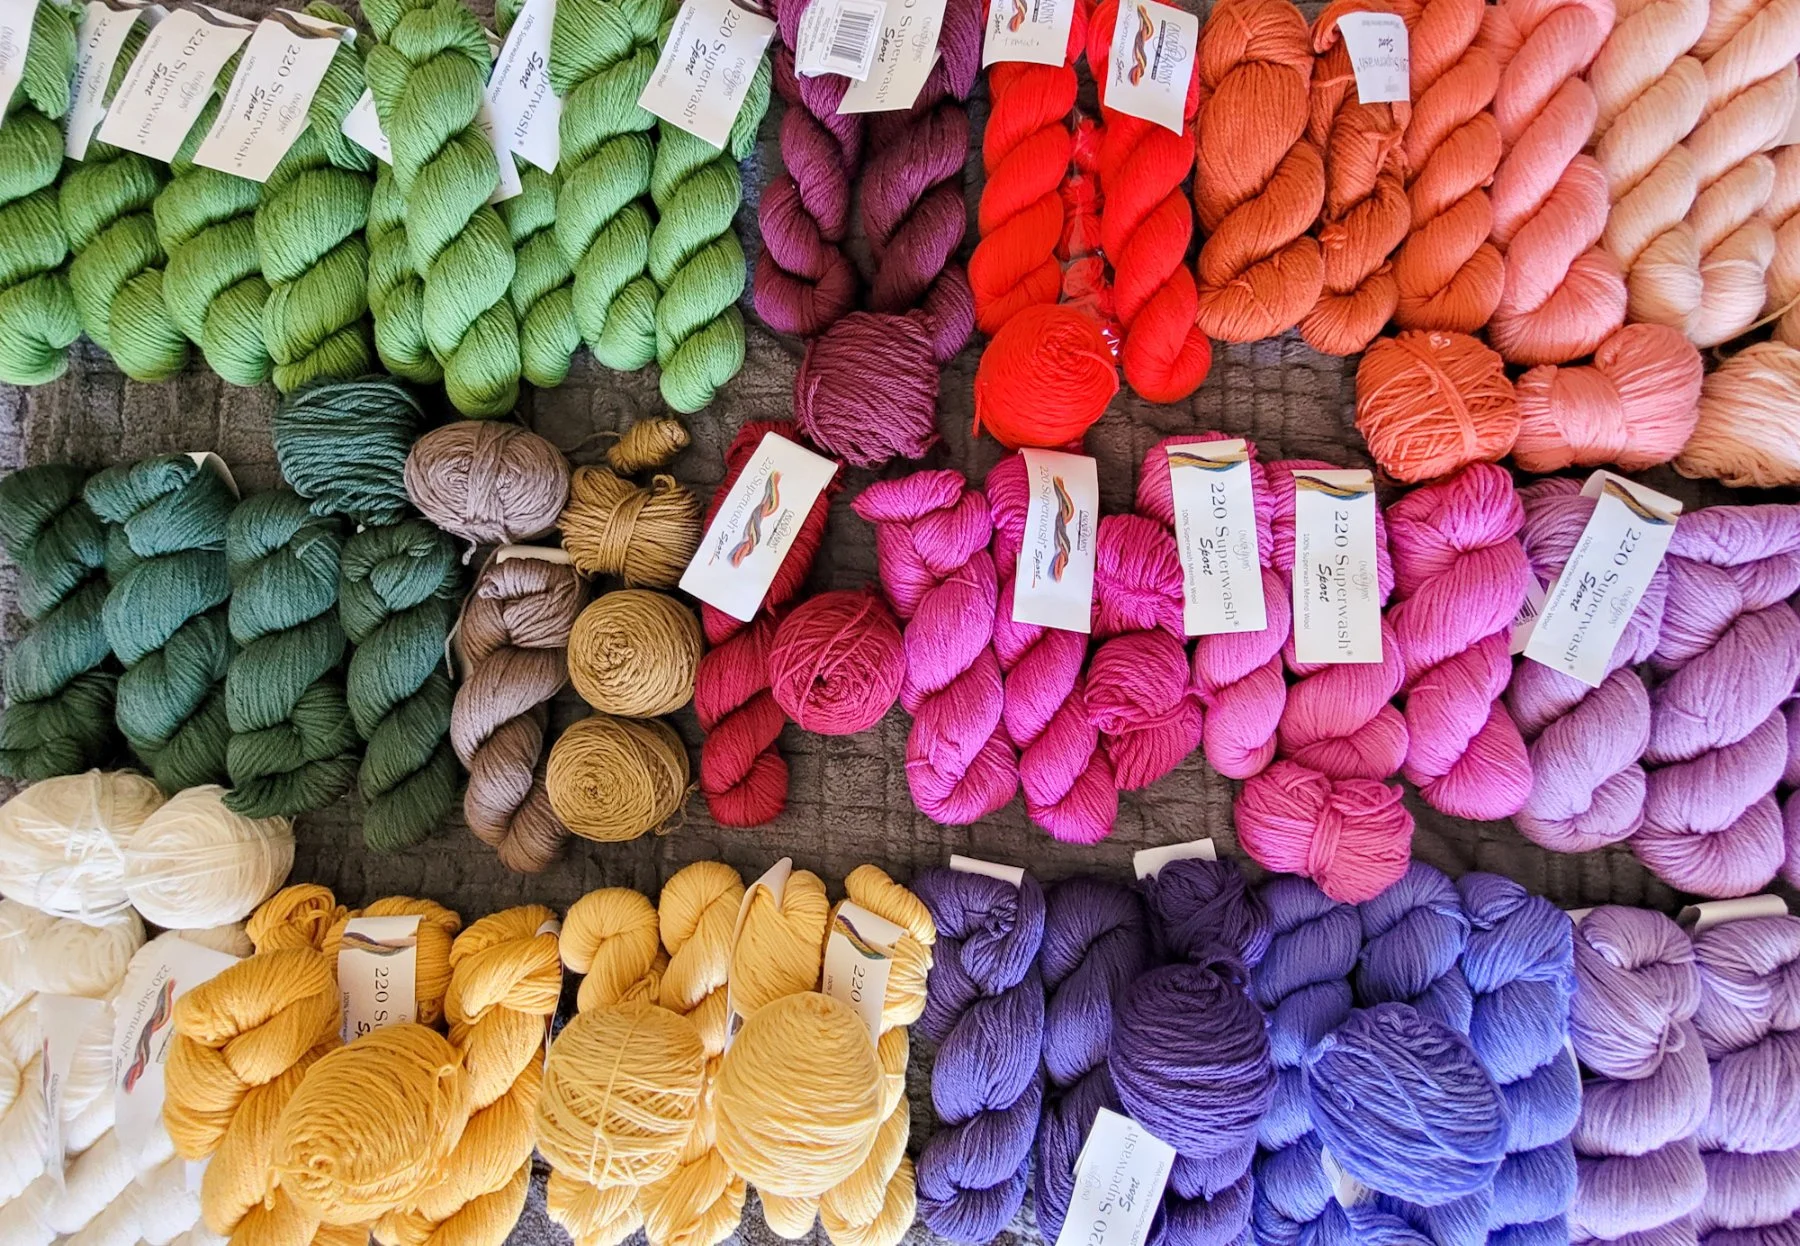
This month I finalized the color palette for the Wildflower Project. From the beginning, botanical realism has been my goal, so choosing yarn mattered deeply. I selected Cascade 220 Superwash Sport early in the process for two reasons: the 50 g put-up (ideal for small motif yardage) and the expansive color range.
Cascade generously provided a full color card, which helped me study undertones and narrow possibilities. Even so, many decisions weren’t clear until I saw how they worked together in the actual flowers.
After lots of trial and error, I refined the palette to 20 colors. The result feels balanced, nuanced, and true to the wide spectrum of Rocky Mountain wildflowers.
February 5, 2026
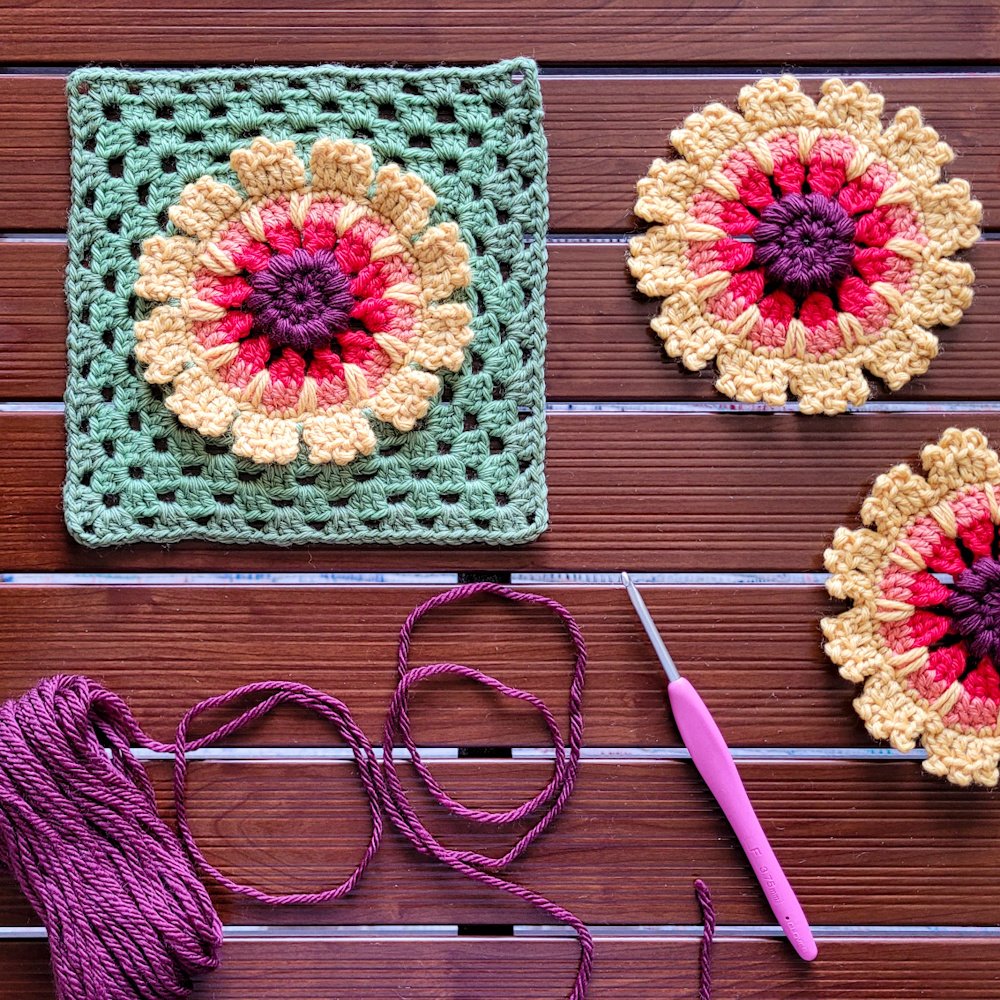
And so it has finally — and officially — begun. Today I opened the call for testers for the first wildflower crochet pattern in this series: the Blanket Flower.
This design holds a special place for me. The Blanket Flower was the very first flower I designed back in February 2022 (scroll down to see the original entry!). Returning to it now, I’ve revisited the pattern with fresh eyes, refining the instructions to make them more user-friendly and expanding the design so that, with just a few rounds of granny stitch, the applique can also be turned into a motif.
It feels fitting that this project begins where the idea first took root, with a flower known for its resilience, long bloom, and ability to thrive in difficult conditions. In many ways, it feels like a quiet marker of how far this work (and I) have come since that first stitch.
January 15, 2026
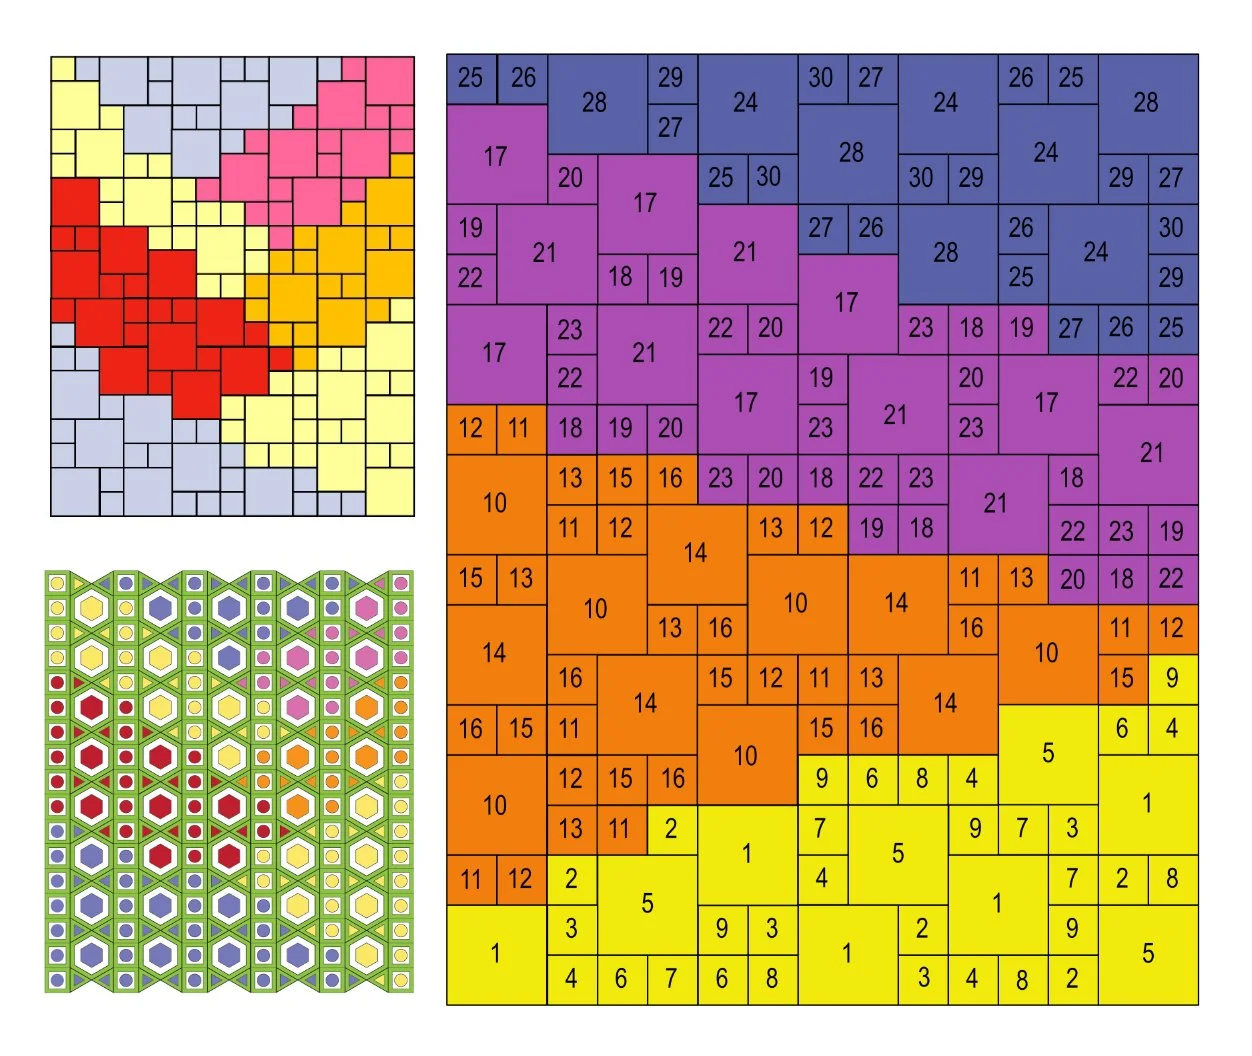
Over the past year, I’ve spent a lot of time experimenting with the overall layout for this blanket. Early versions leaned toward more complex arrangements, and while they were interesting on paper, they began to feel heavier than the project needed to be.
Recently, I stepped back and simplified the layout significantly. The current design is built around square motifs in two sizes, which feels like a much better match for the wildflower theme. The variation in scale adds visual interest and should help the finished blanket read more like a field of flowers than a strict grid, while keeping the construction approachable and flexible.
In the image, two previous layouts appear on the left, and the current layout is on the right. This pared-back approach feels like the right foundation moving forward — one that leaves room for the wildflowers themselves to shine.
May 19, 2024
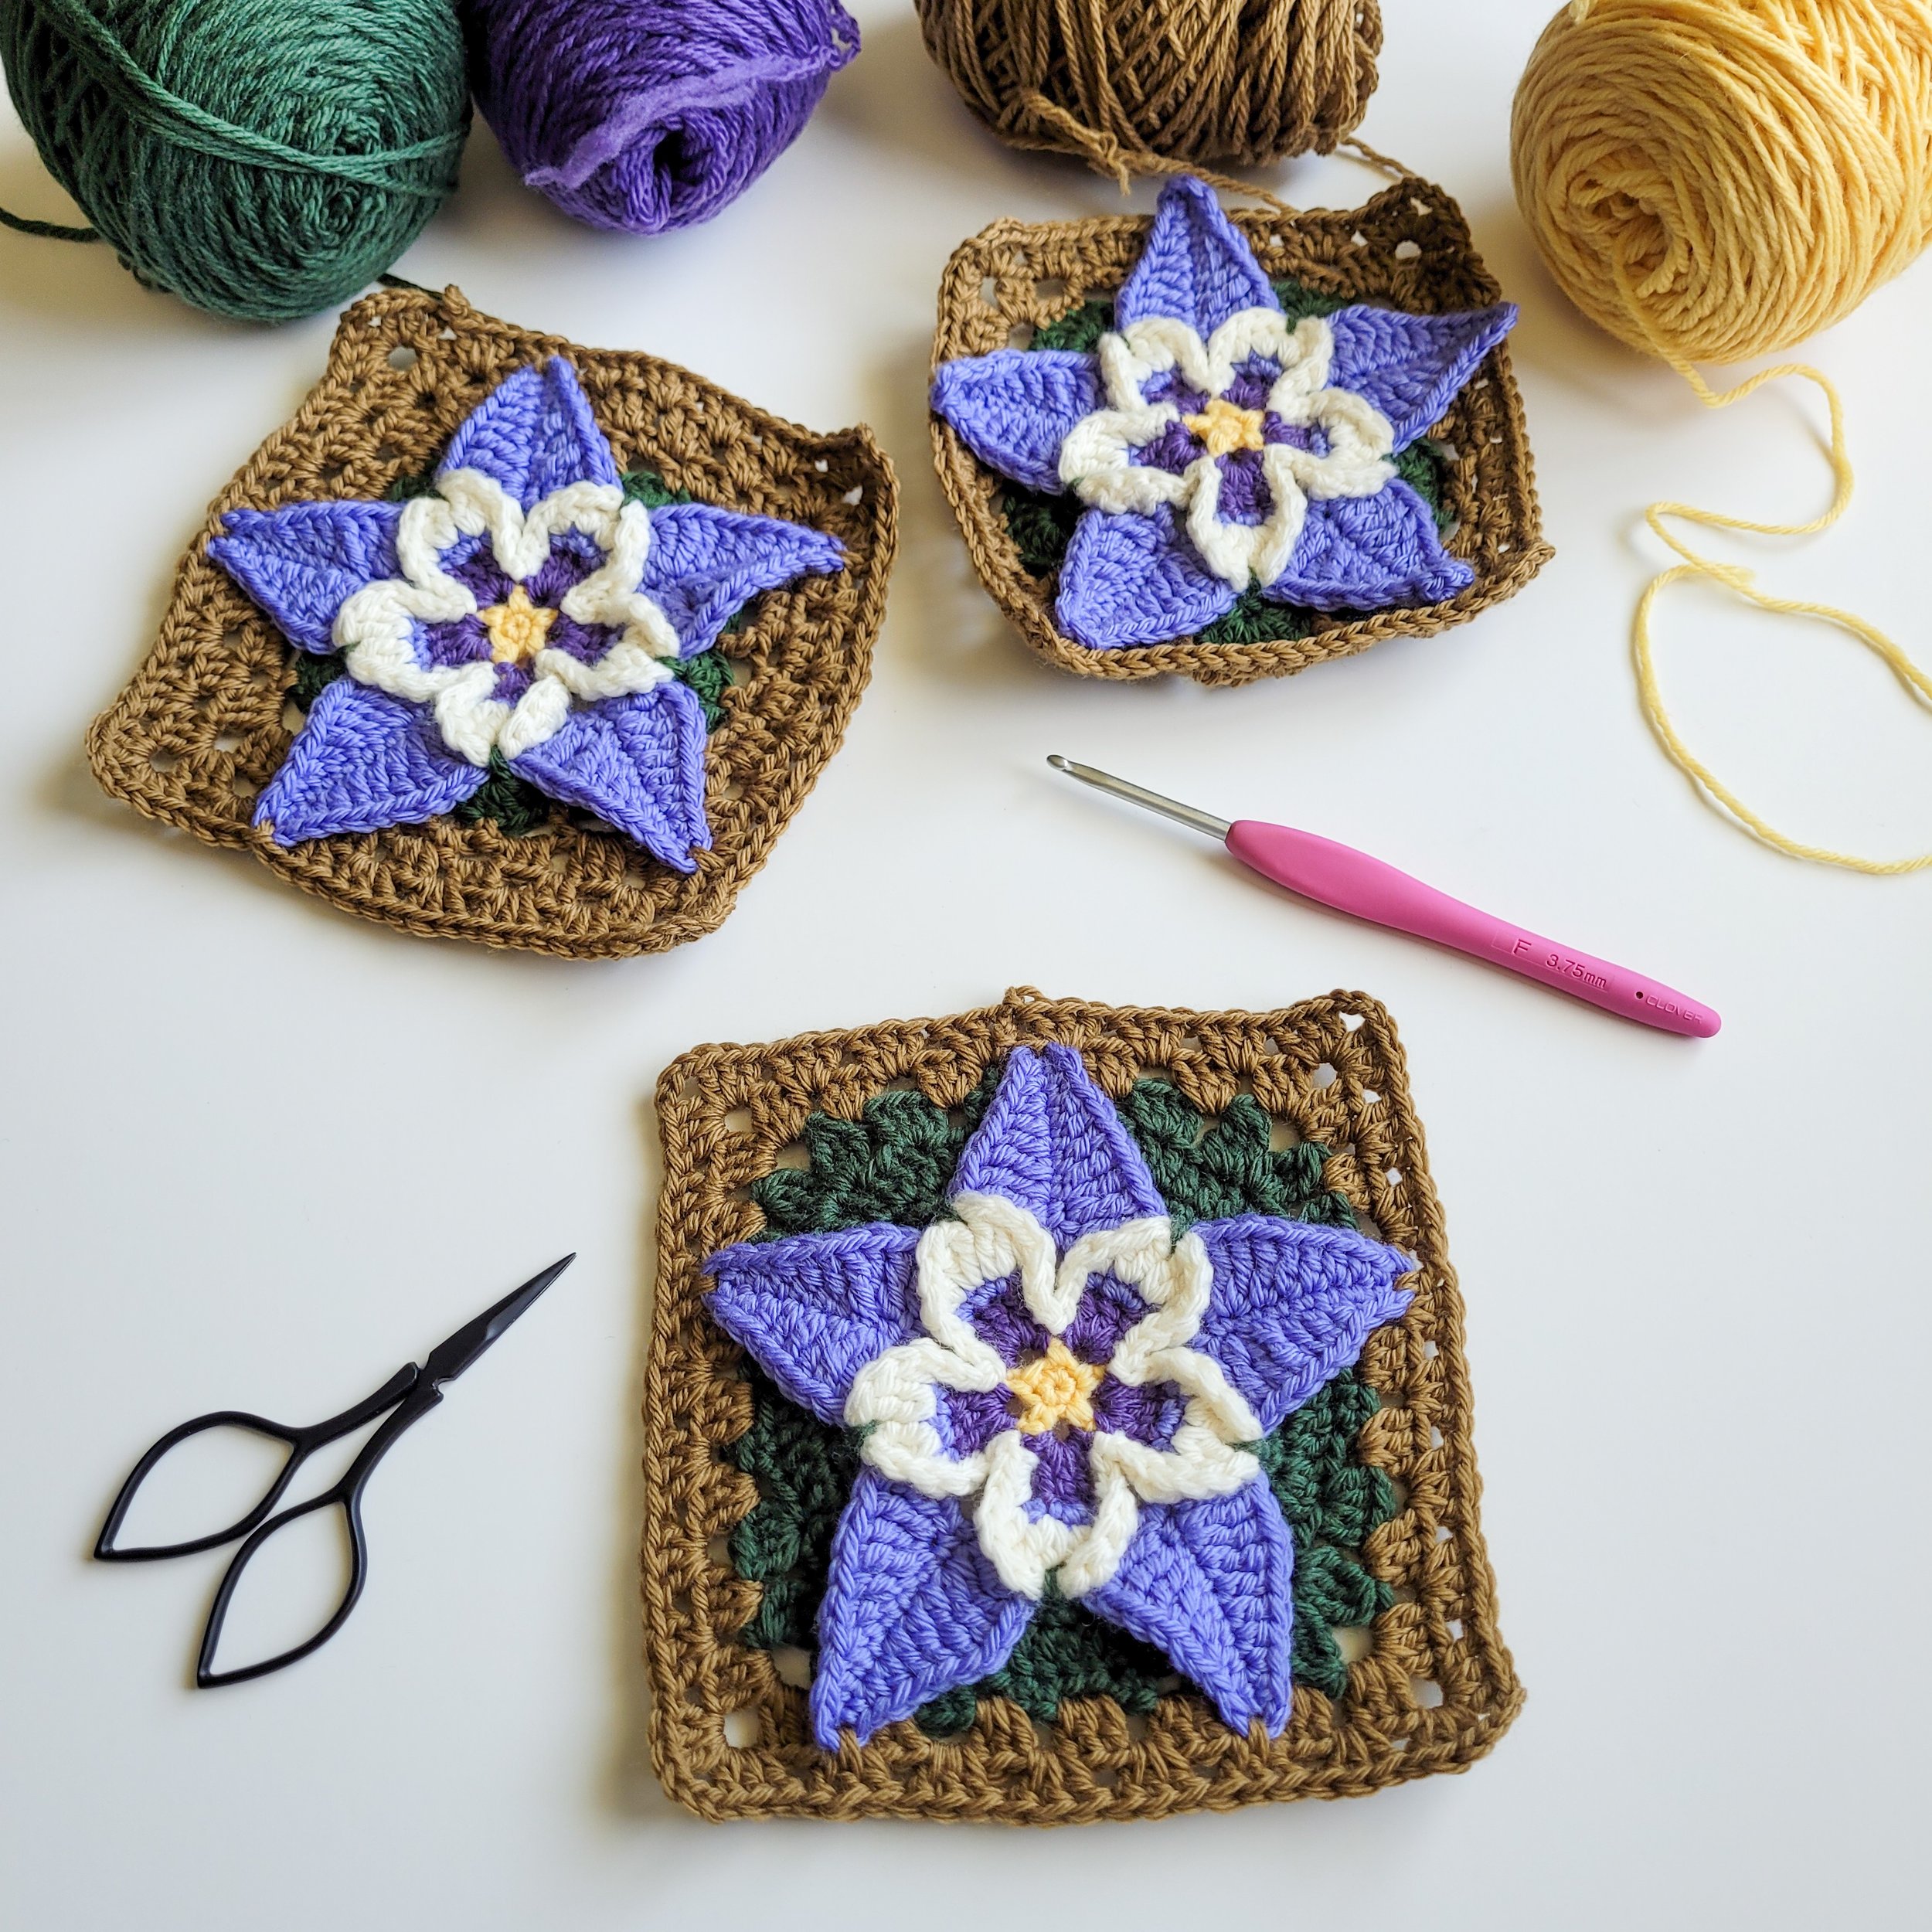
It’s been several years since I started designing these crochet wildflowers. Originally, my plan was to crochet the flowers and sew them onto a granny square blanket. The original blanket, with all of its sewn on appliques, was never meant to be a pattern. I just thought it would be something fun to try. But now, looking at all the wildflowers I designed, it would be a shame not to share them with you! And so, I’ve decided to redesign the flowers as square motifs so that they can be joined as you go. There will be at least 20 different flower motifs, including columbine, mariposa lily, blanketflower, fireweed, and paintbrush. I started by redesigning the columbine flower to make it into a square.
August 12, 2022
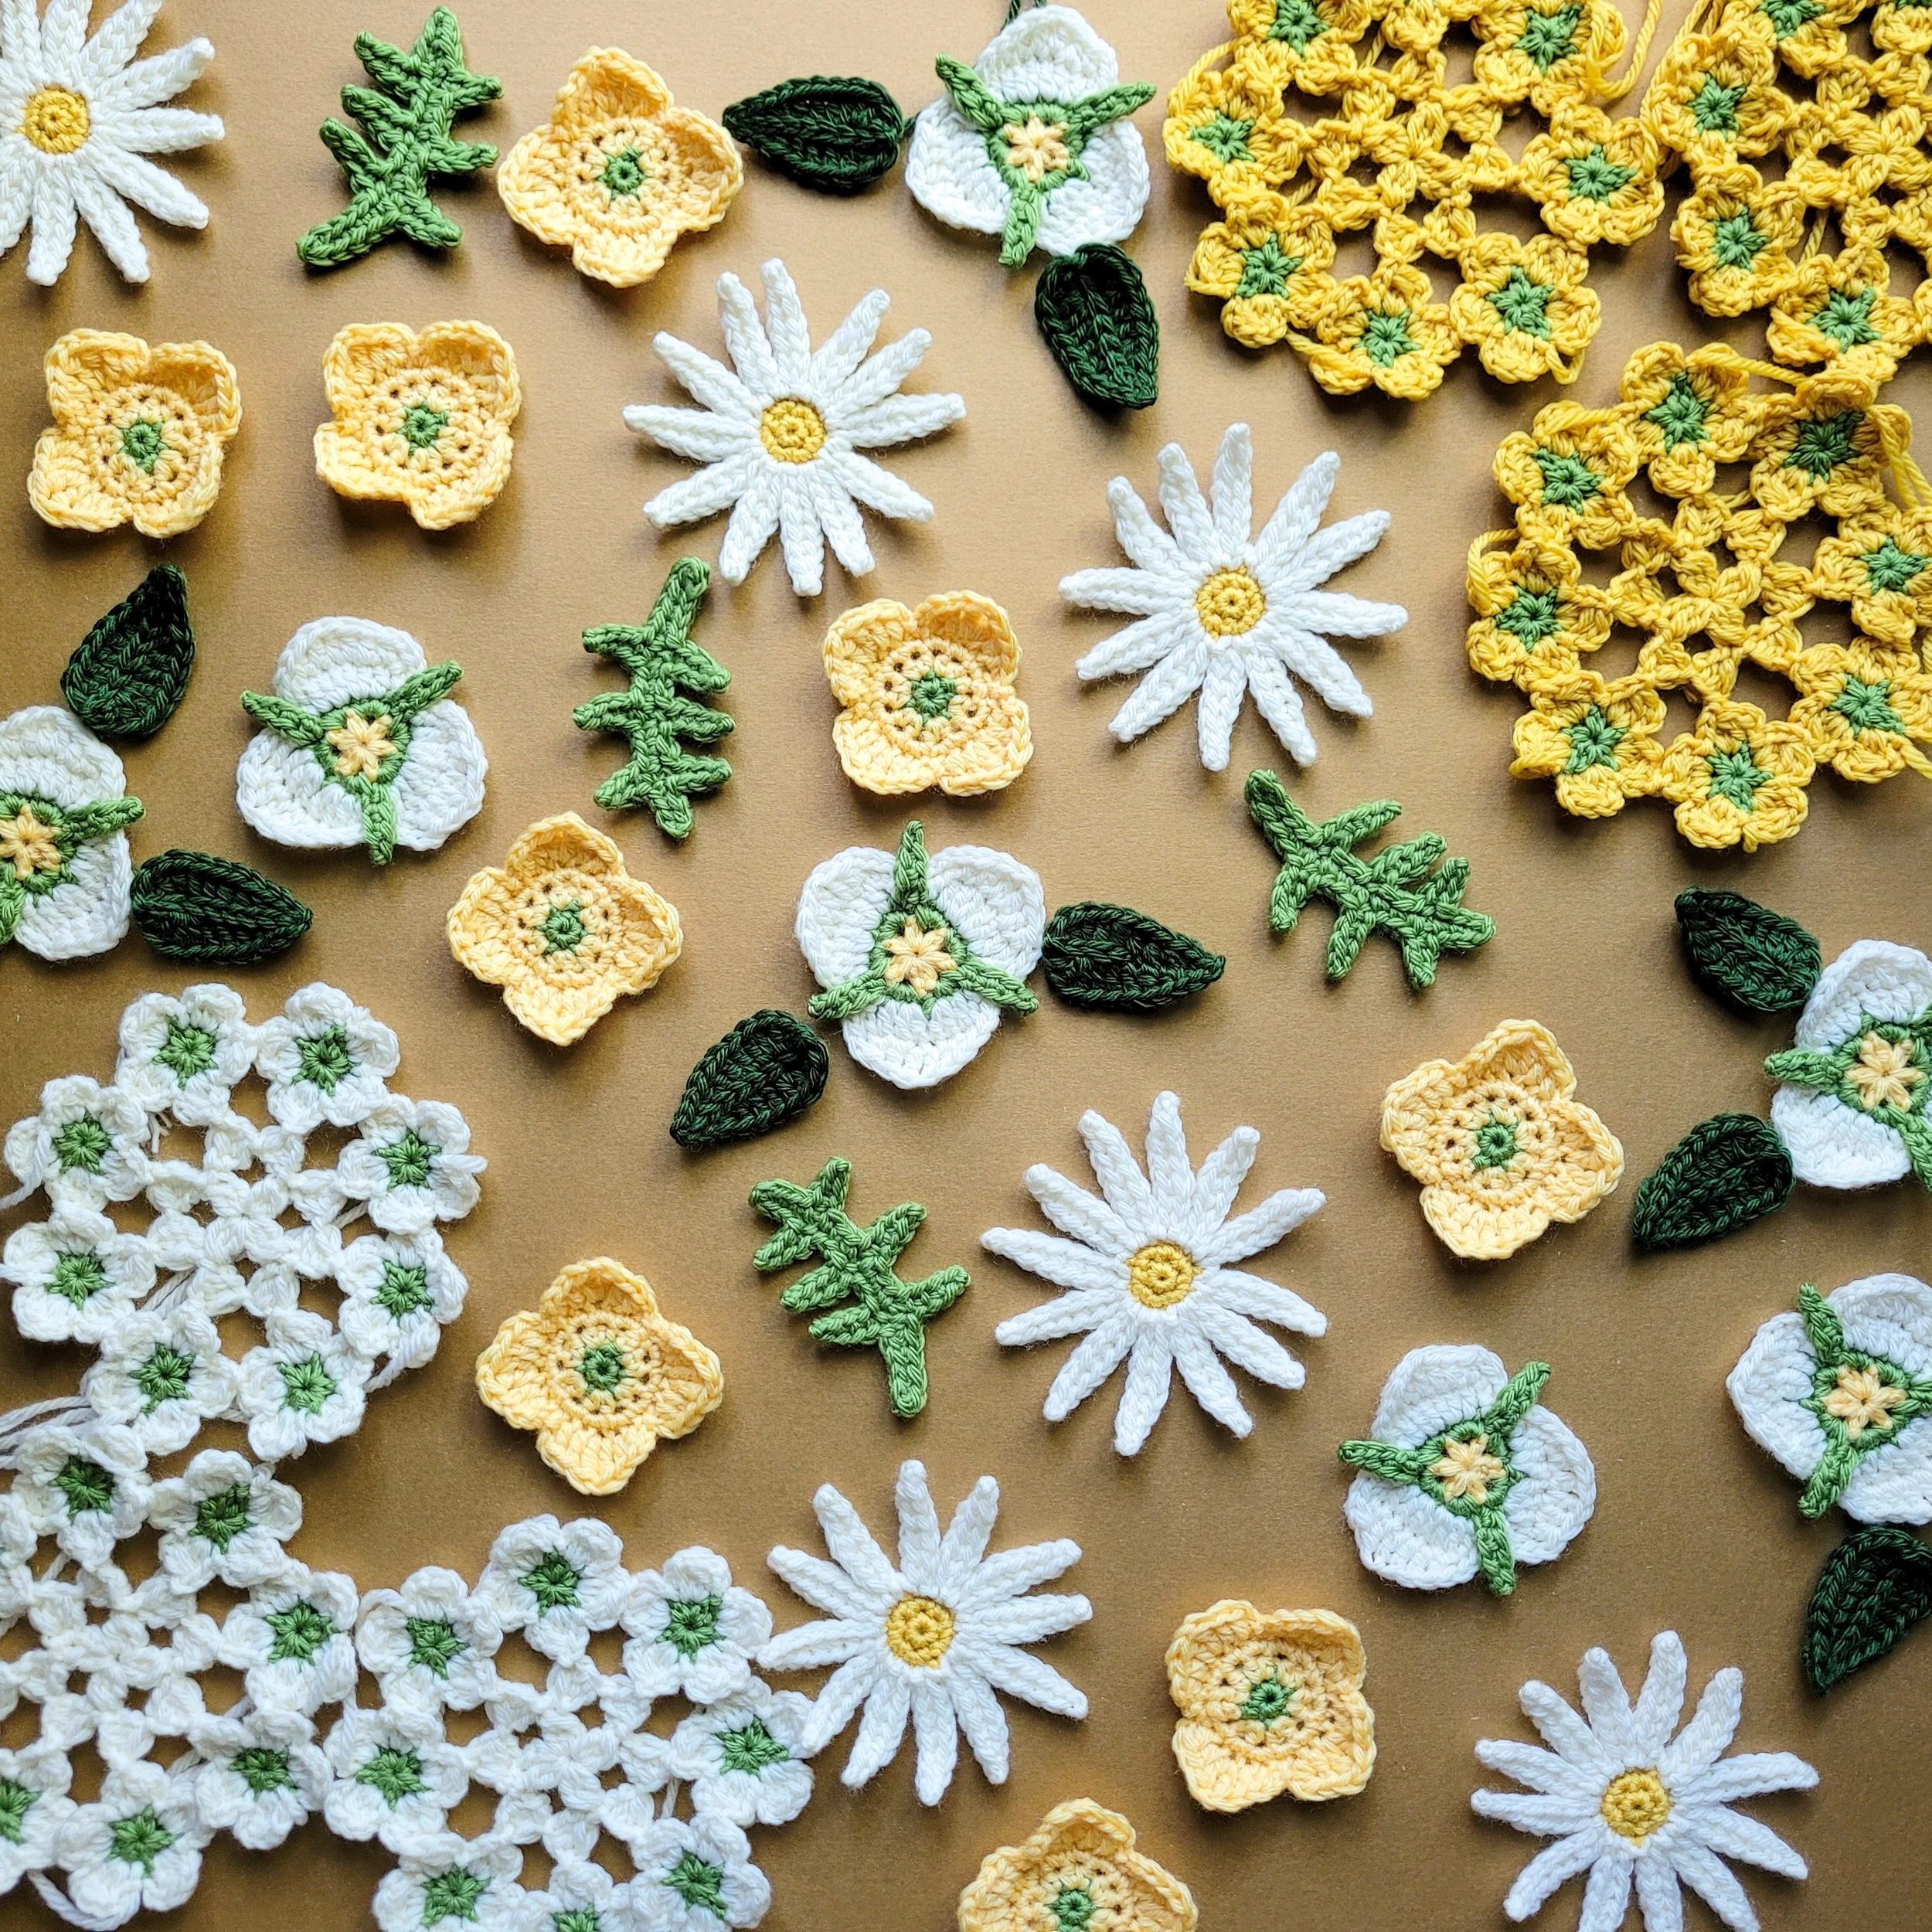
I’ve been busy! I can hardly believe that I crocheted all these flowers for the first yellow section in the last week. I guess it helps that I only needed to design one new flower and I could reuse flower patterns from the first blue section. The newest flowers the mariposa lilies, which are the three-petaled flowers in the picture. I’m loving these colors. Aren’t they cheerful? The next step is turning some of these into granny squares and then working them into the blanket.
I'm predicting that each section will take about a month, so hopefully I'll have the blanket finished by the end of the year. I’m also starting to consider whether or not I should publish this pattern. I’ve been writing down the instructions all along, so it wouldn’t be that hard. I’m just worried that it might end up being a very long pattern.
July 22, 2022
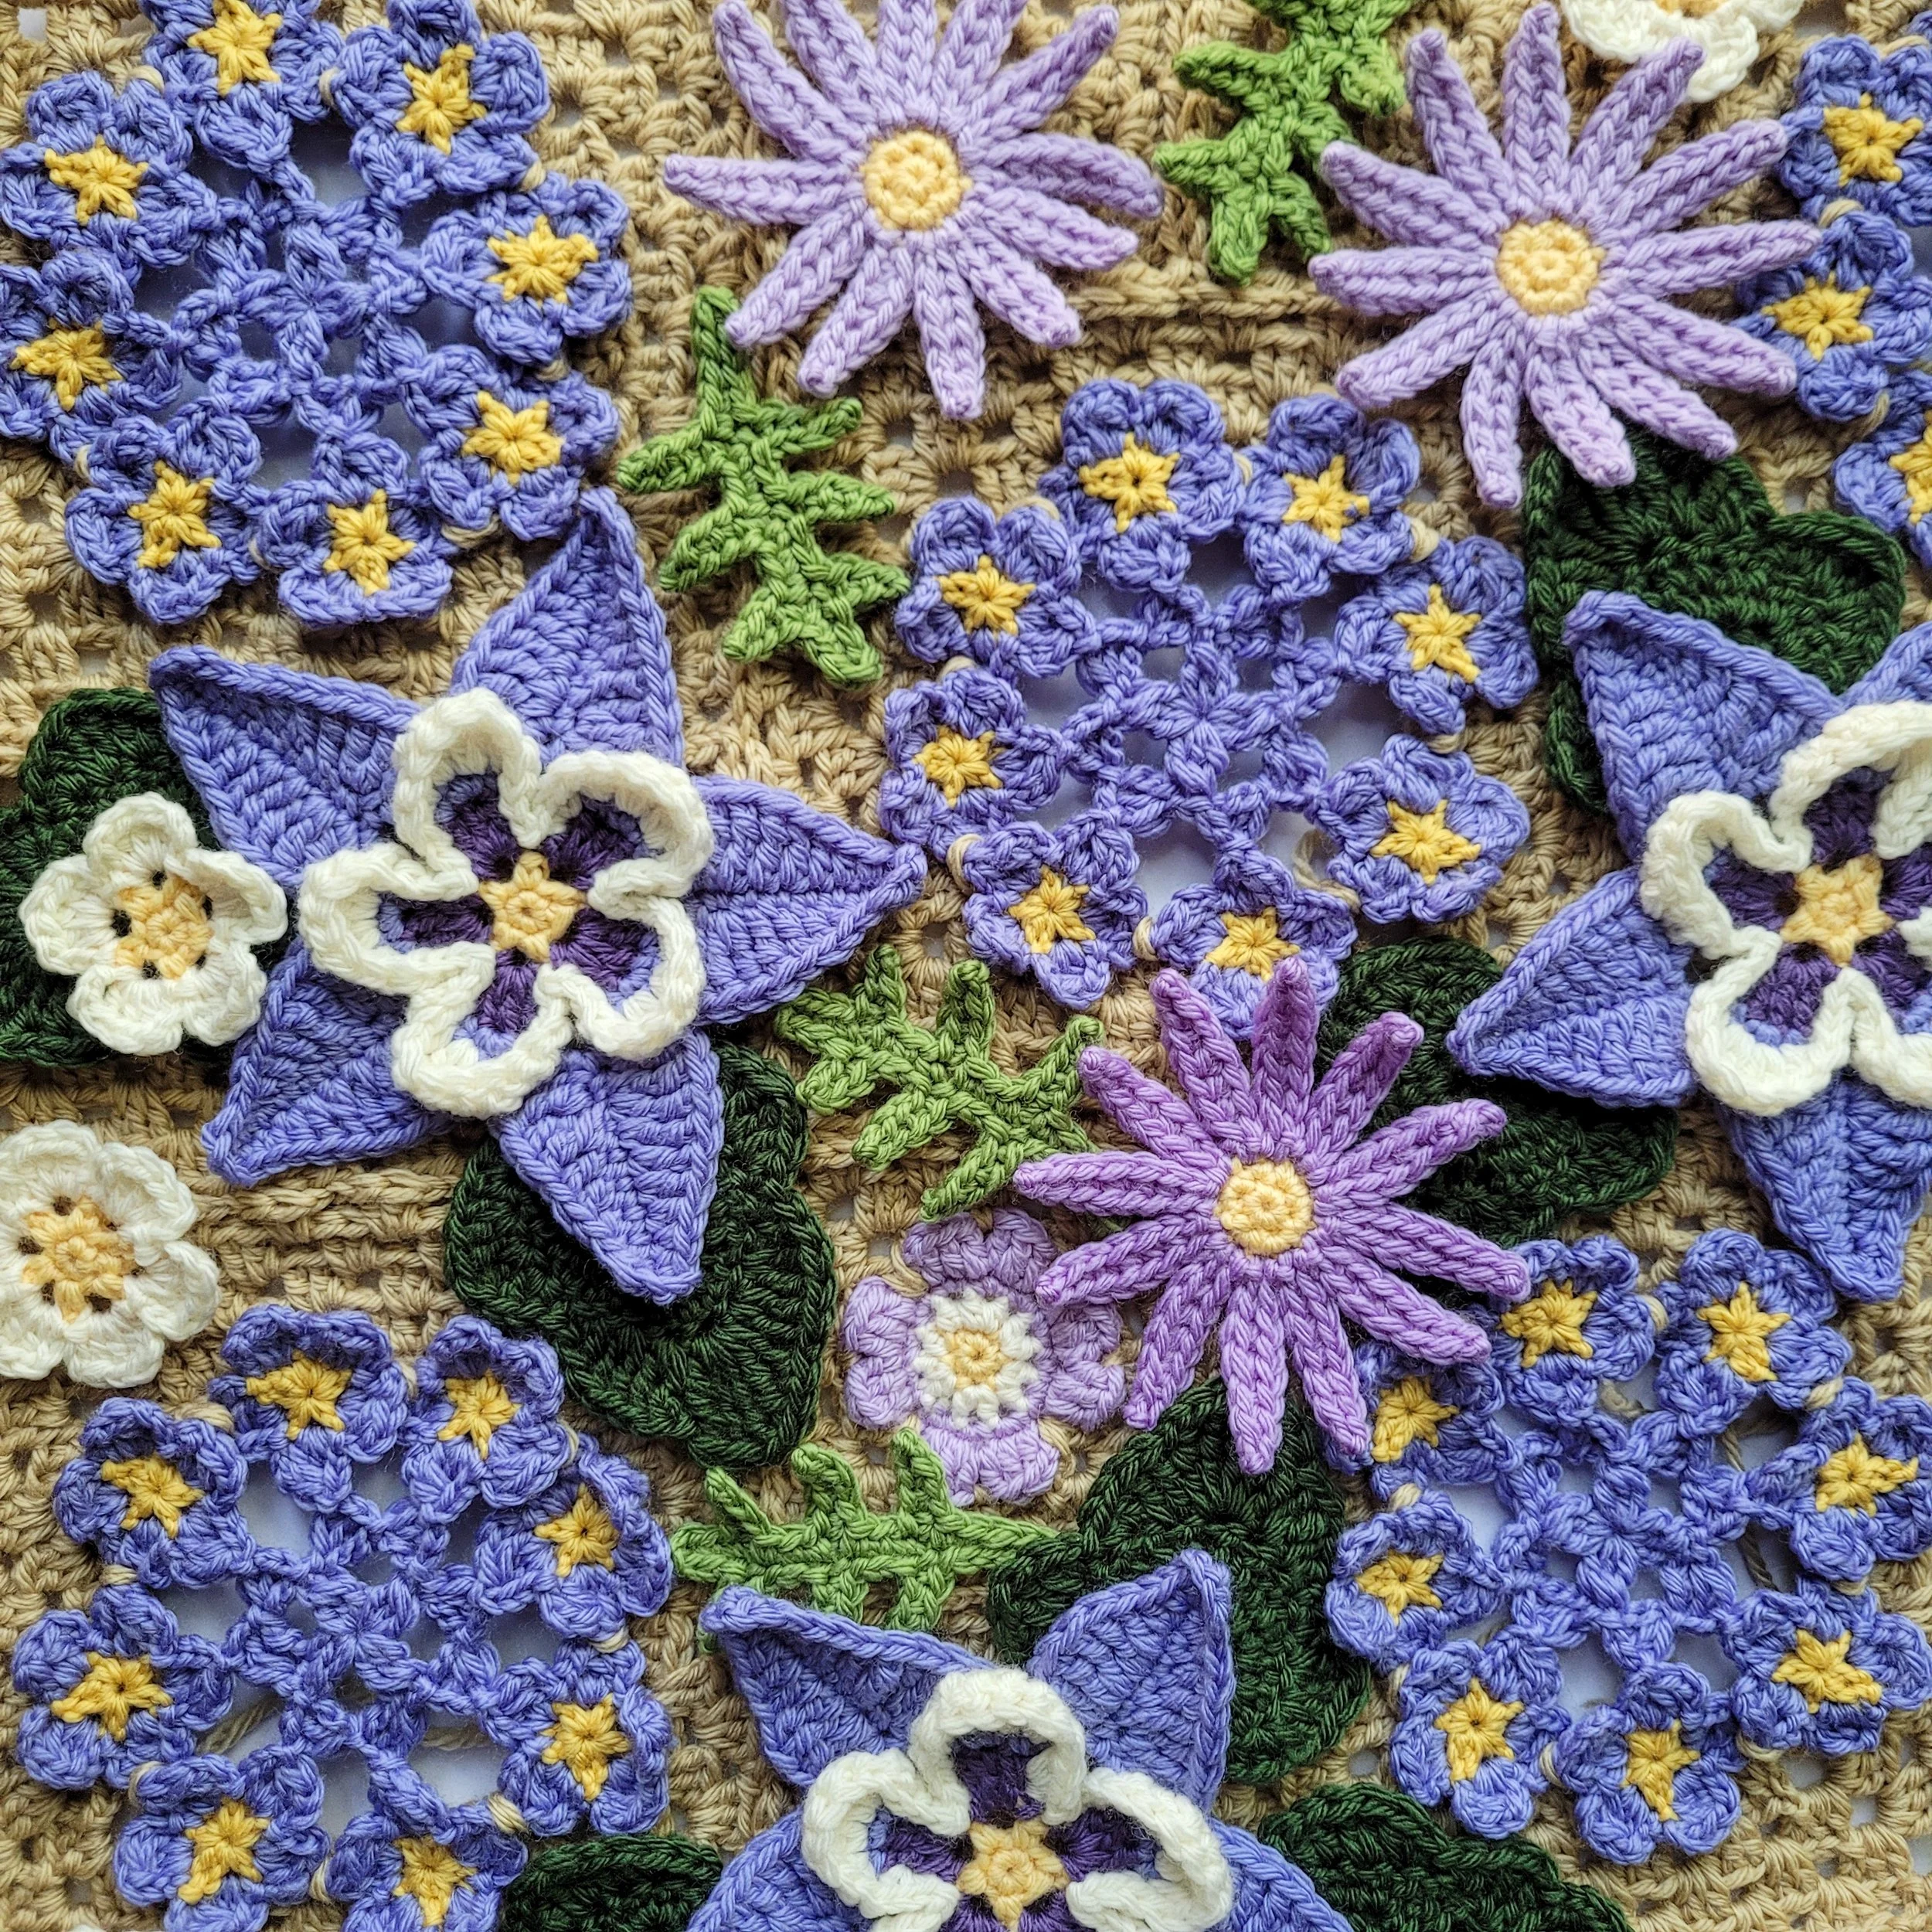
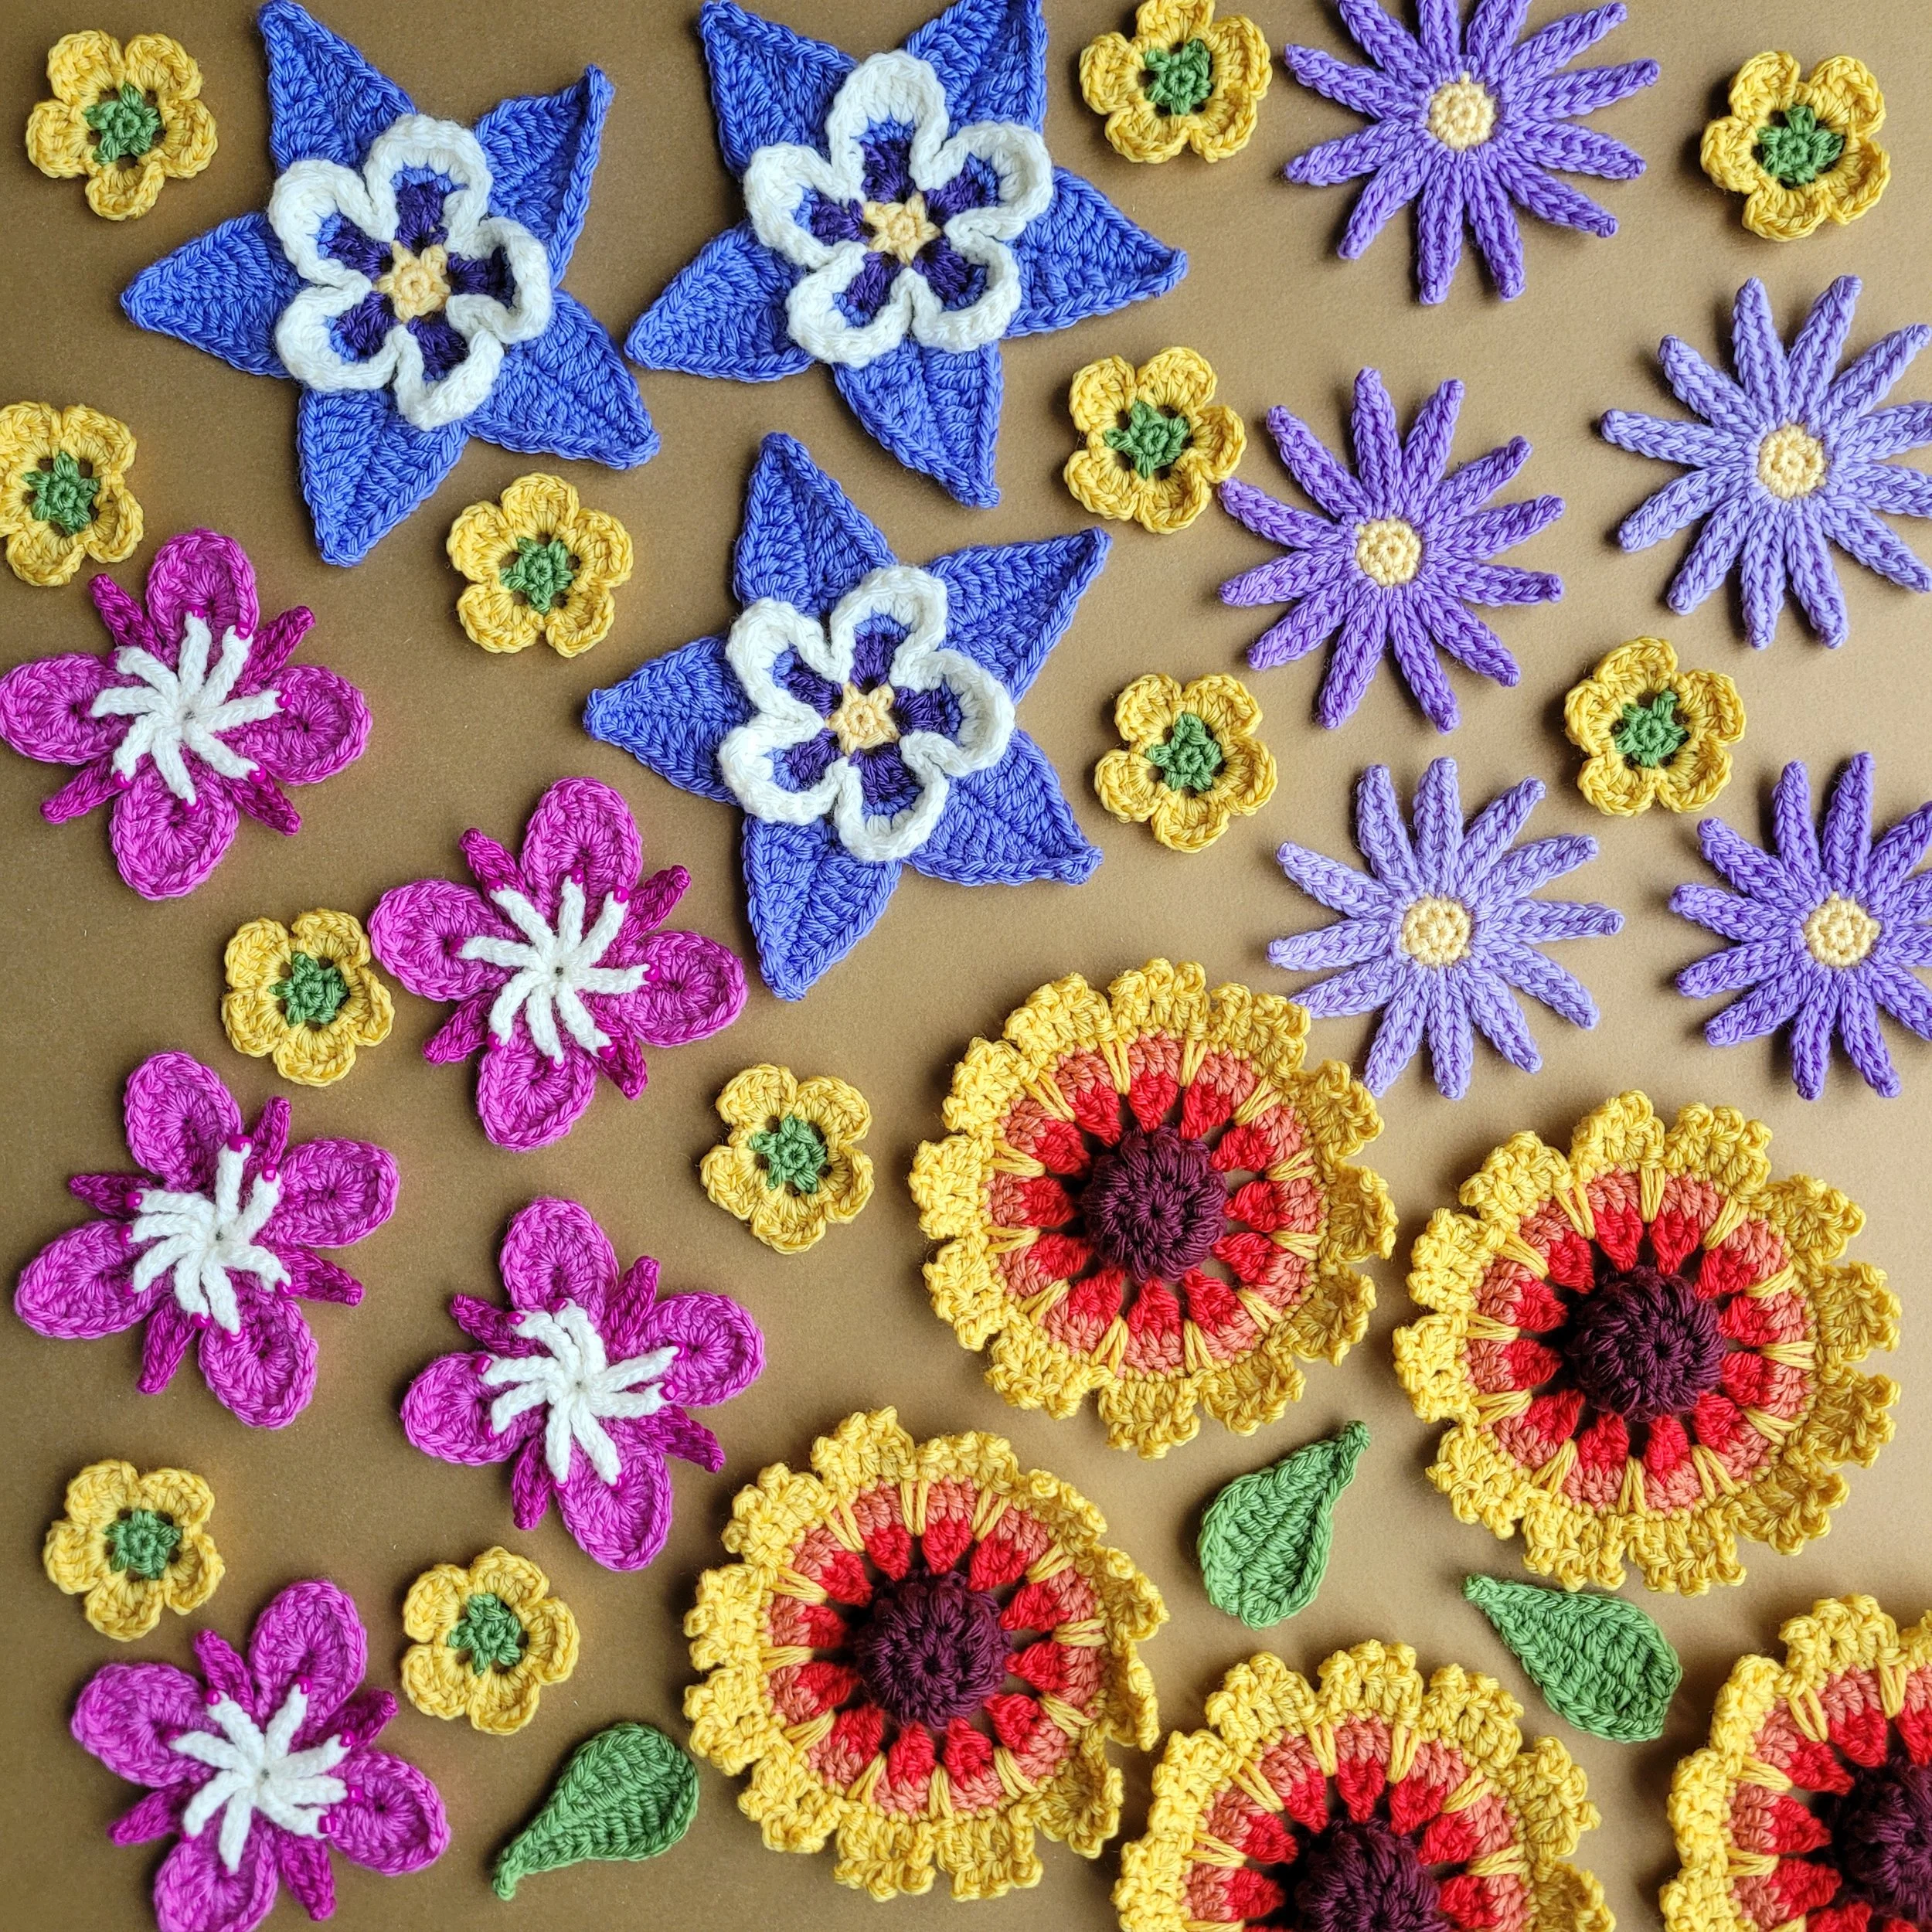
This week, I began sewing the flowers onto my wildflower blanket. I’ve decided to divide the blanket into color-blocked sections to resemble a high mountain valley. The first section of blue flowers includes columbines, prairie flax, primrose, and tansyasters.
July 12, 2022
This week I worked on organizing all my flowers and sketching out a layout for the blanket. I’m very inspired by photos of mountain valleys covered in wildflowers. I love how each field of flowers can turn a mountainside into a different color. I think I might try to recreate that look with my blanket.
July 6, 2022
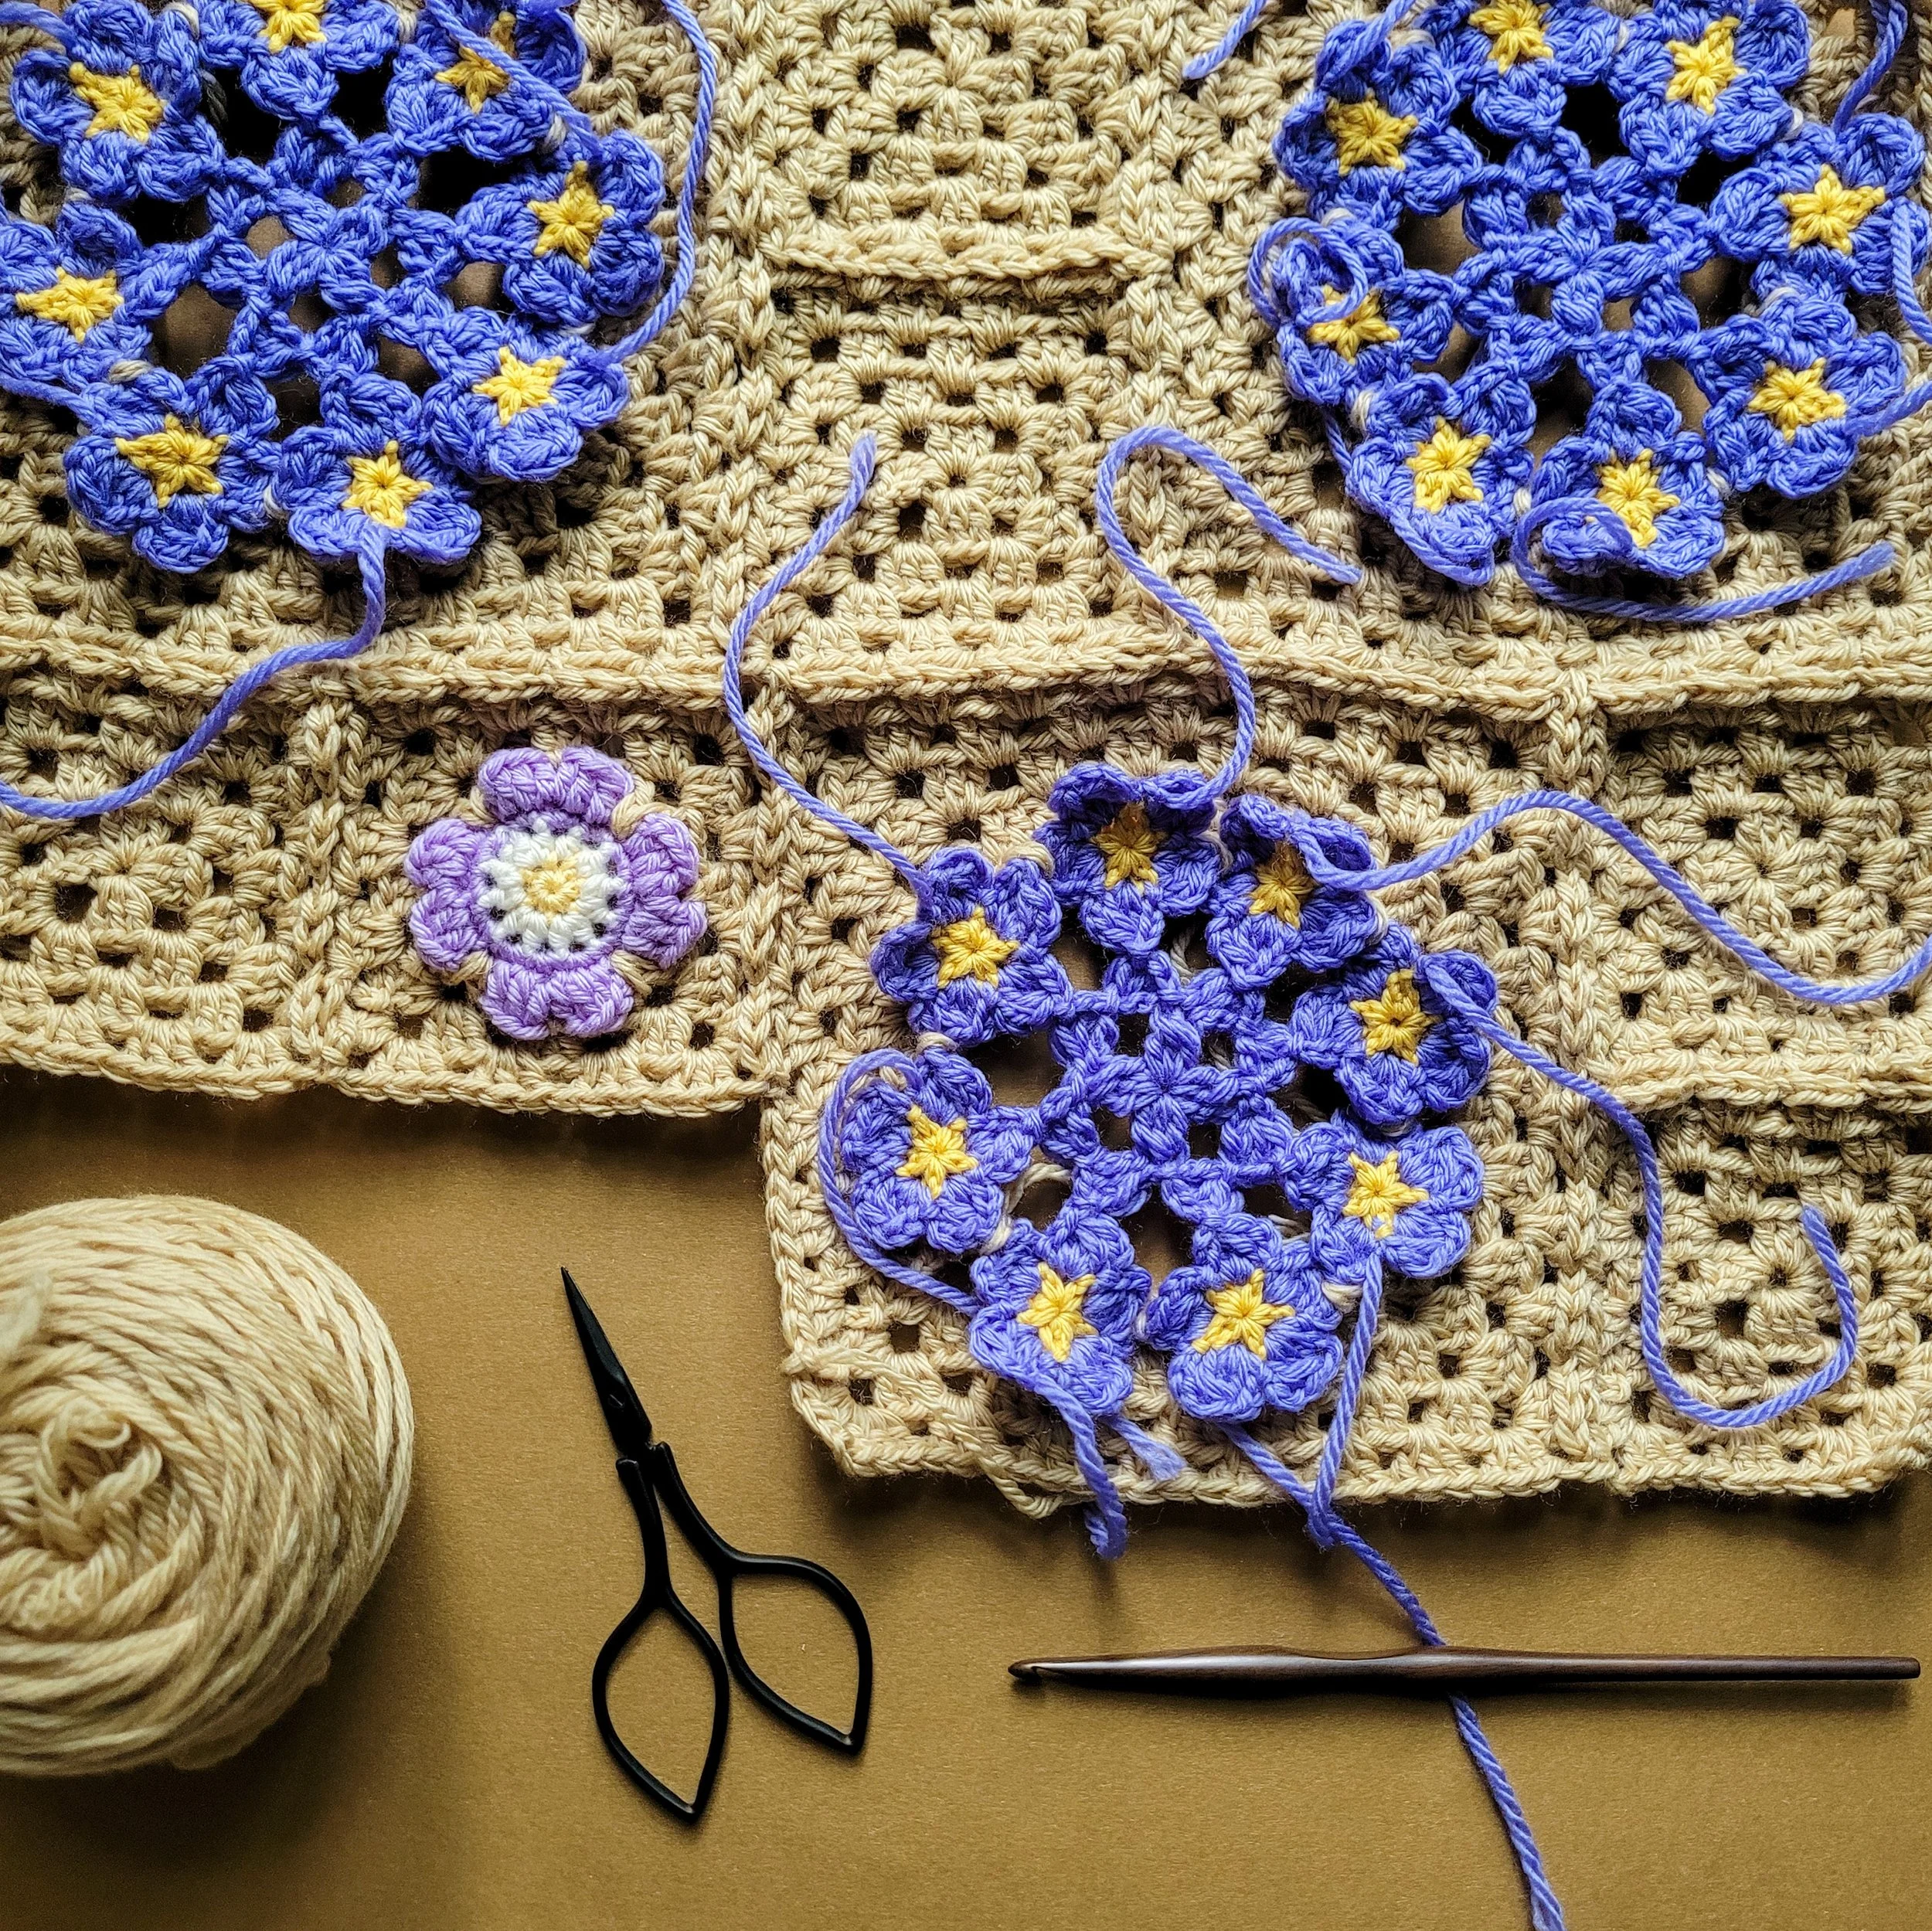
I’ve started joining squares and weaving in ends. Each prairie flax flower has 4 ends to weave in, so that means each cluster has 32 ends (plus 2 in the middle)—so many ends! But it’s worth it. I’m really loving how these clusters seem to float on the blanket. Because I worked the granny square outward from the outer ring of flowers, you can see through the lacy flower in the center.
I also created a new little flower called a showy primrose and turned it into a small granny square too. I’ve begun working on the layout, and I’m excited to get the squares joined together.
June 26, 2022
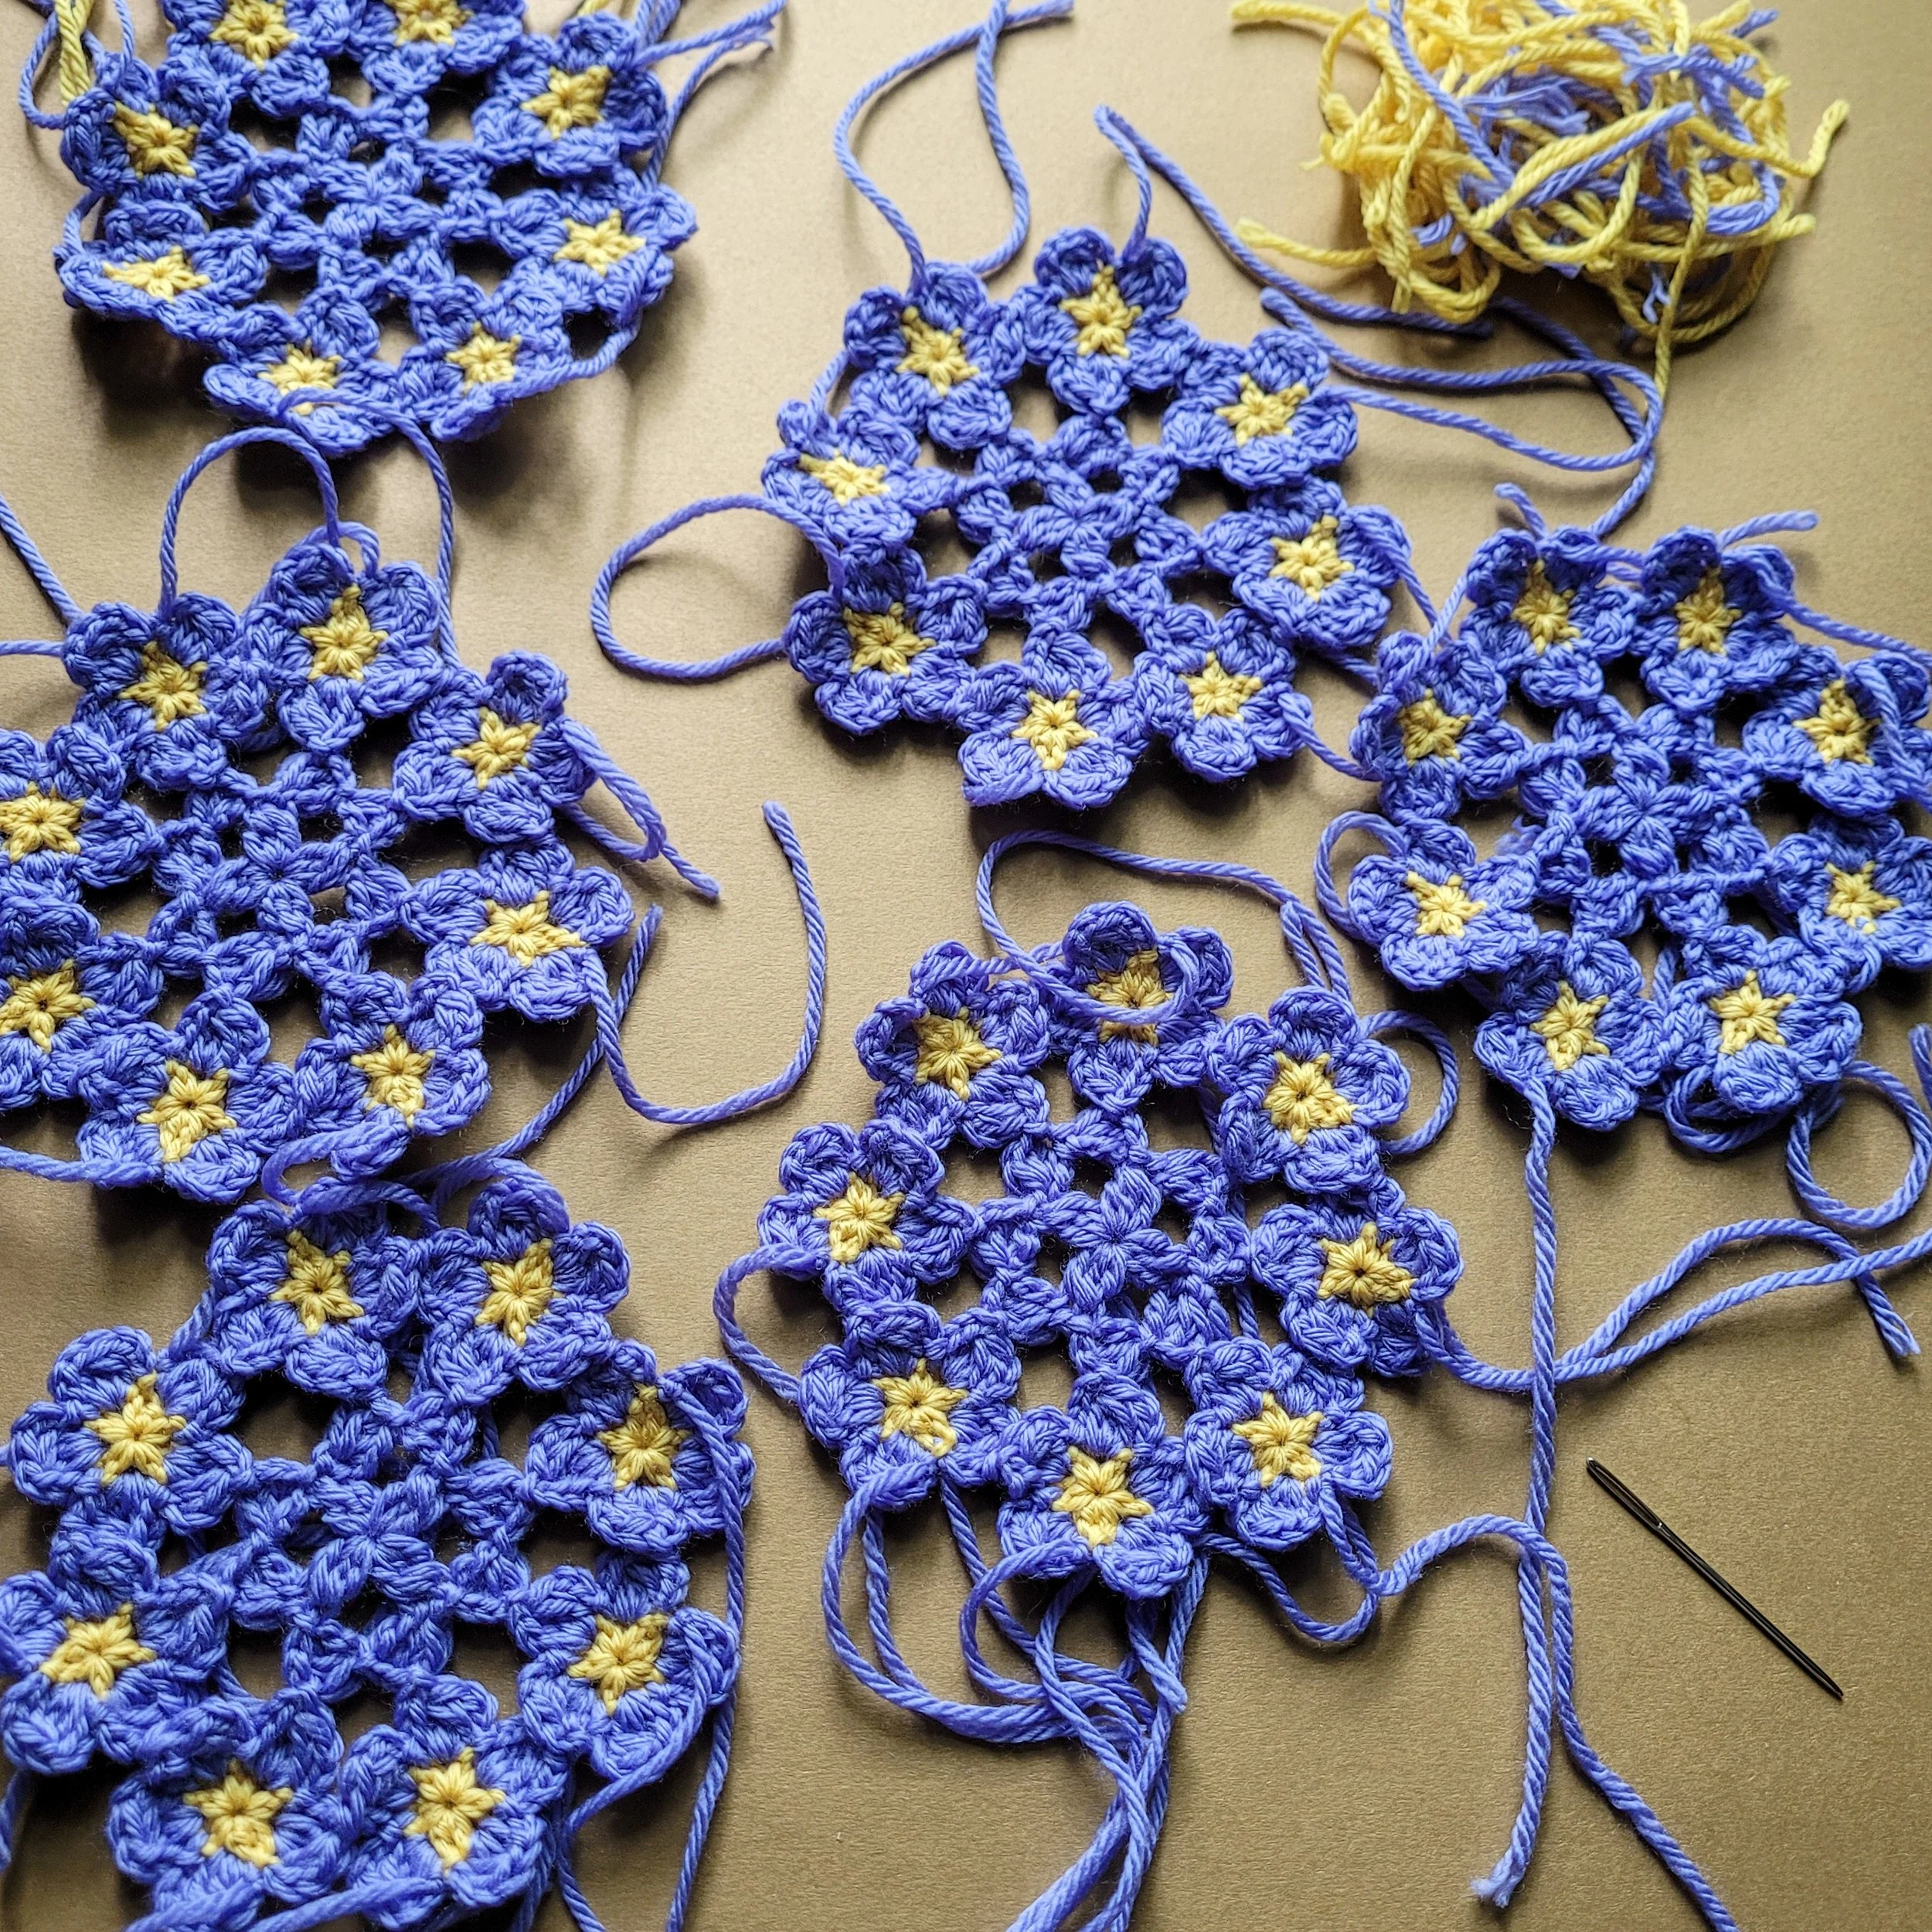
After many attempts to square off different configurations of tiny flax flowers, I settled on an arrangement of 8 flowers around a central flower. These prairie flax clusters are finally ready to become granny squares.
June 19, 2022
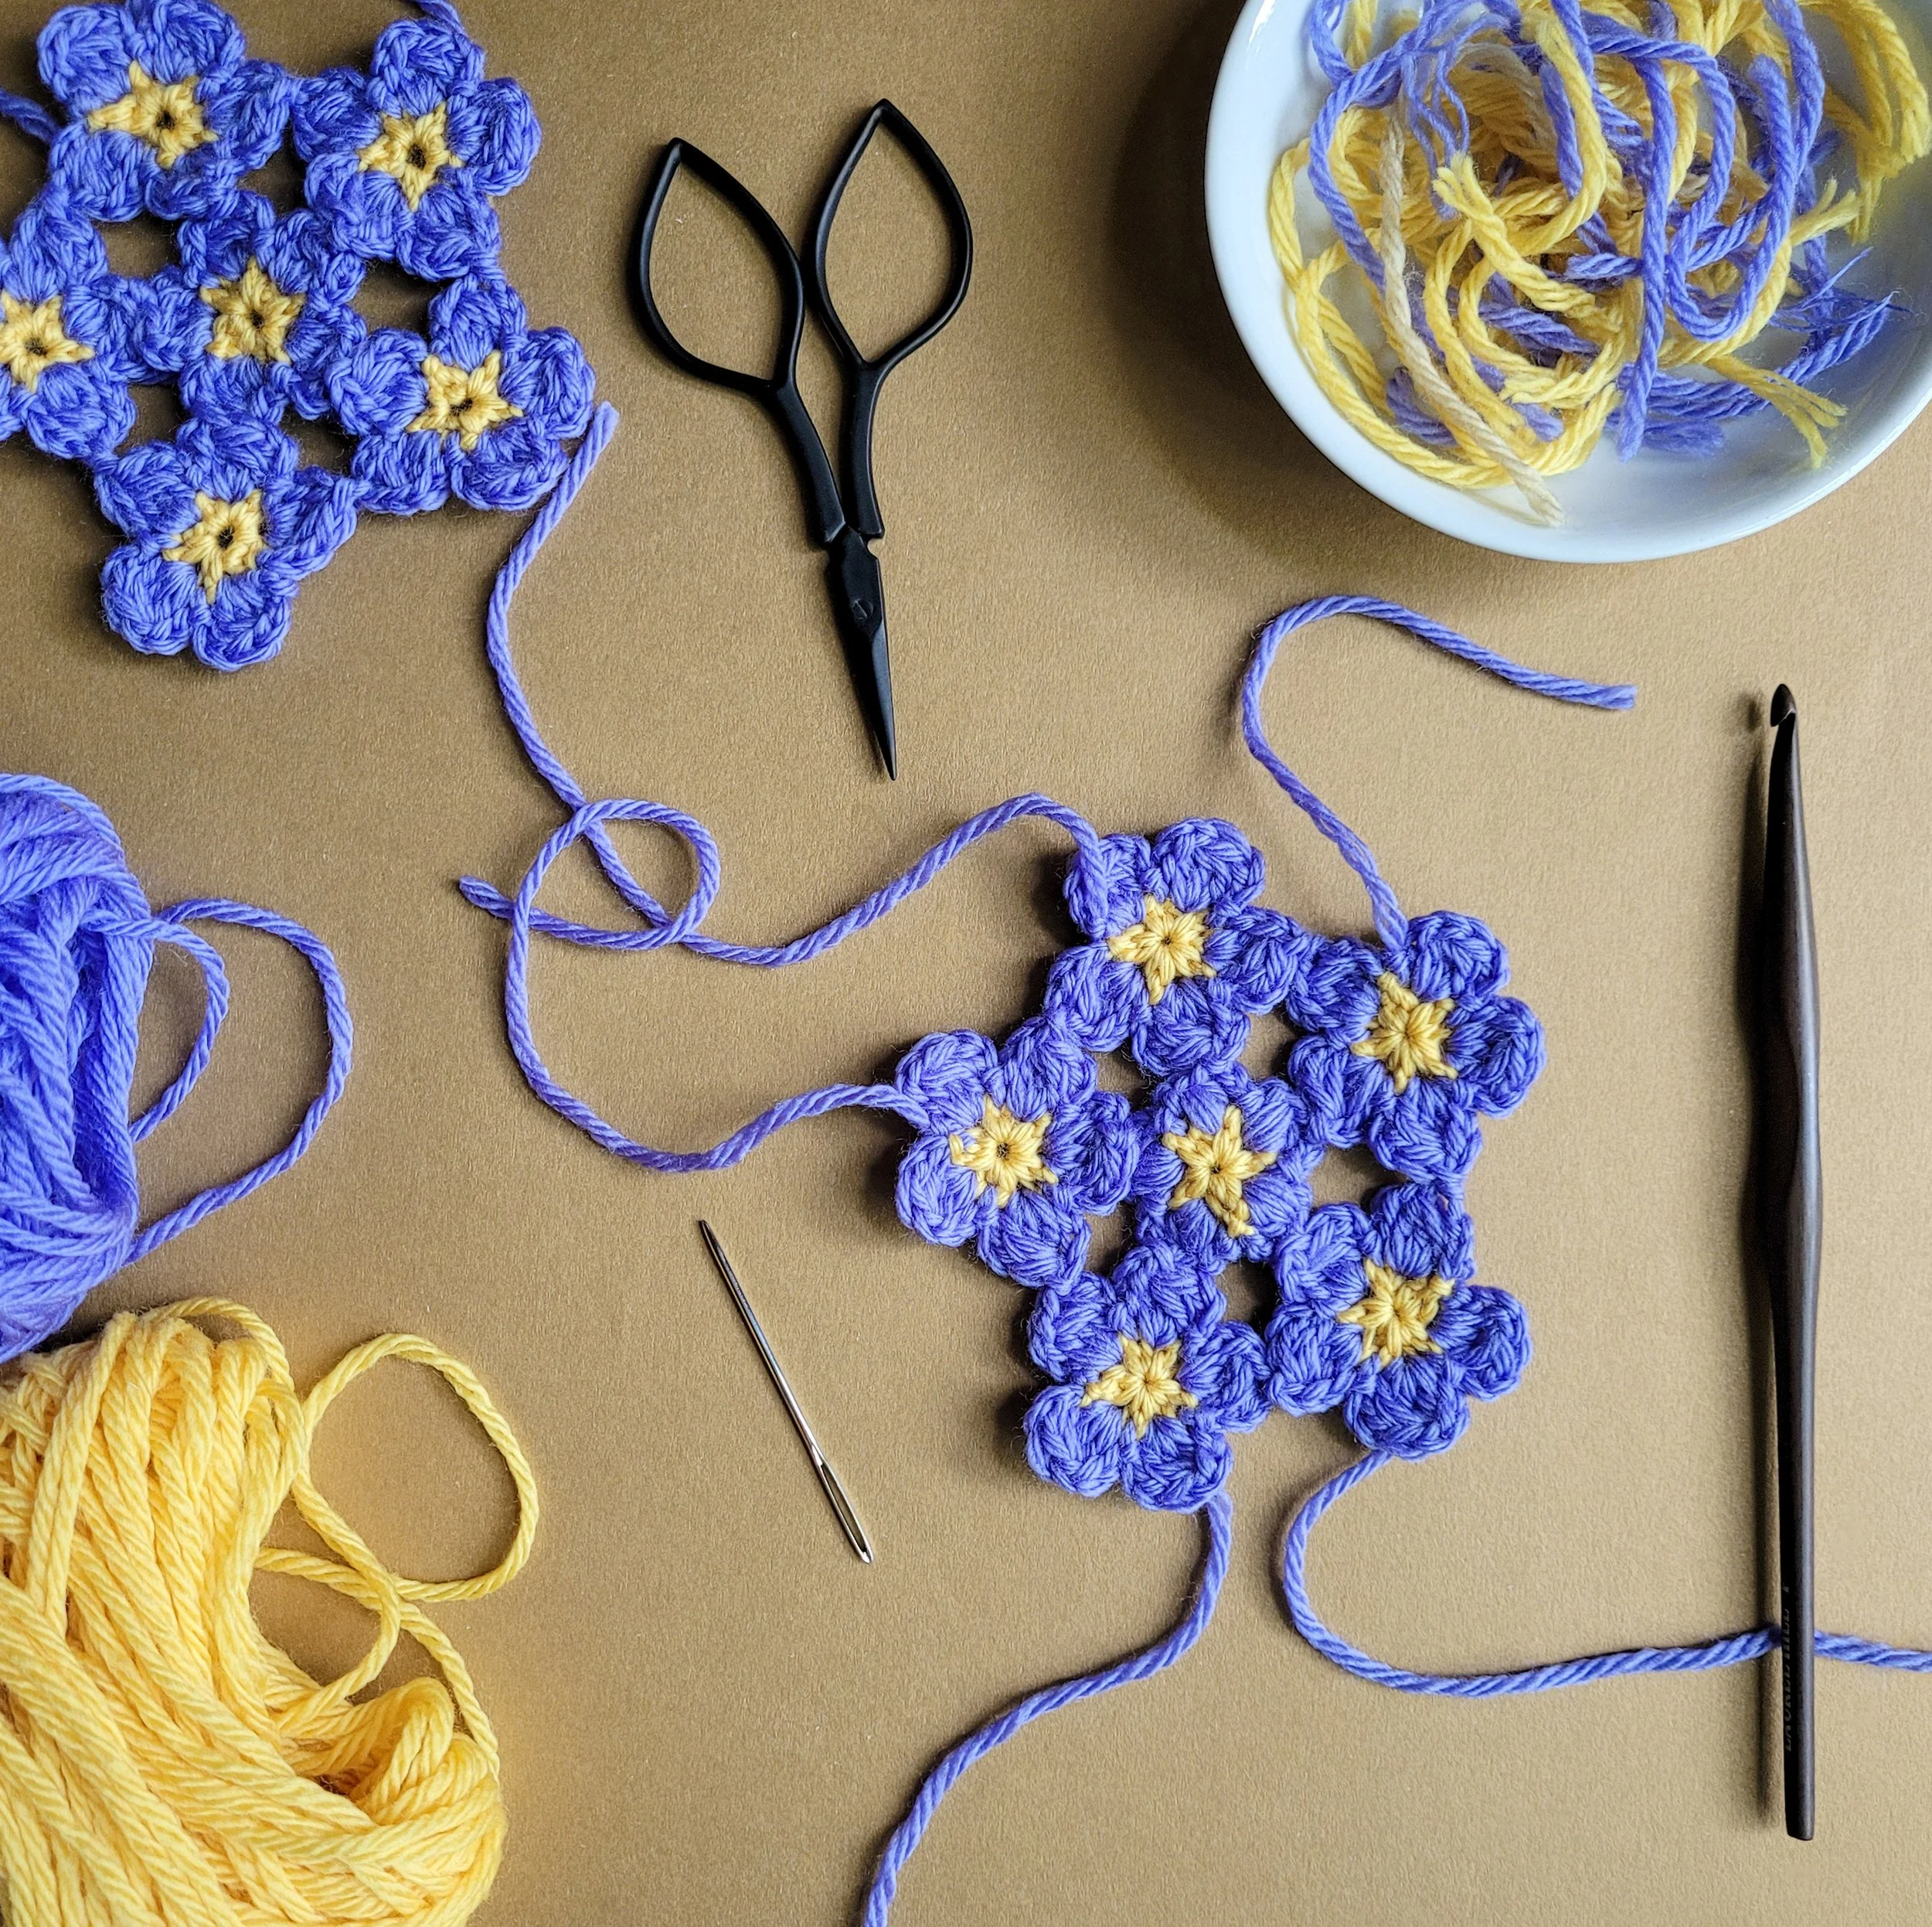
Today I’m designing a cluster of prairie flax and later I’ll work on turning it into a granny square. That’s where I’m sure it will get really interesting—with plenty of math, sketching, and trial & error. It’s always a puzzle but that’s what makes it fun and so rewarding.
June 16, 2022
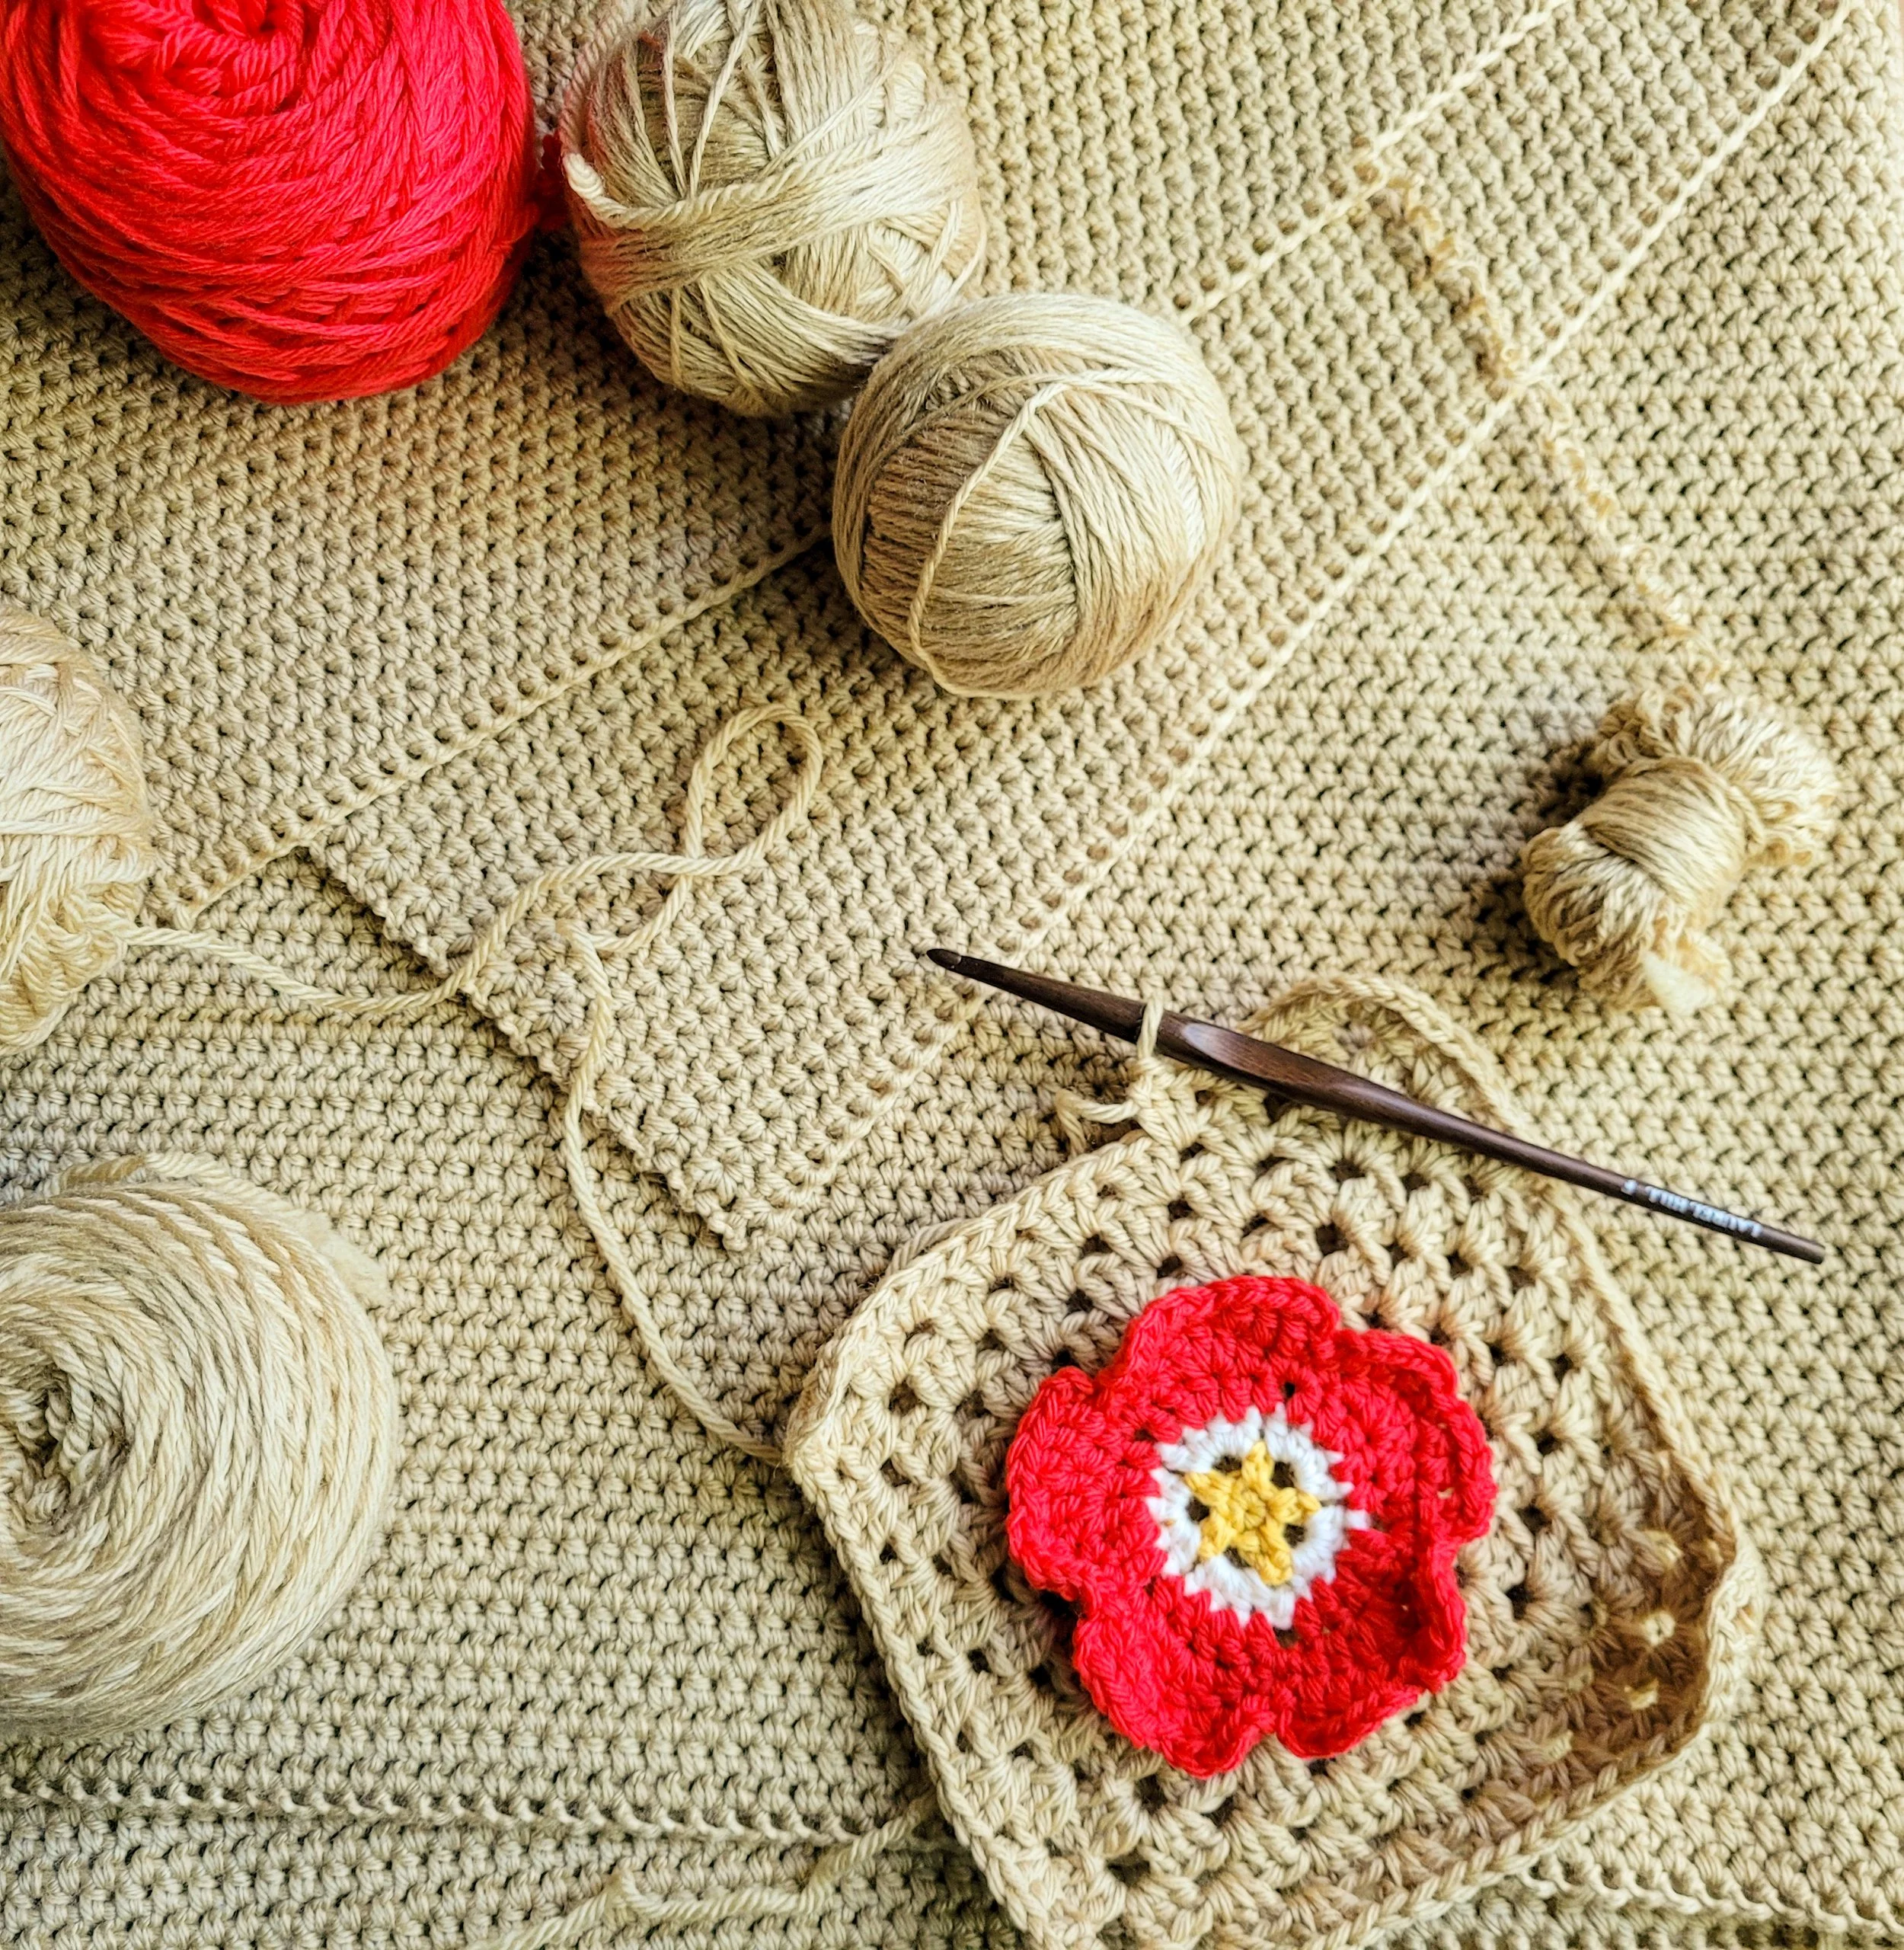
Well, there’s a reason I haven’t said more about the base fabric for this blanket. Simply put, I wasn’t satisfied with it. The whole time I was crocheting it on the road last month, I kept thinking, “why am I not making this as a motif blanket?” The fabric turned out beautiful, but it’s far too stretchy. I just know that it’s not going to be fun sewing appliques onto it. So I’ve begun the long process of unraveling about 12 days of work. You’d think it would be heartbreaking, but I’m finding it exhilarating. It feels good to have a new beginning.
I’ve also decided to turn some of my wildflowers into granny squares. I’ll still applique a lot of the flowers and leaves, but I think having some flowers built into some motifs will add to the layered effect. And the granny stitch background should be more stable than the fabric I had before.
June 10, 2022
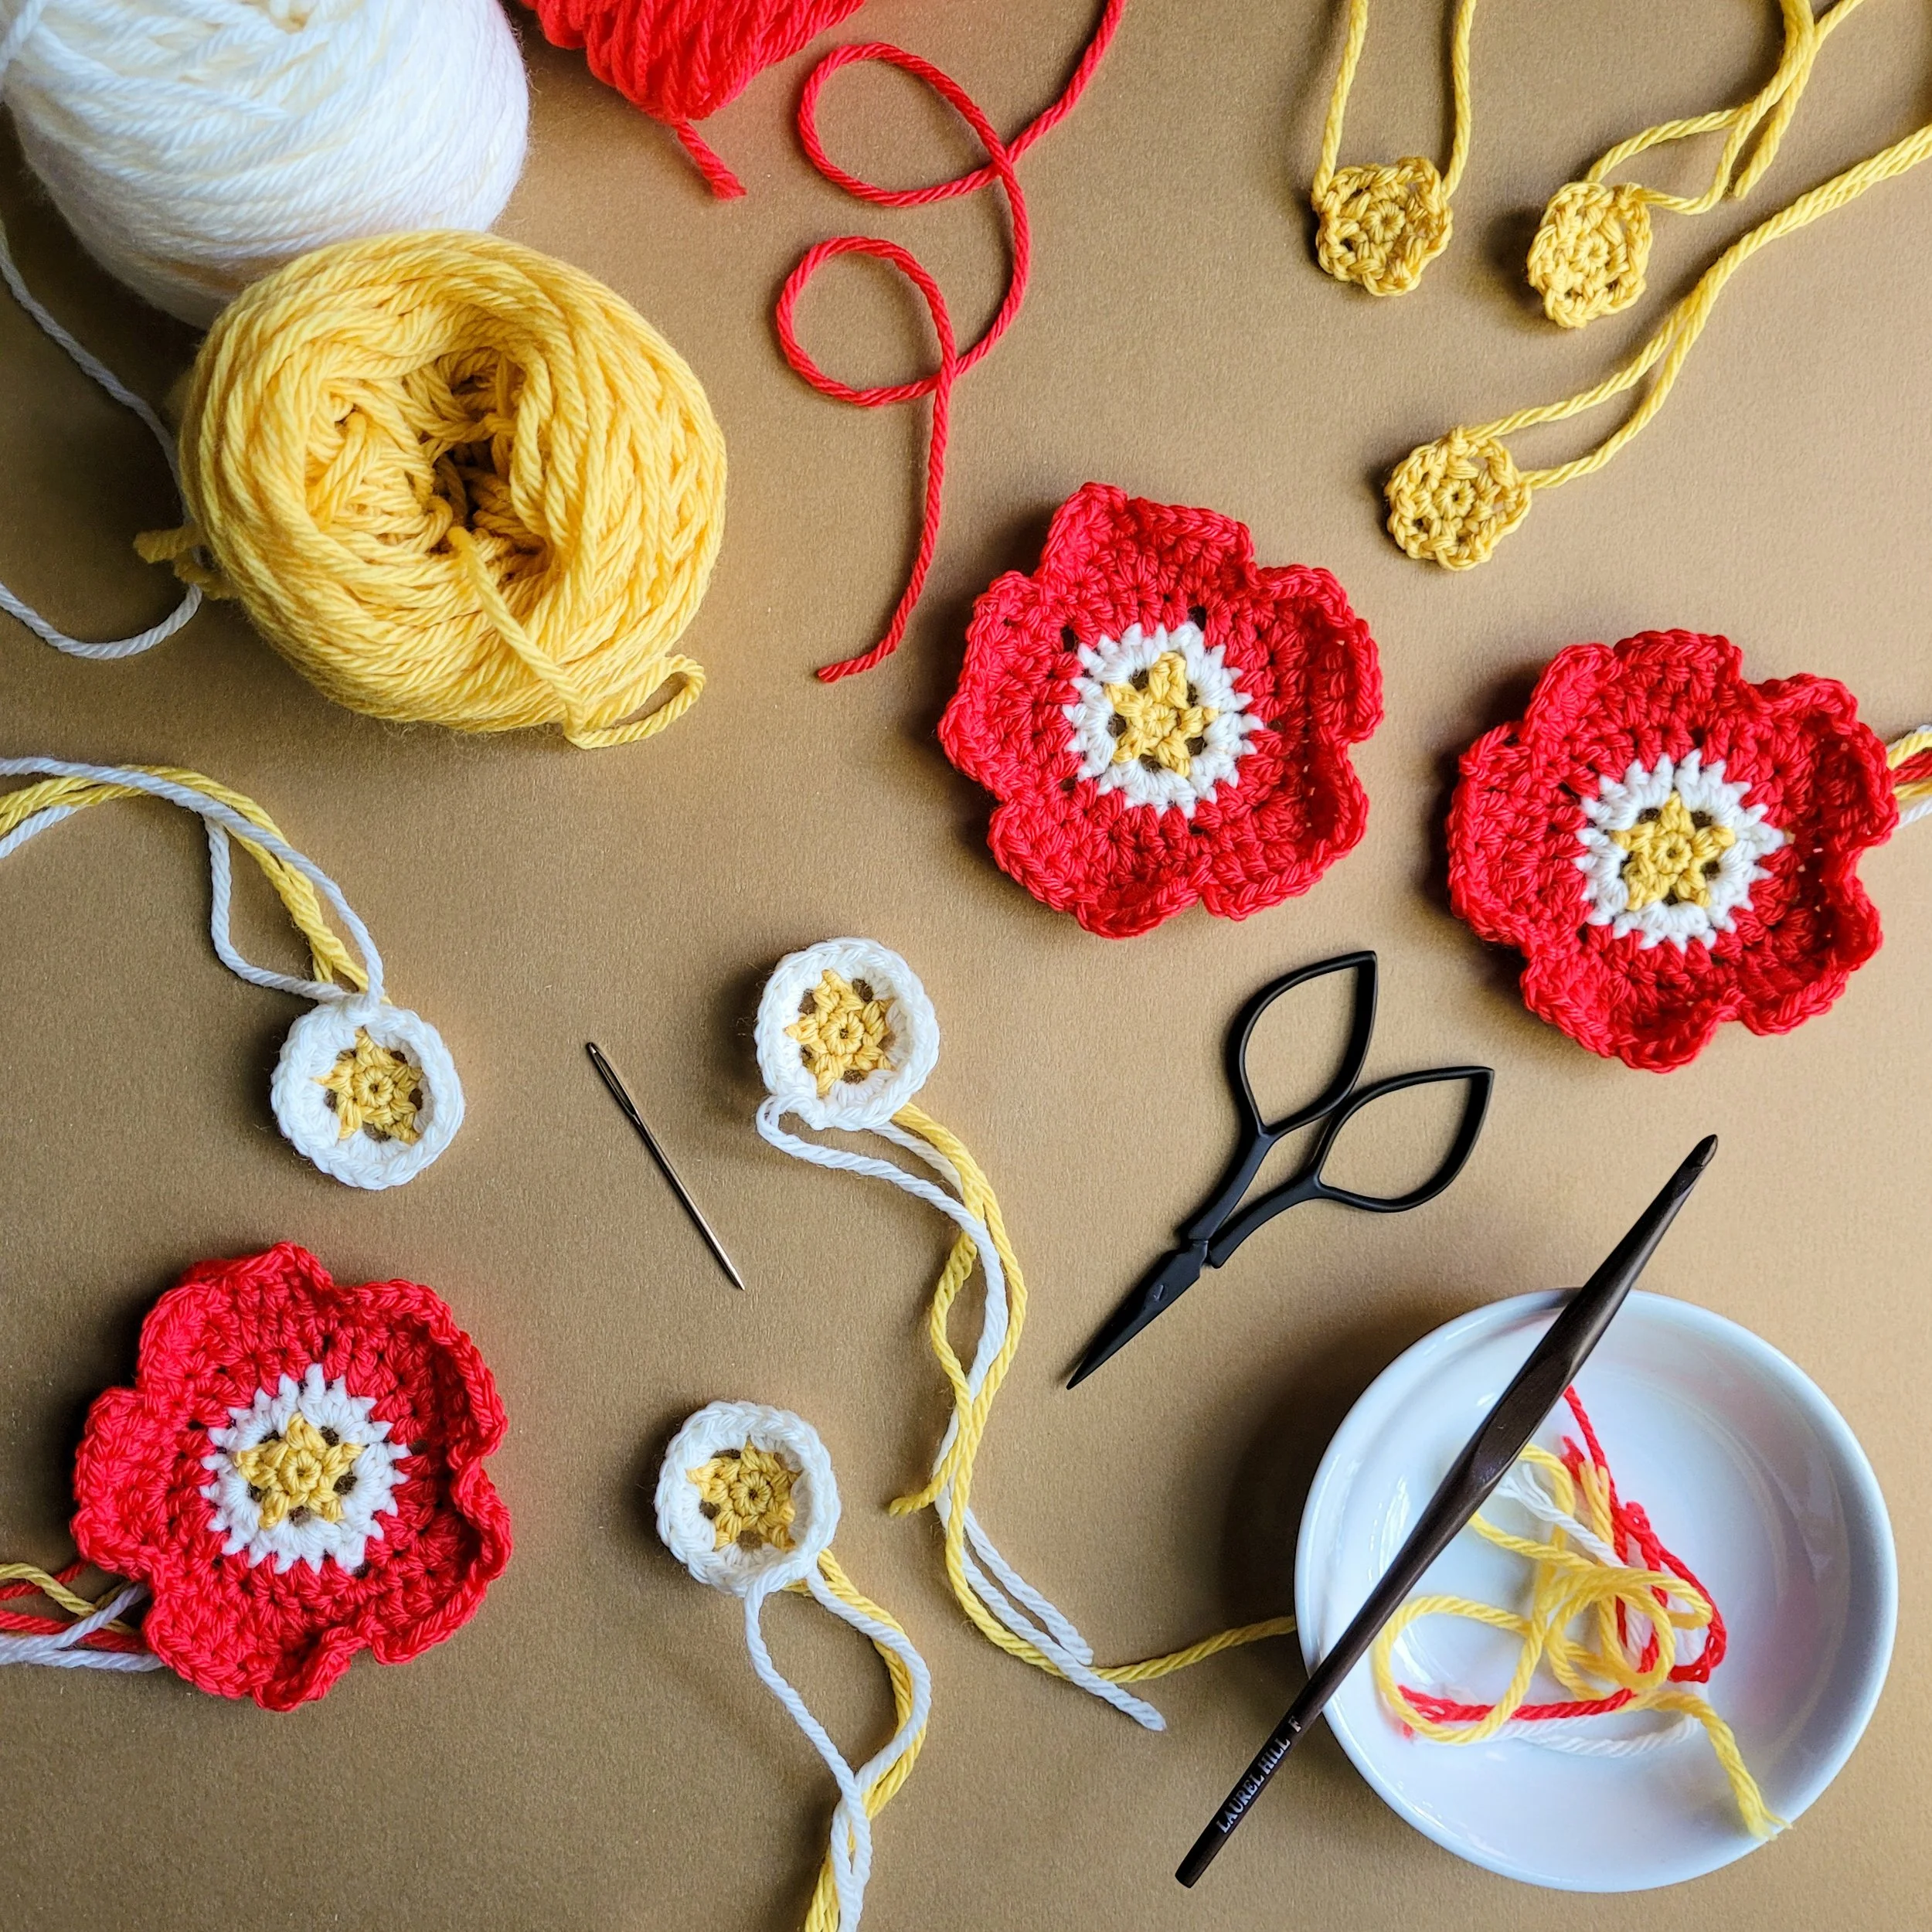
This week I worked on my design for a scarlet globemallow flower. I love how the edges of the petals are very subtly ruffled.
May 29, 2022
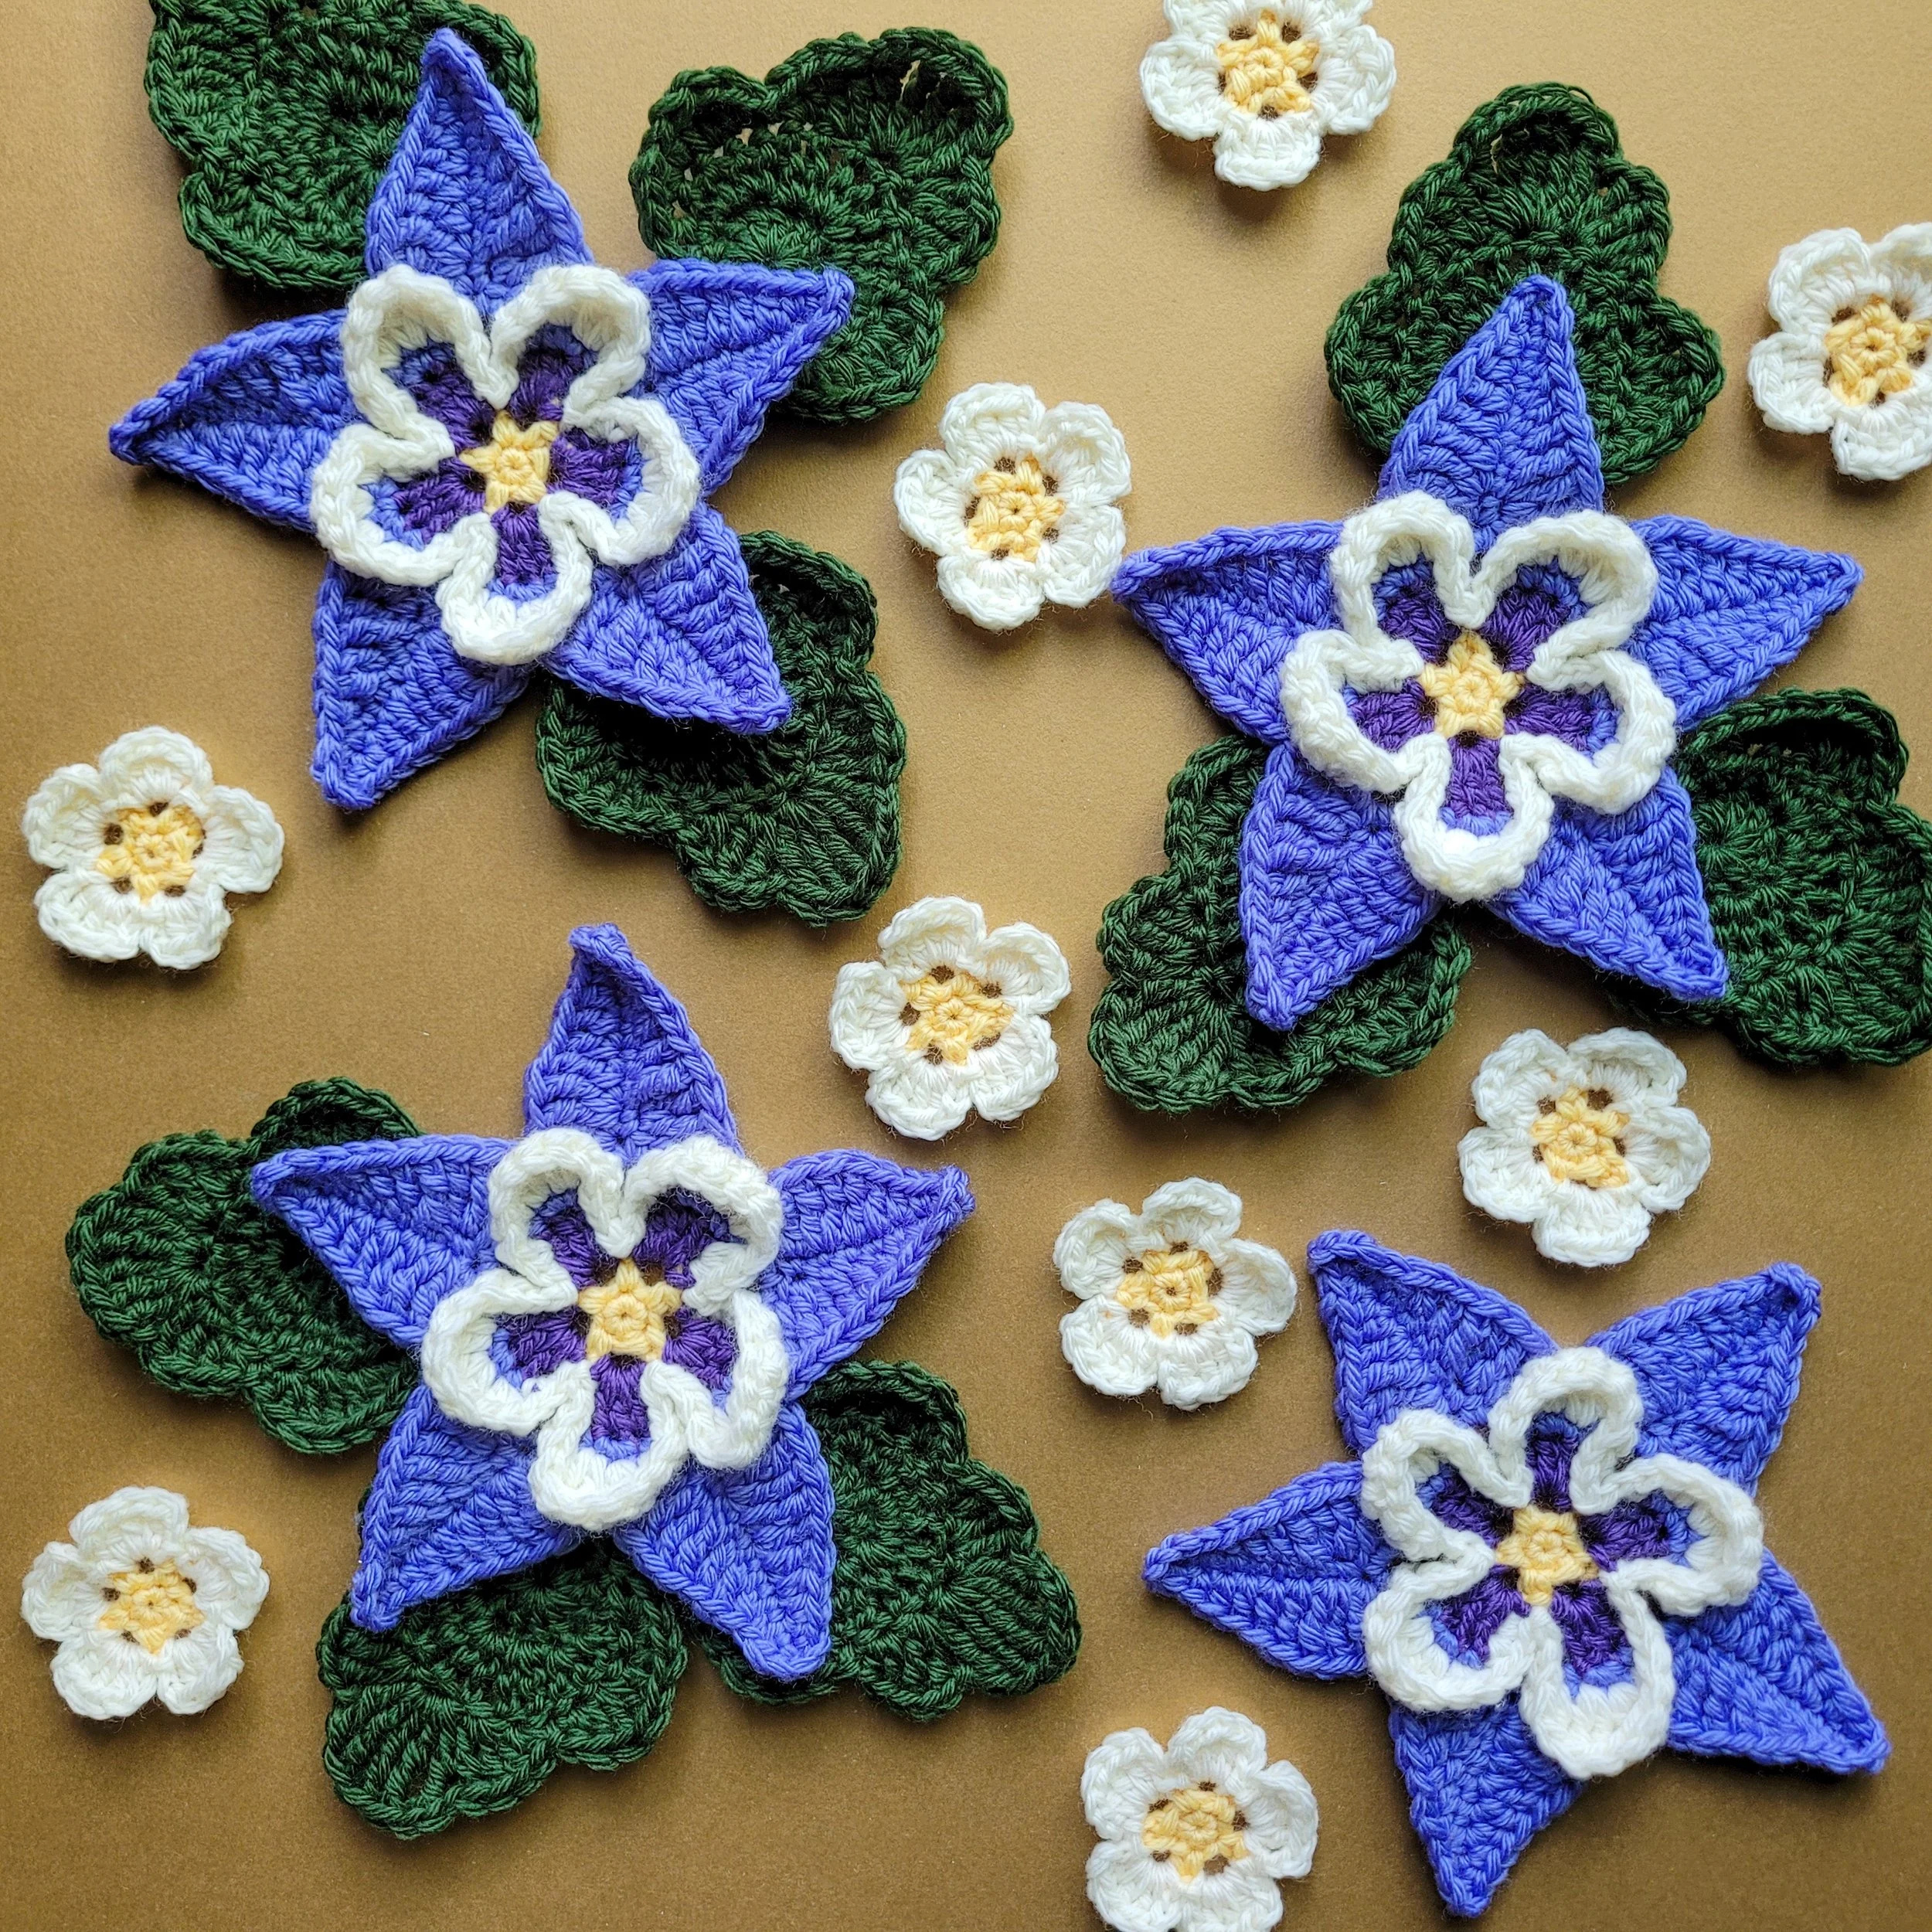
I decided to design some leaves to go with my columbine flowers. I’m not as experiences with crocheting leaves and these took a while to get right. In the end I decided to make them in joined rounds (as opposed to turned rounds or rows), and elongating one side with taller stitches. I’m pretty happy with how they turned out and I think they’ll look great underneath the columbines as one of the first layers on the blanket.
May 18, 2022
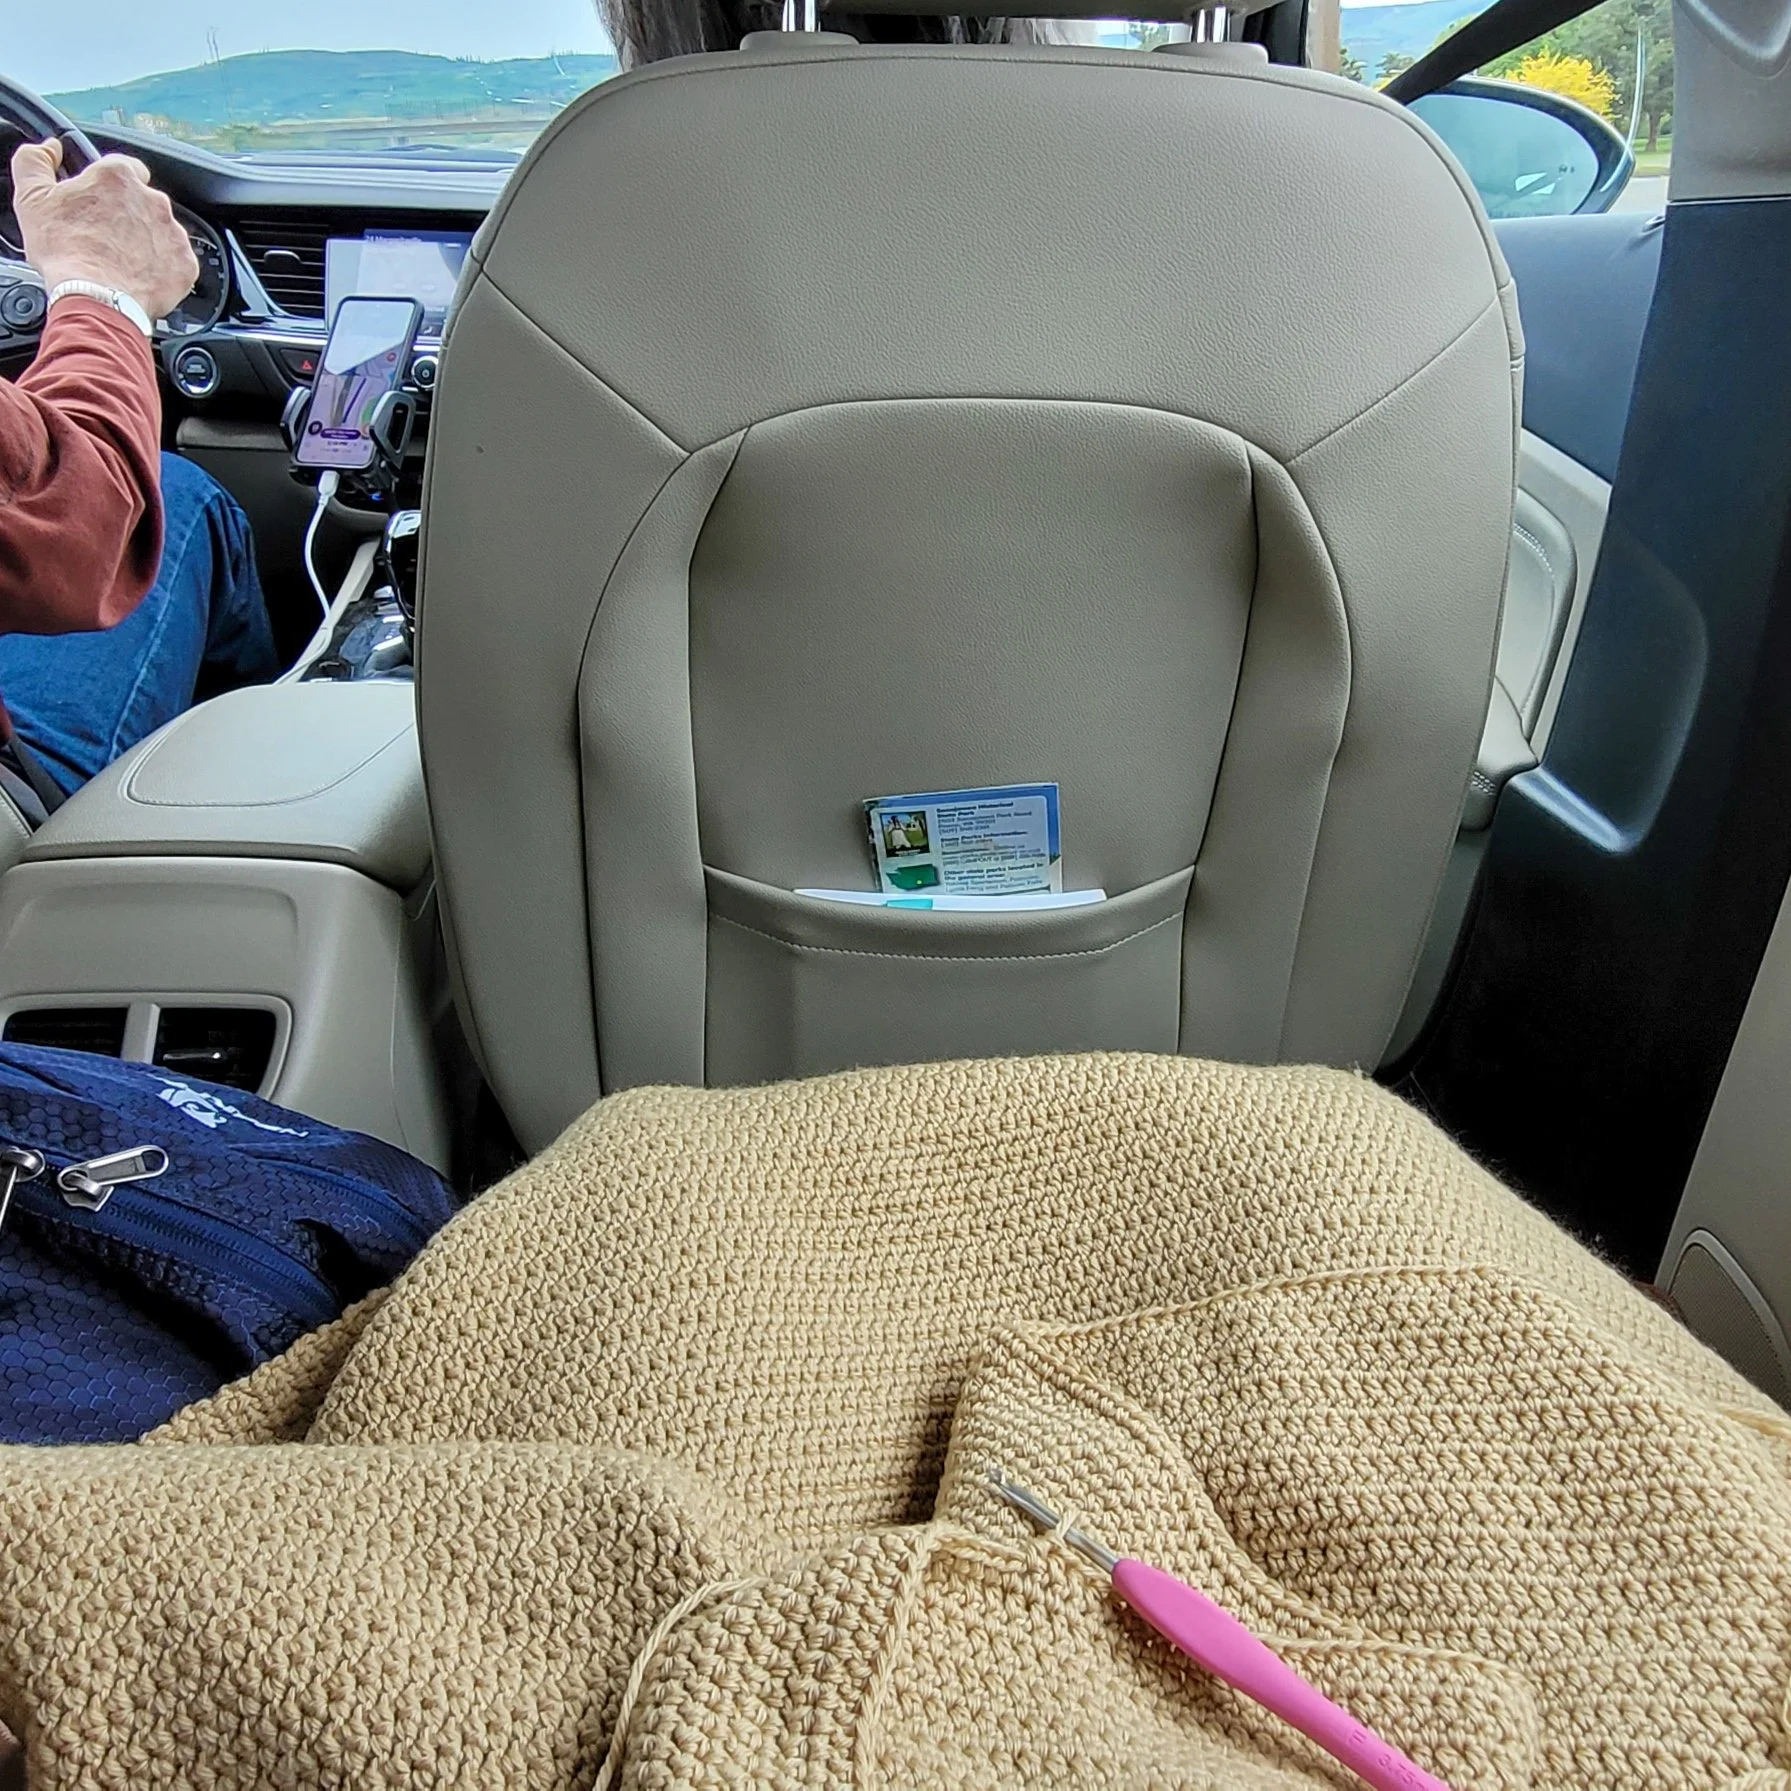
I just got back from a 10-day trip across the county with my parents. We traced the Lewis and Clark trail from Missouri to Oregon (actually I joined them in Omaha, Nebraska). It was a very educational trip! And I got a lot of car crochet done. I actually finished the base fabric for my blanket on the trip.
I also picked up a new wildflower guide at the Lolo Pass Visitors Center (they have great complimentary coffee there too). It covers wildflowers of the northern Rockies. Flipping through the pages, I found myself wanting to create crochet versions of all the flowers. I may have to expand my blanket to the whole Rocky Mountain Range… or maybe I’ll have to do a second blanket someday.
May 1, 2022
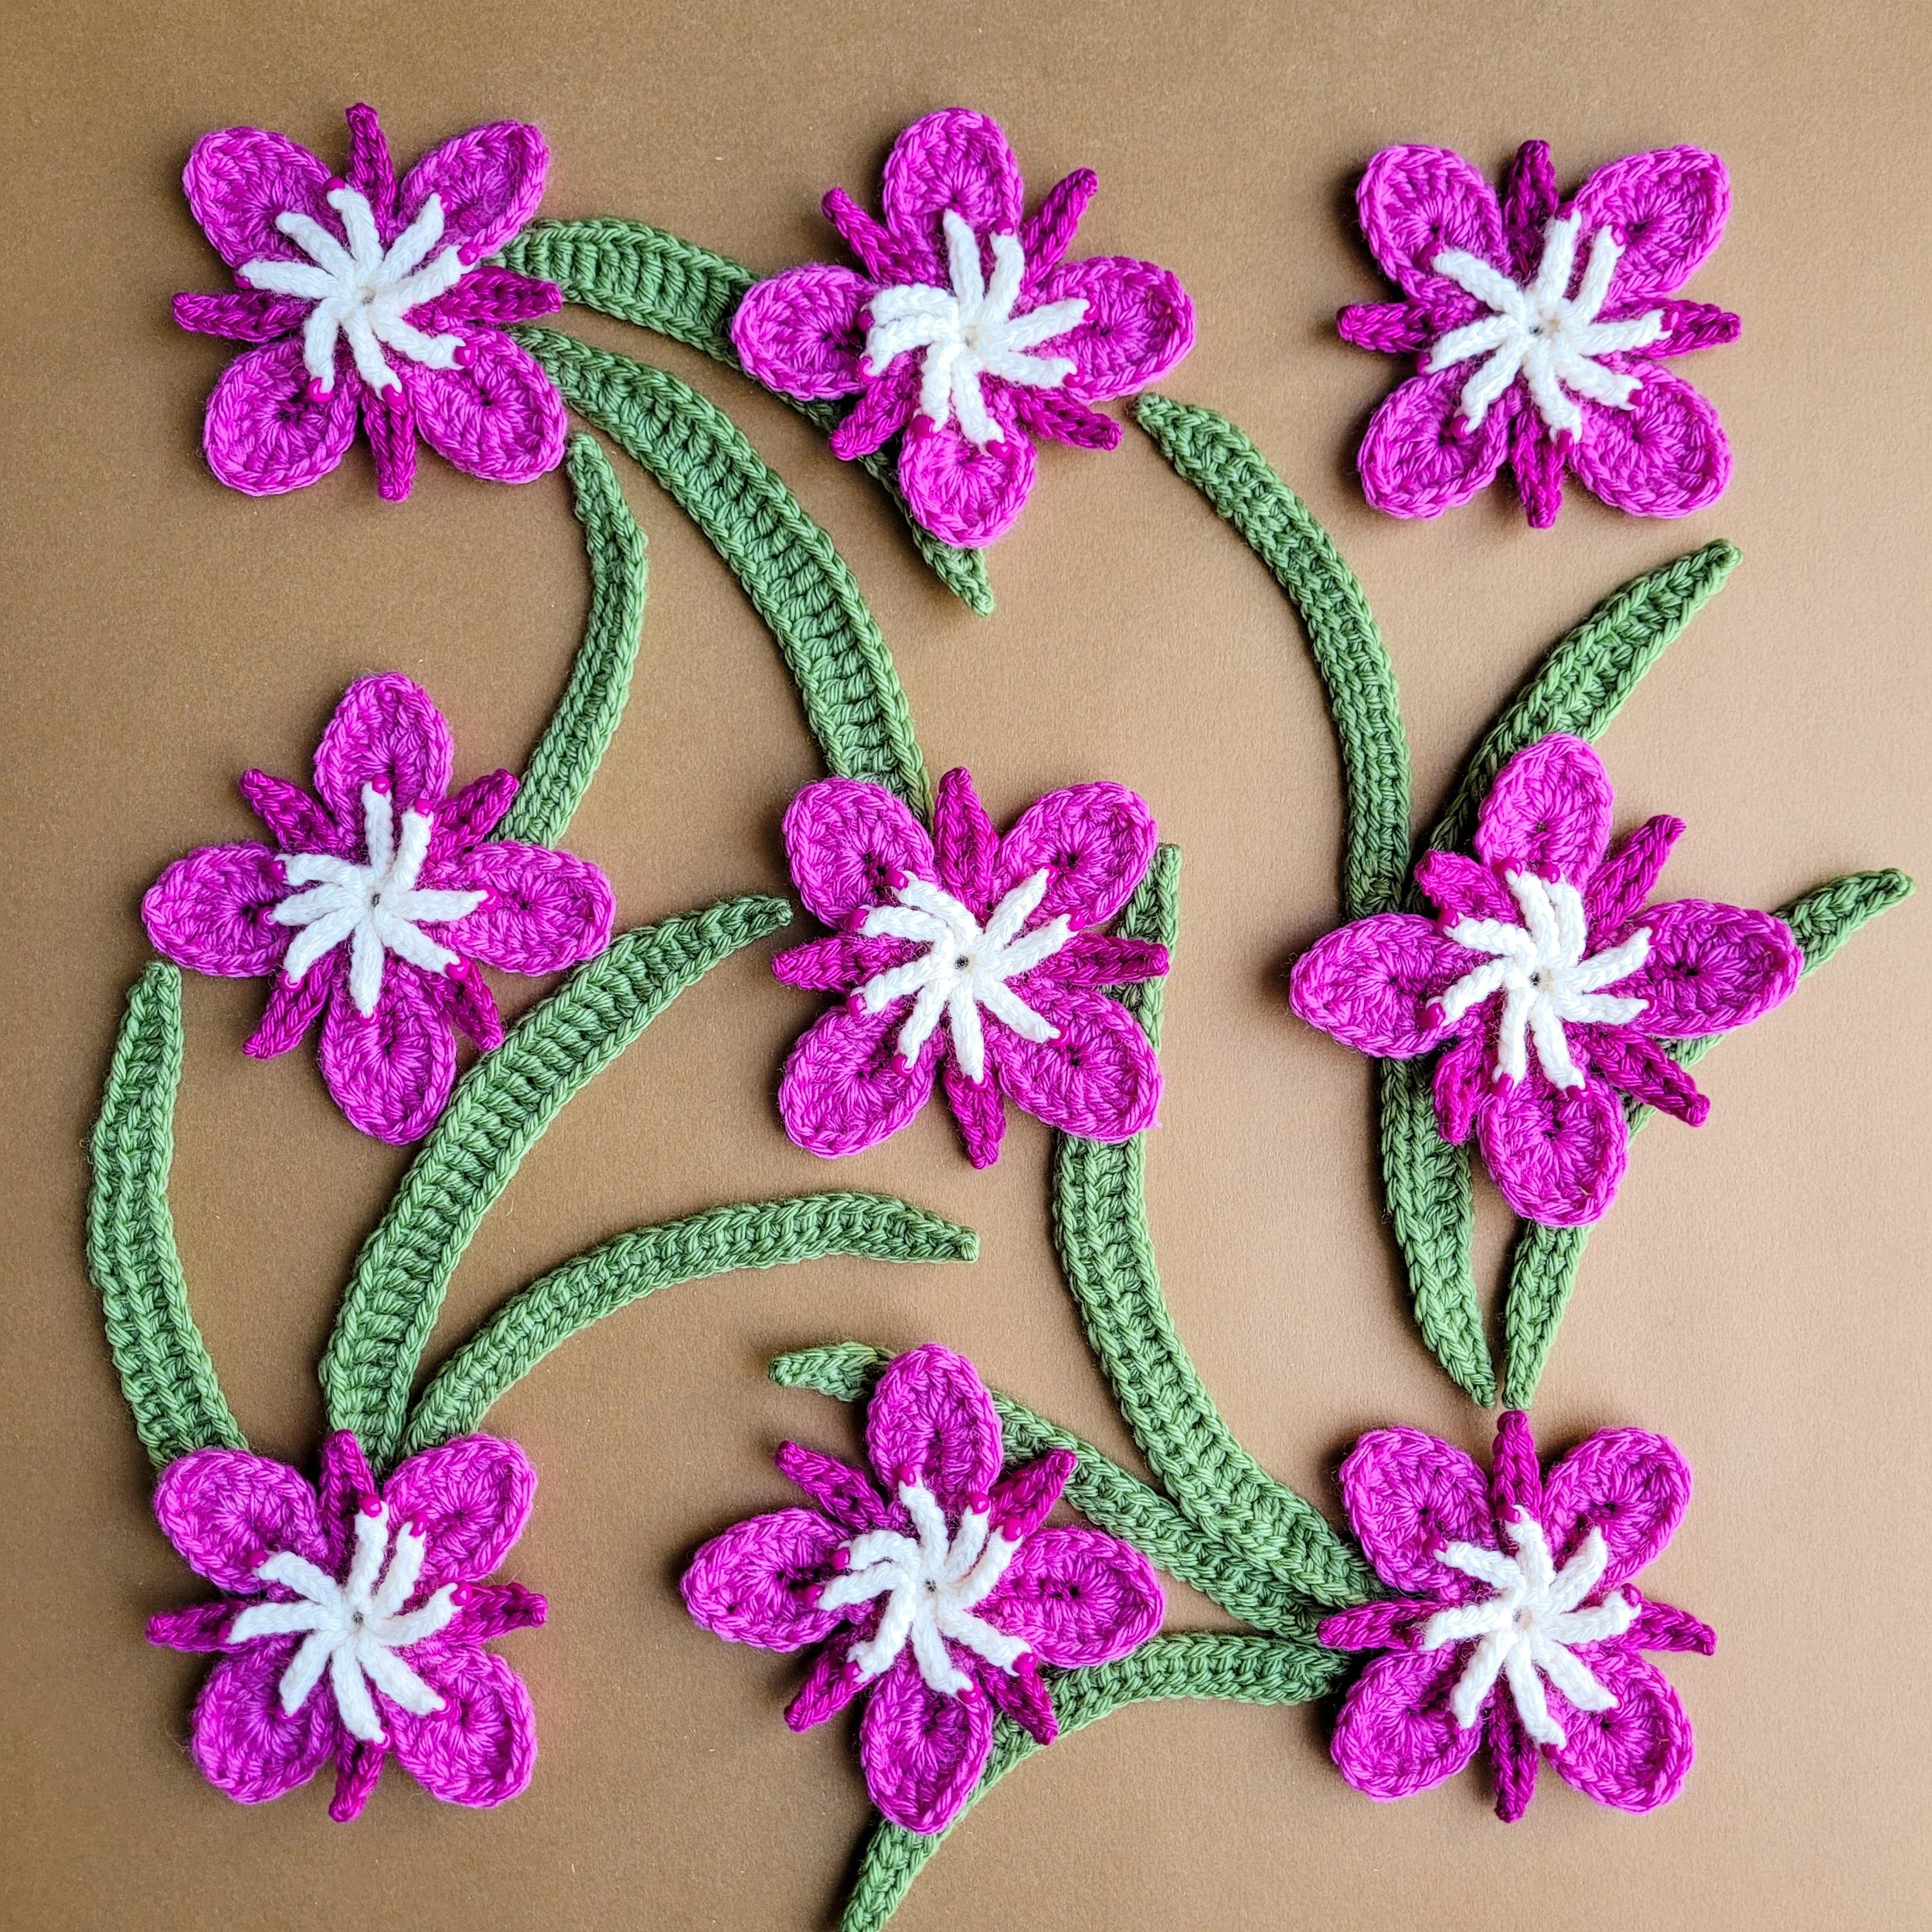
I made a bunch of fireweed flowers and leaves this week. And I learned that if you’re in Canada, you might know this flower as great willowherb, in Britain and Ireland as rosebay willowherb.
I’m going on a cross-country road trip with my family next week, so I might take a bunch of yarn along and work on the base fabric for this blanket. My favorite traveling projects are those that don’t require too much thought, but are interesting enough to keep my mind occupied.
April 24, 2022
This weekend, I’m designing a fireweed flower. Check out those colors! I still can’t believe I found just the right shades of magenta for these brightly colored petals. I even found magenta seed beads for the anthers — I’m learning flower anatomy now too!
April 18, 2022
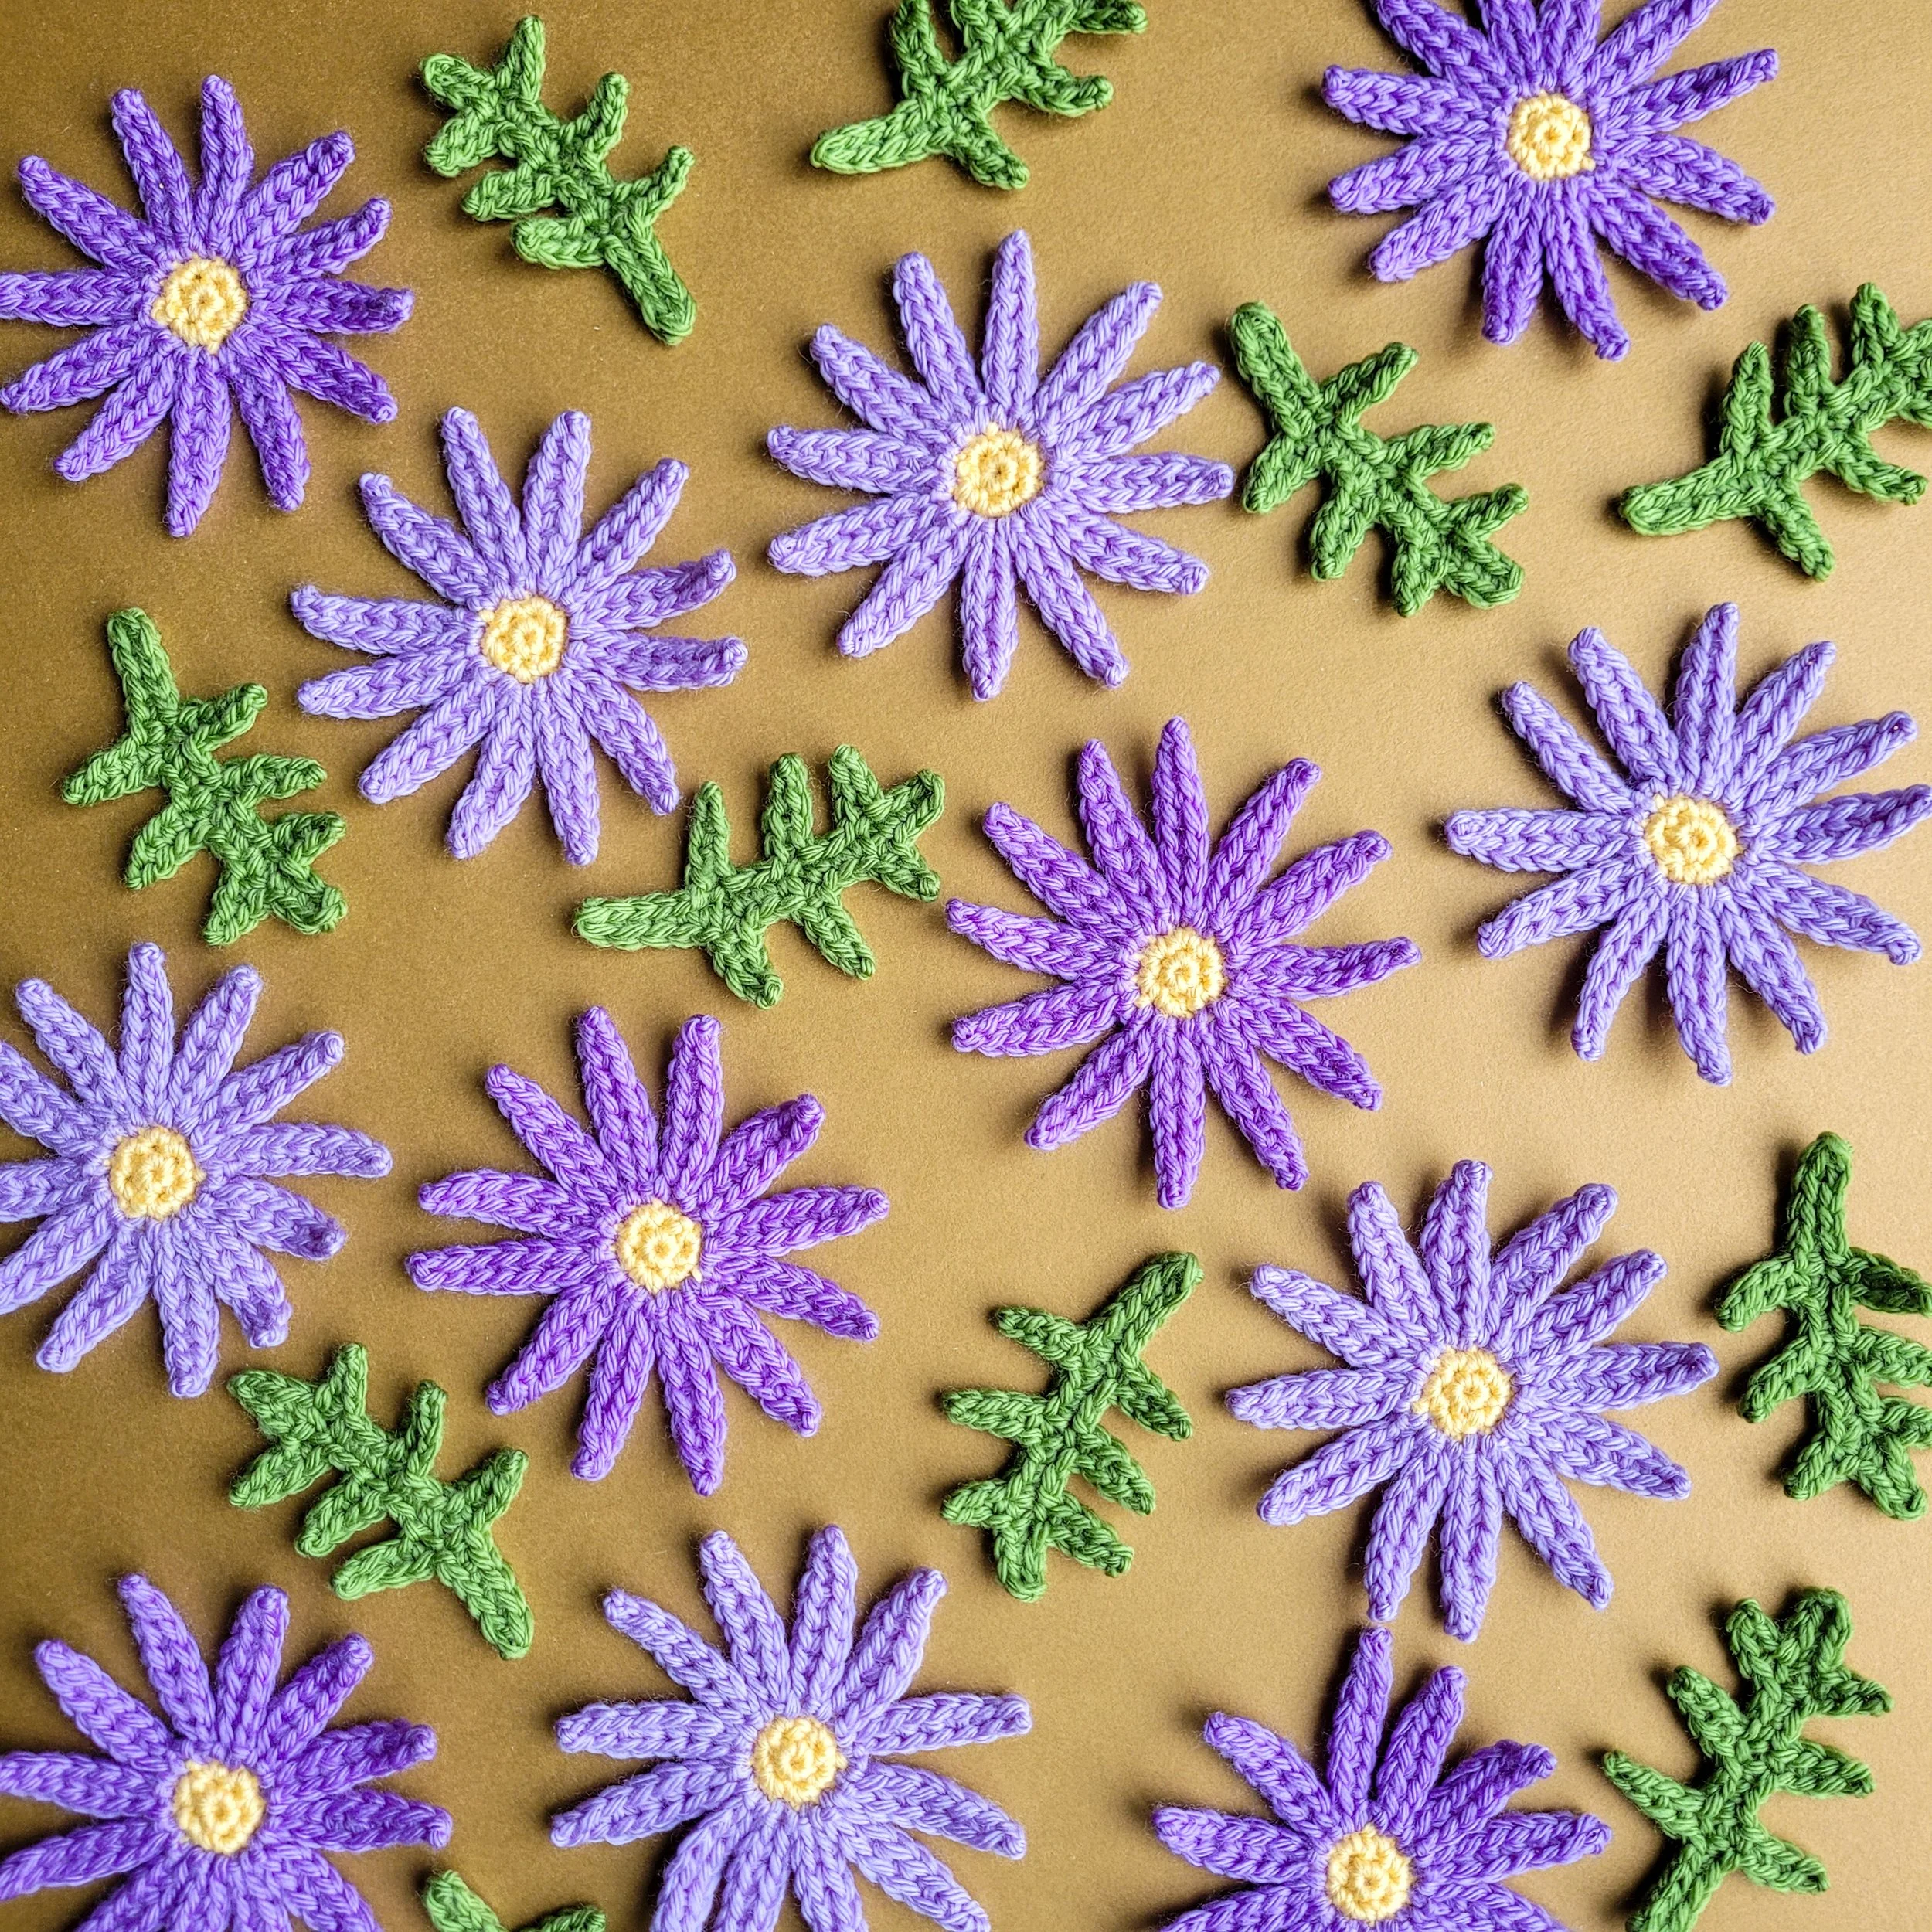
I finally found the right colors for the tansyleaf tansyasters. In the end I couldn’t choose between pale lavender and wisteria, so I decided to use them both! Now I have some light-purple flowers and some dark-purple flowers, and I’m liking how they look together.
I also discovered something new while I was playing with this design. Each petal is made by working into a chain. I decided to try placing each stitch into the back bump of the chain instead of the top loop or 2 loops like I usually do. I was excited to discover that this creates a knit look on both sides of the petal. It really give the flower a nice finishing touch, without any extra effort. I love when I stumble upon something that works!
April 10, 2022
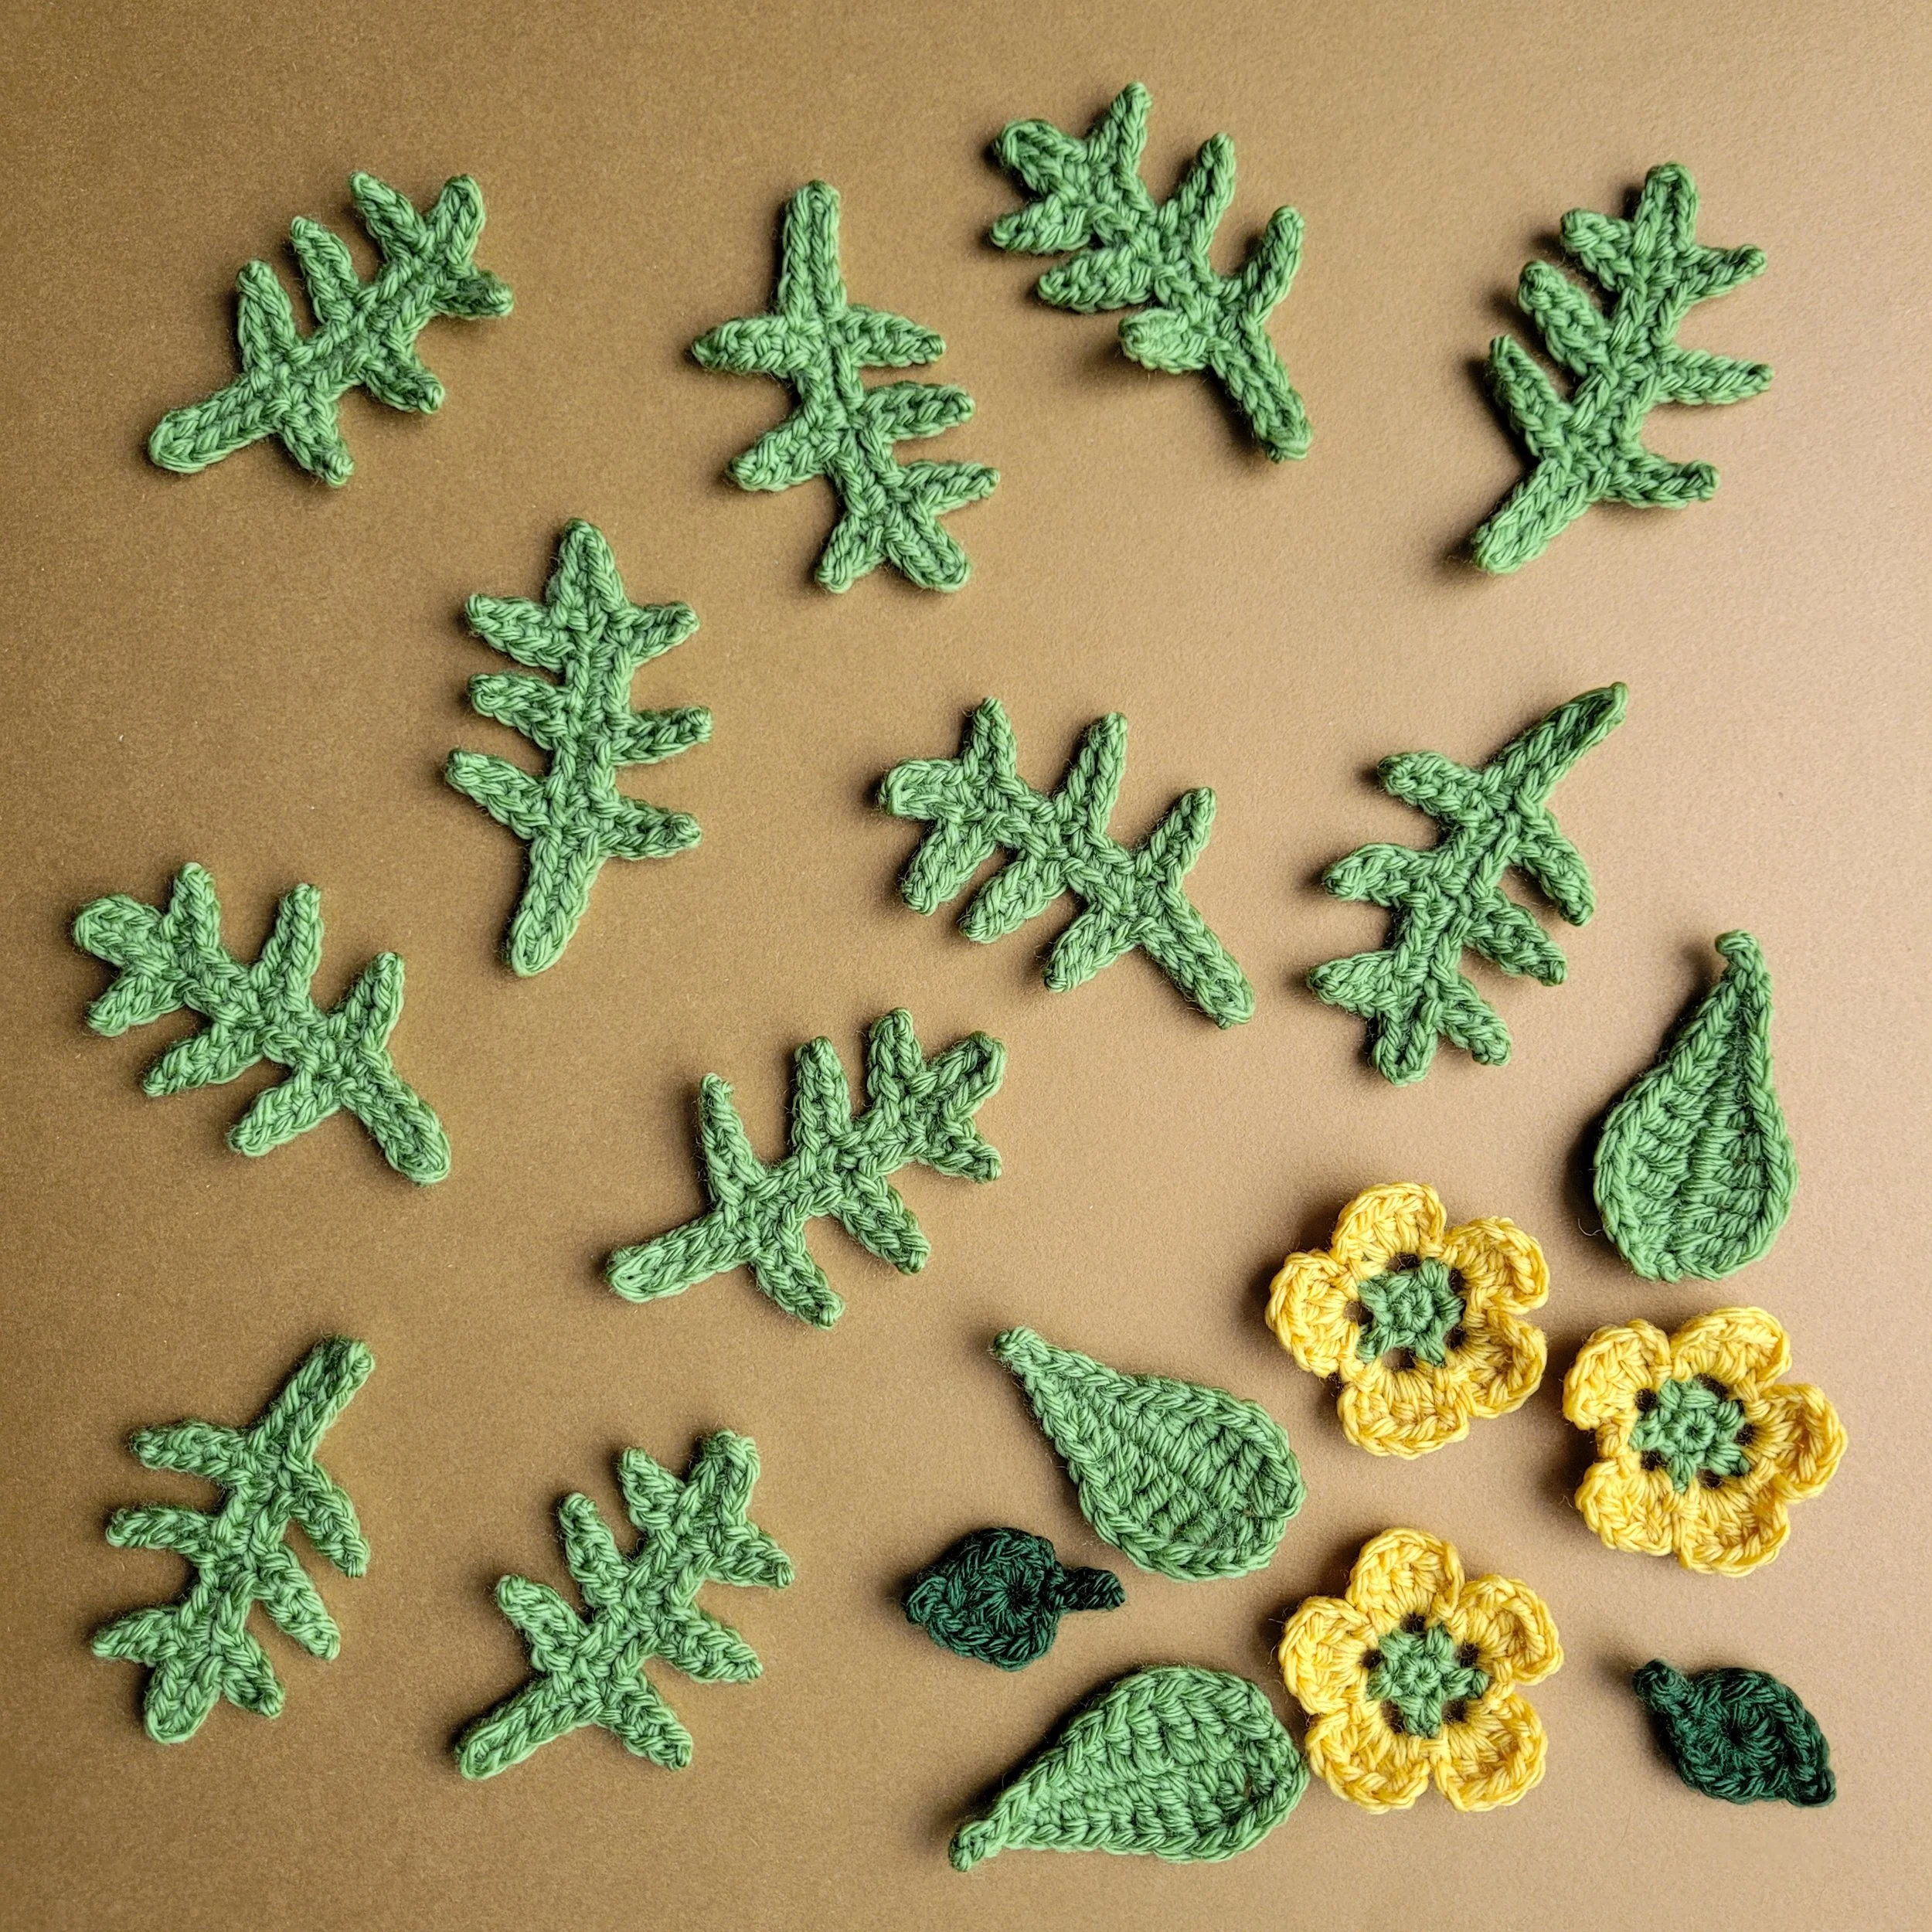
These leaves belong to the tansyleaf tansyaster (also known as the Tahoka daisy). I’m in the process of picking just the right colors for the flowers, but in the meantime, I thought I might design the leaves. I actually Googled “What is a tansyleaf” and learned that tansyasters have multi-lobed, fern-like foliage, which grows from a branched stem.
This project involves a lot of research! I’m really enjoying learning all about the plants that are native to the Colorado Rocky Mountains.
March 27, 2022
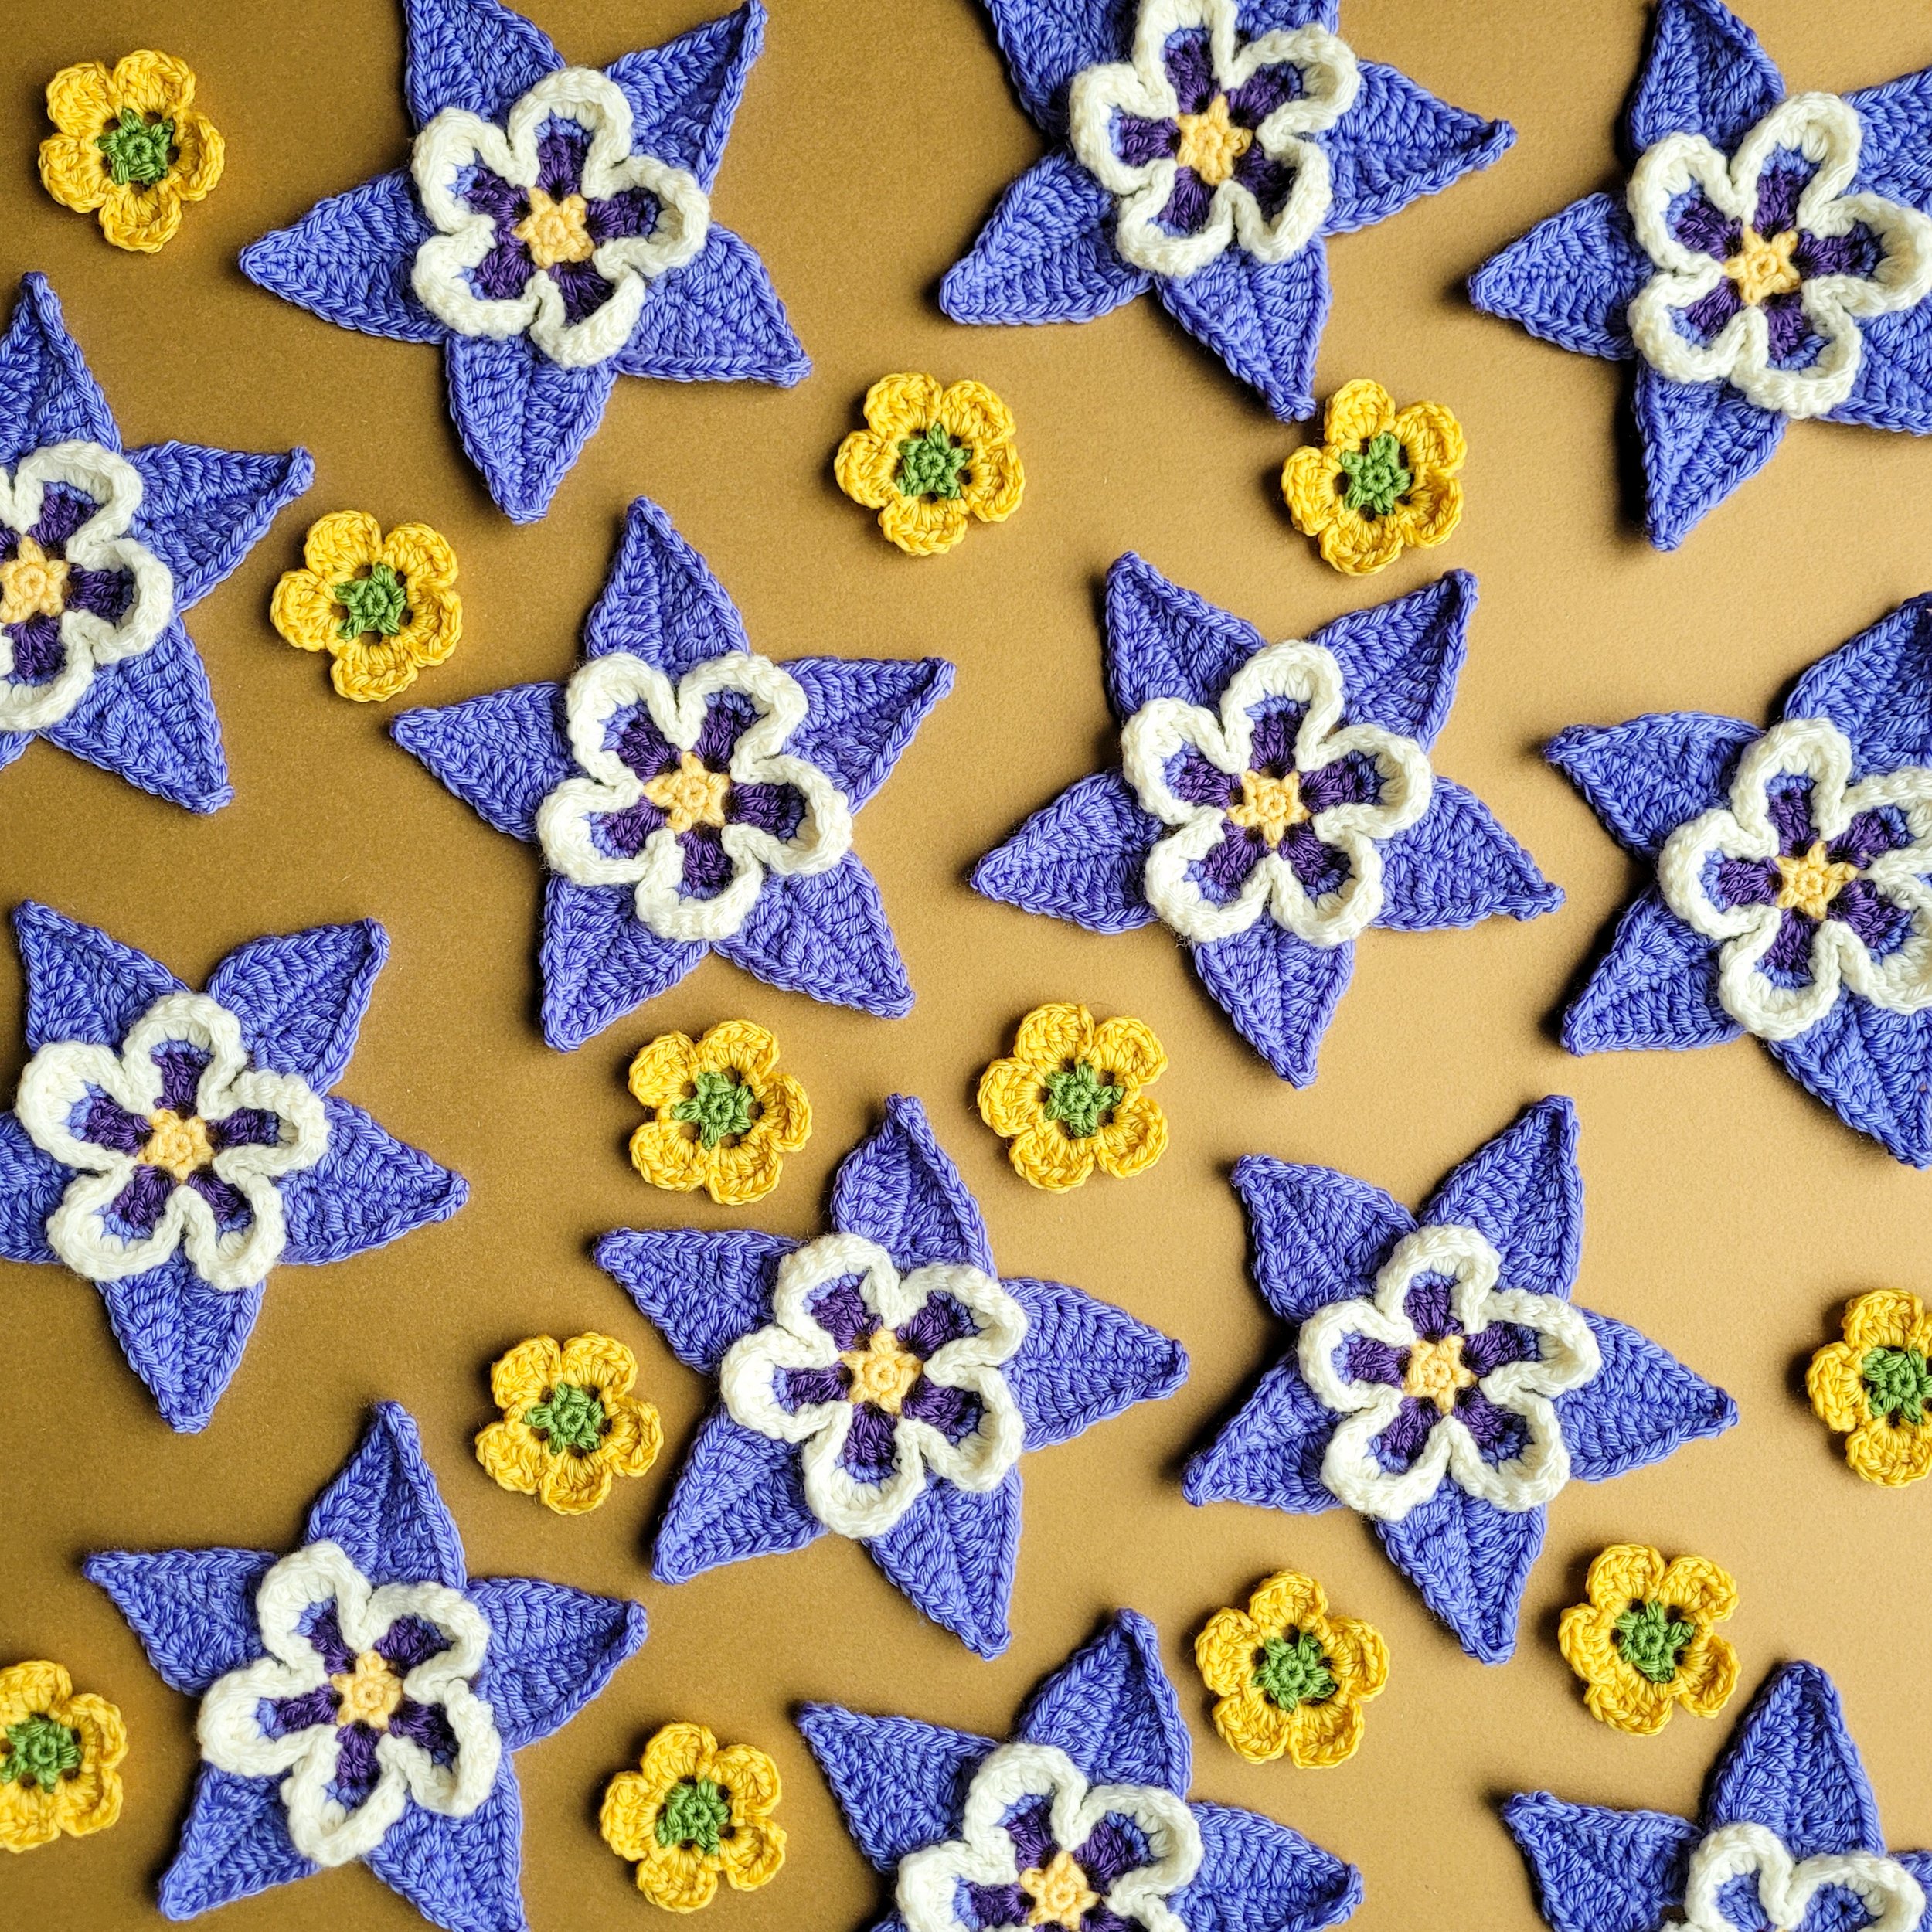
These columbines are a lot of fun to make! Can you tell? I can’t stop making them! I even discovered that I can use the first few rounds of the pattern to make some pretty yellow alpine buttercups too.
March 20, 2022
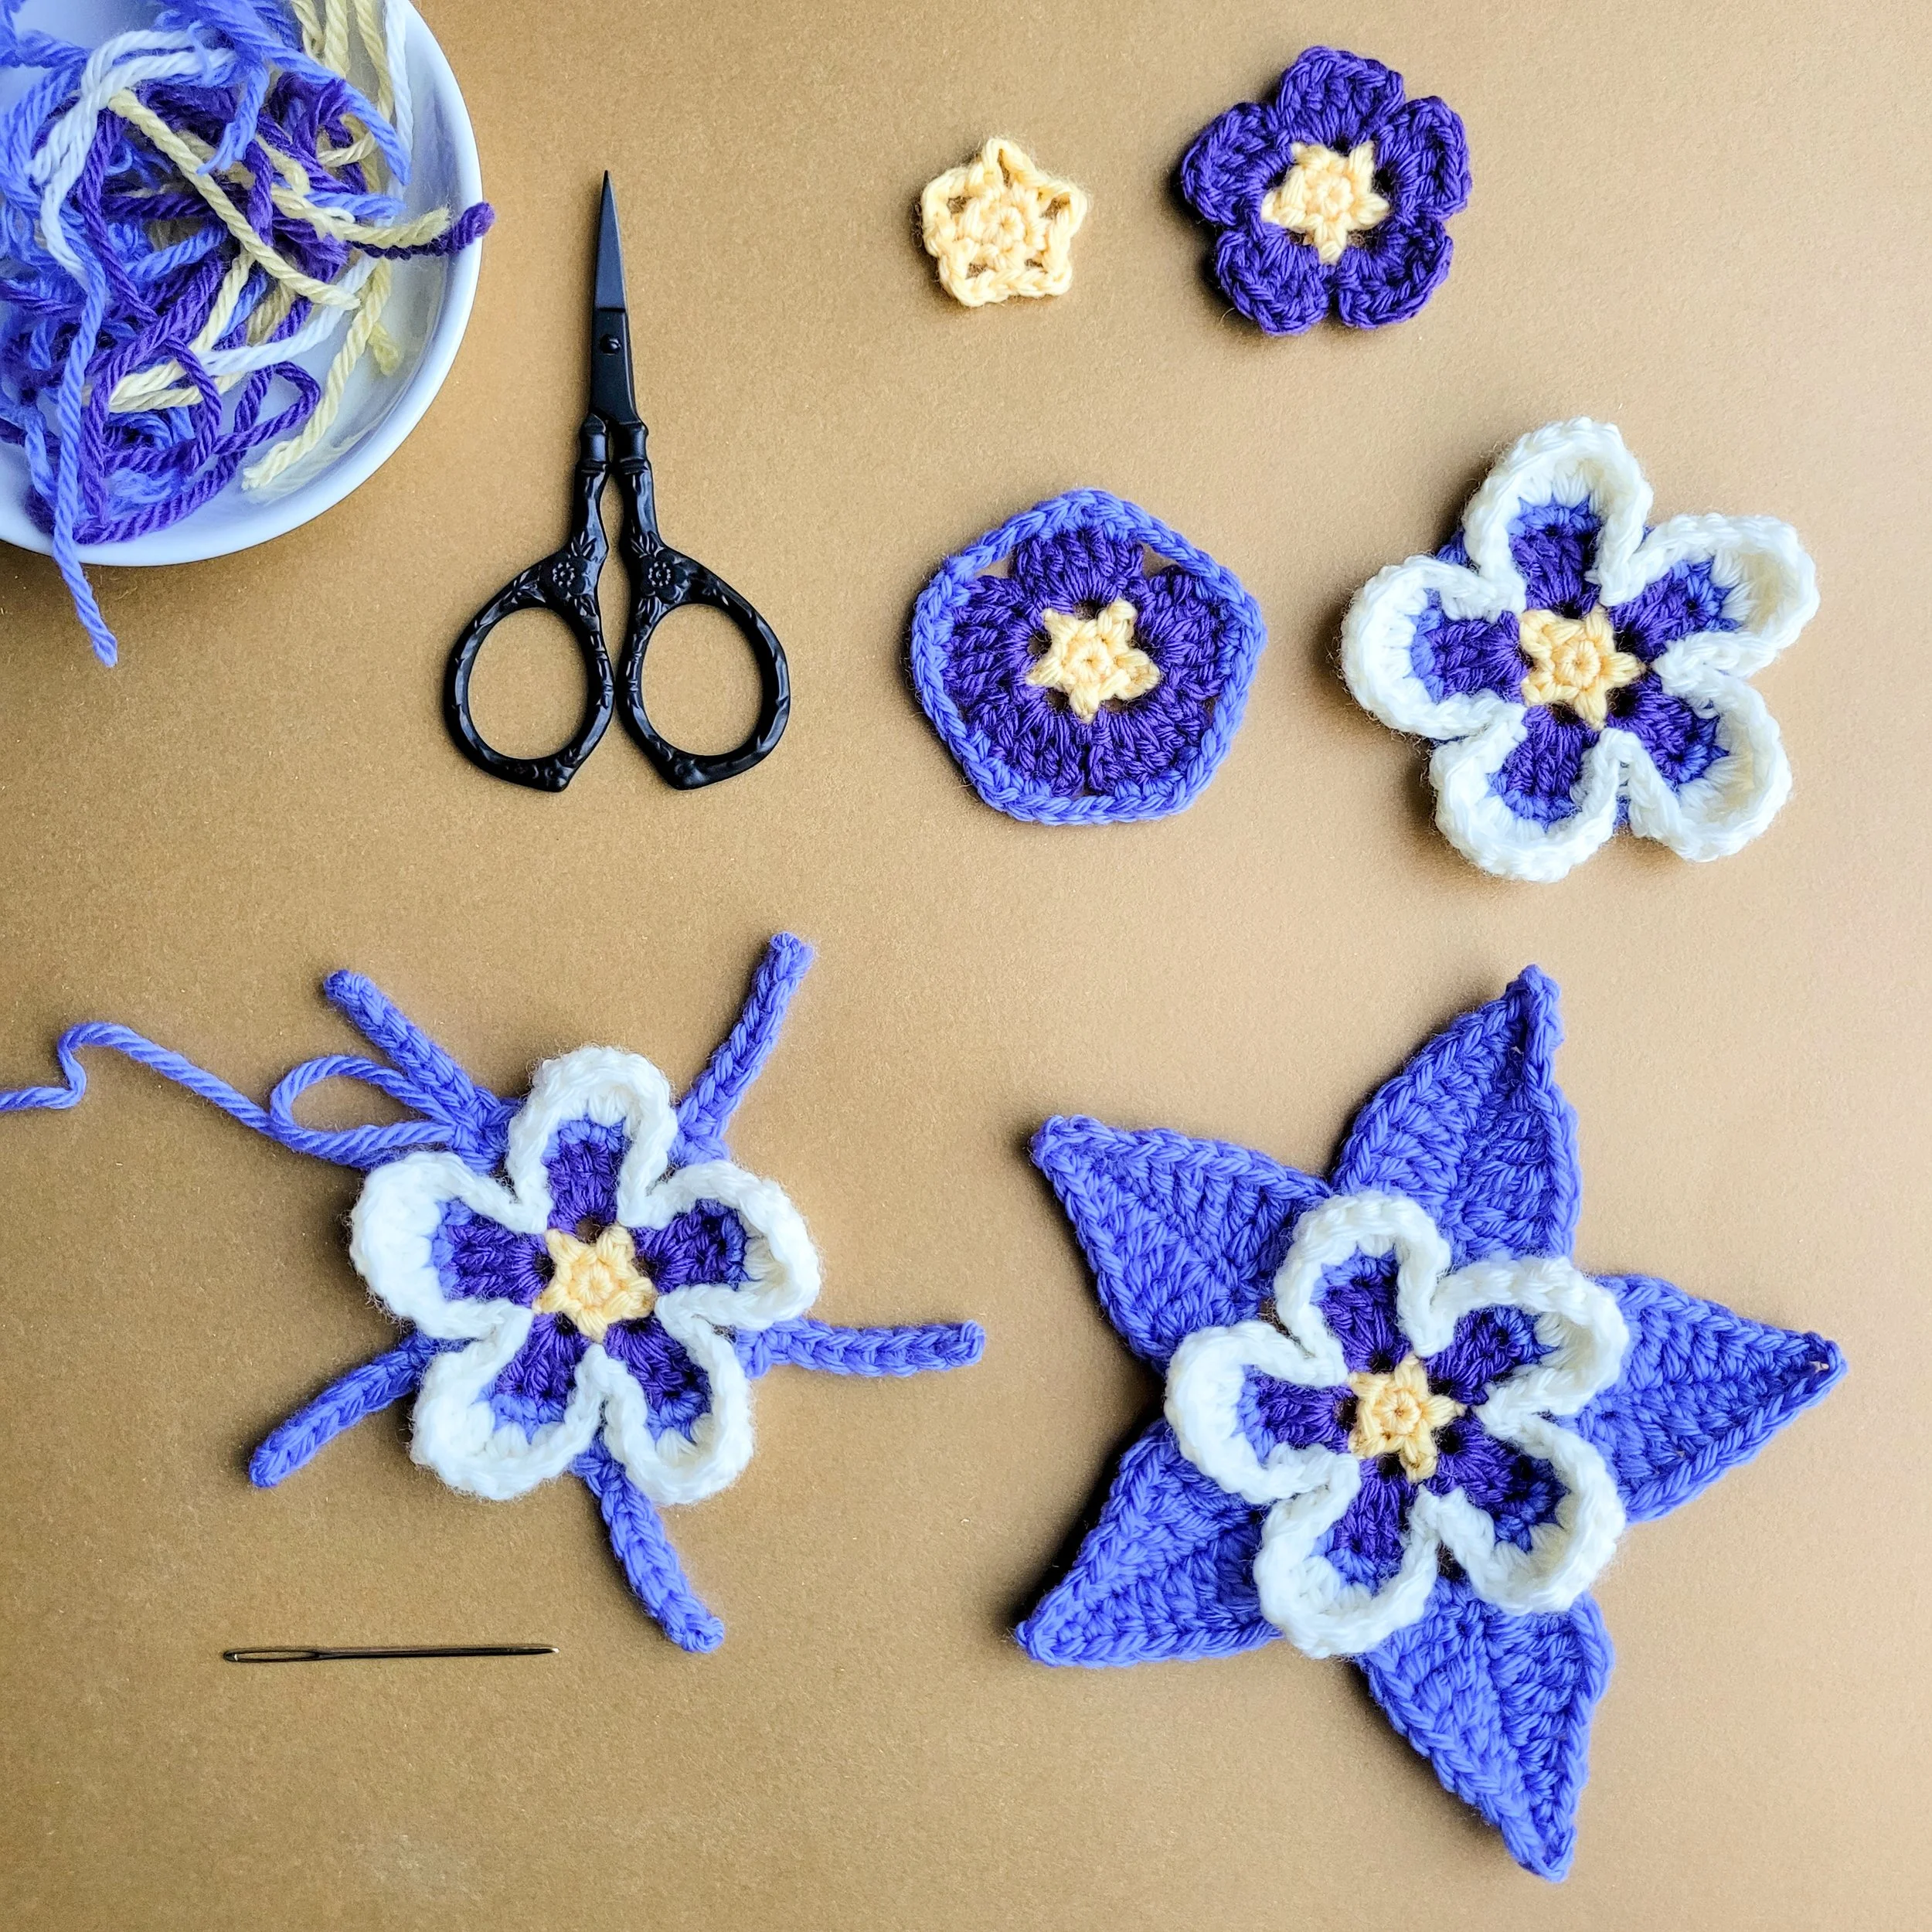
I found the perfect colors for my blue columbines. I’m using Cascade 220 Superwash Sport in lemon (820), mulberry purple (269), periwinkle (844), and ecru (817). After a lot of searching, I decided on Cascade Superwash for this project because of the wide range of colors in this line. Sport will be the perfect weight because I plan on layering these applique flowers and I don’t want the finished blanket to be too heavy.
I spent some time on the pattern this week as well. It takes 7 rounds to make this columbine. The first tiny yellow motif in the photo shows the flower after round 2. Each flower after that represents the progress after 1 round.
March 6, 2022
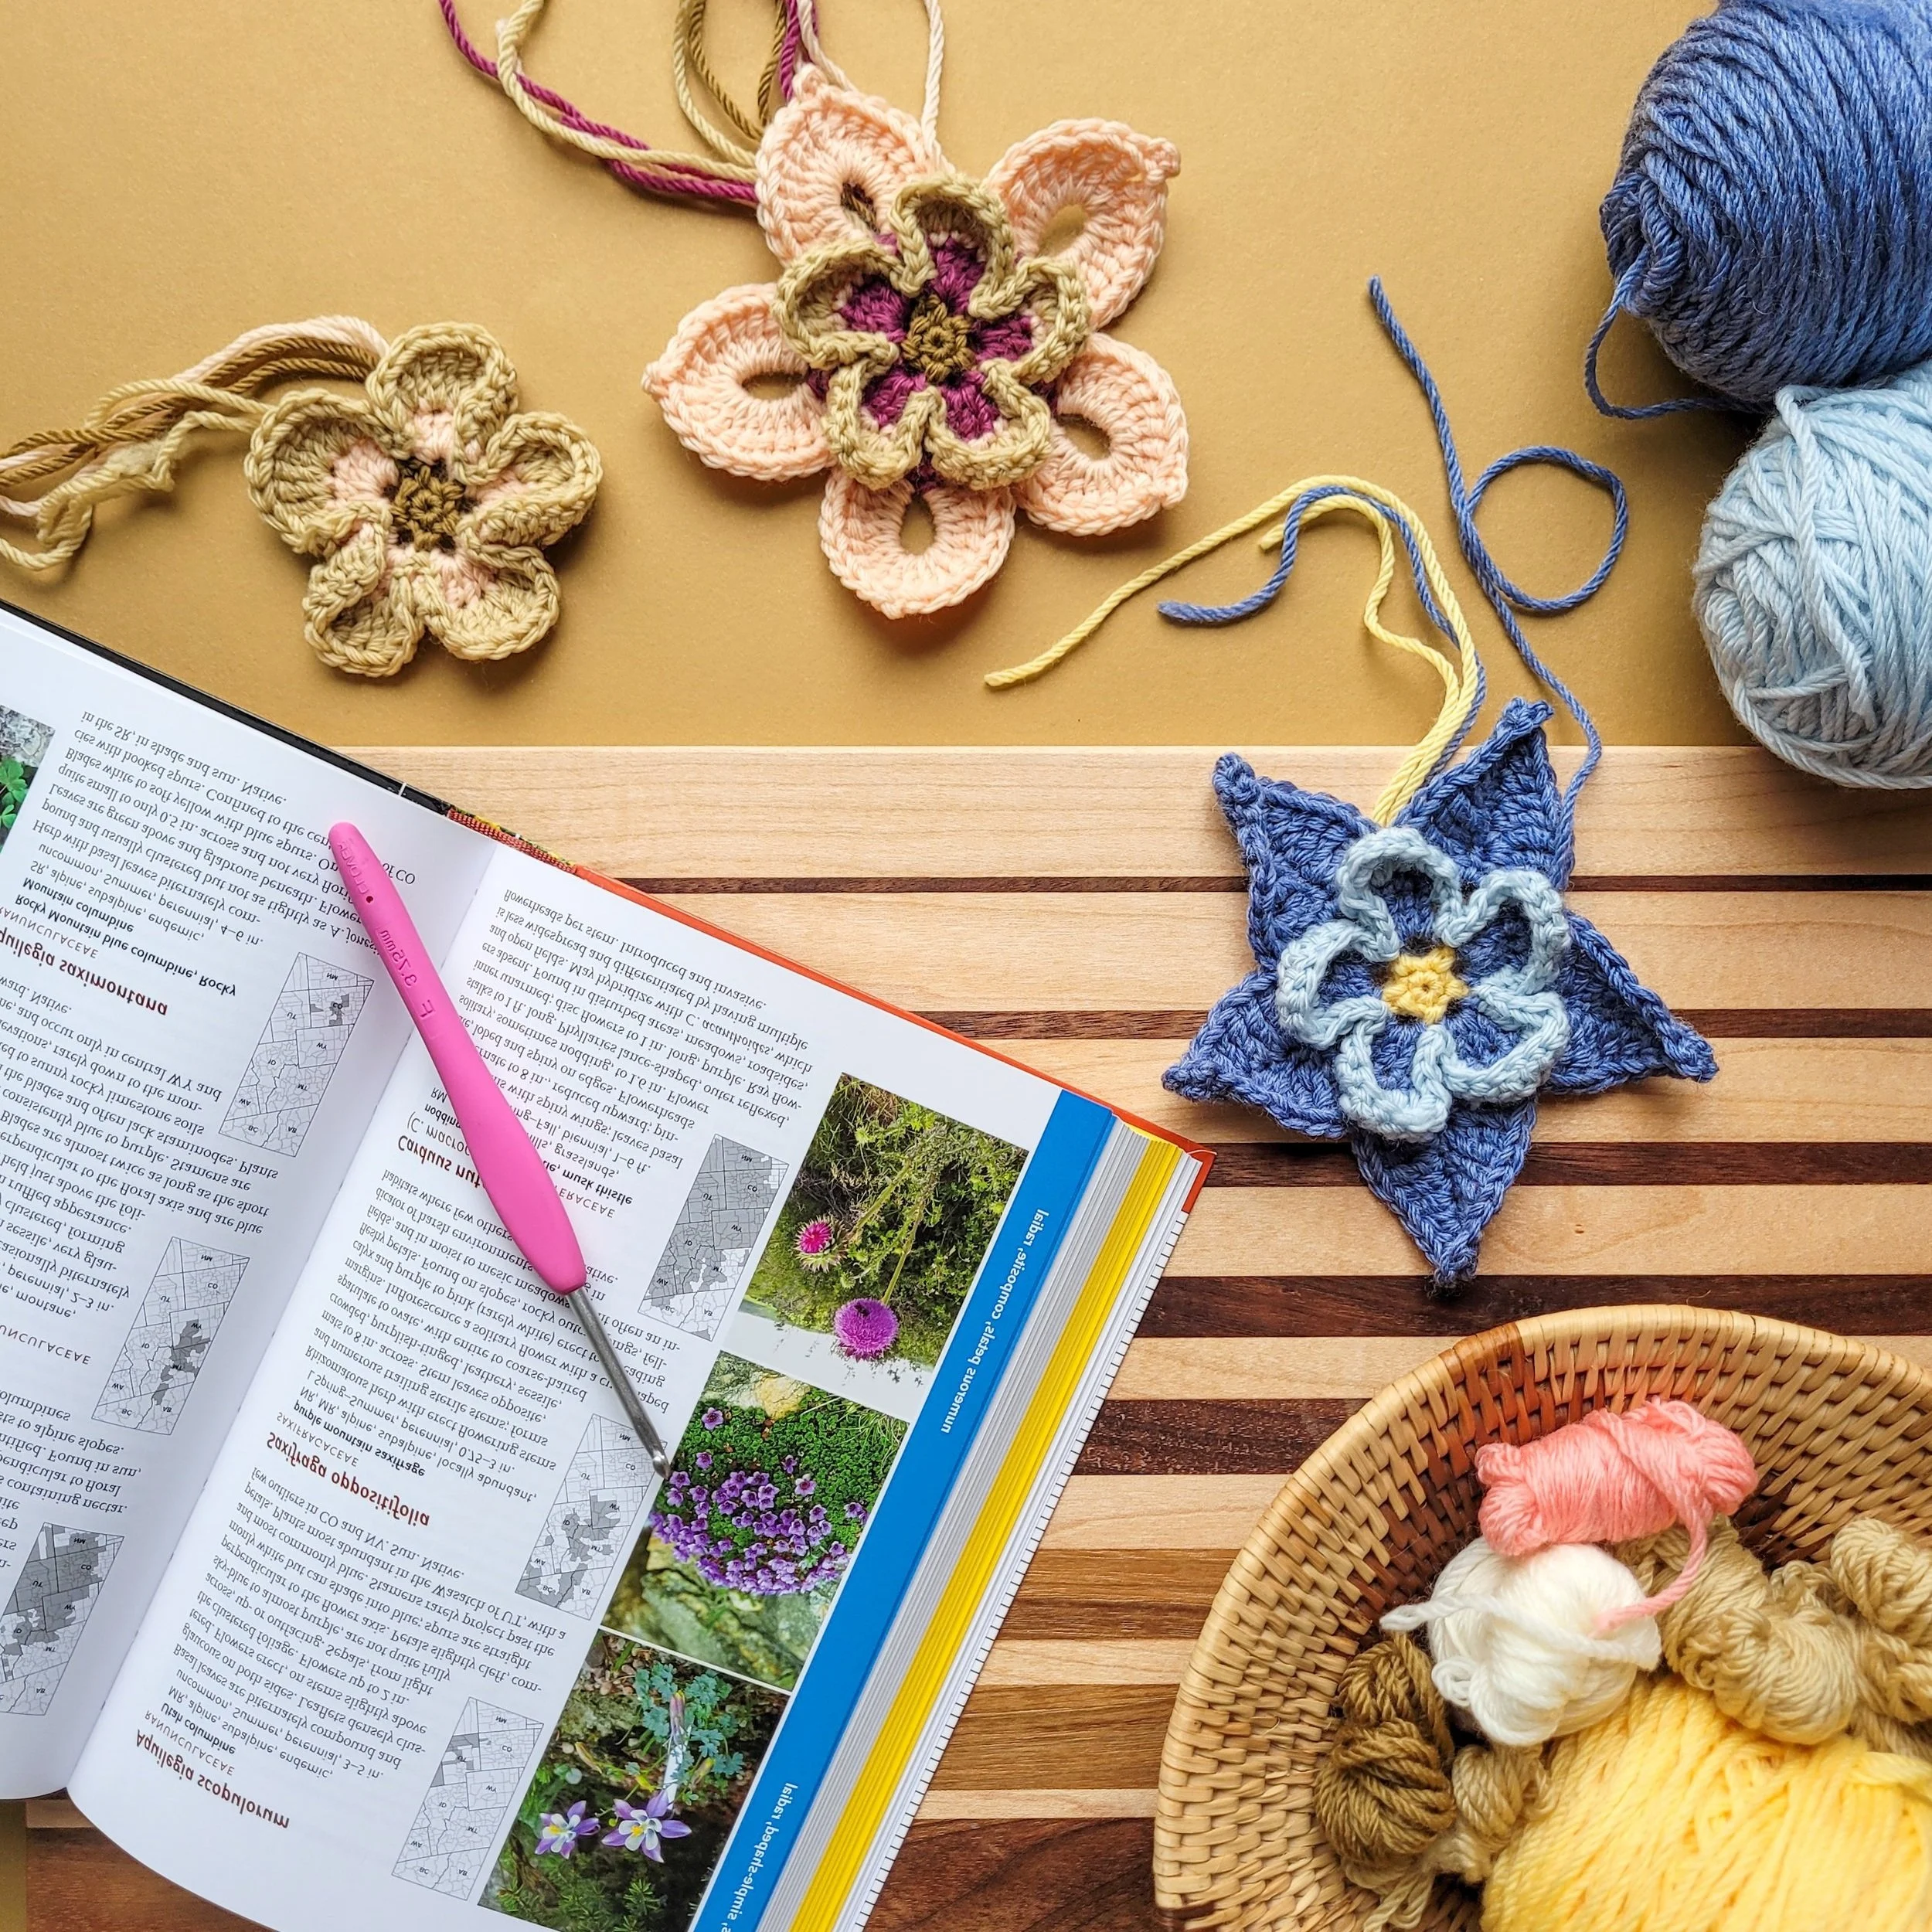
This morning I’m working out how to make the next motif for my wildflower blanket. The blue columbine is the state flower of Colorado, so of course it has to be included in my blanket.
Sometimes it’s hard to remember to stop and take a photo when you’re deep in a project, but I’m glad I did today! Here you can see the different iterations, as I tried out various petal shapes, leading up to the final design. The colors aren’t accurate though — when I’m working on a design I tend to use yarns from my scrap basket first. Only once I’ve got the design down is it “worthy” of the real yarn. I’ve had to shop around for just the right colors for the columbine, which is closer to periwinkle than what I have here. I’m hoping to find the right colors by next weekend so I can make a true columbine.
February 27, 2022
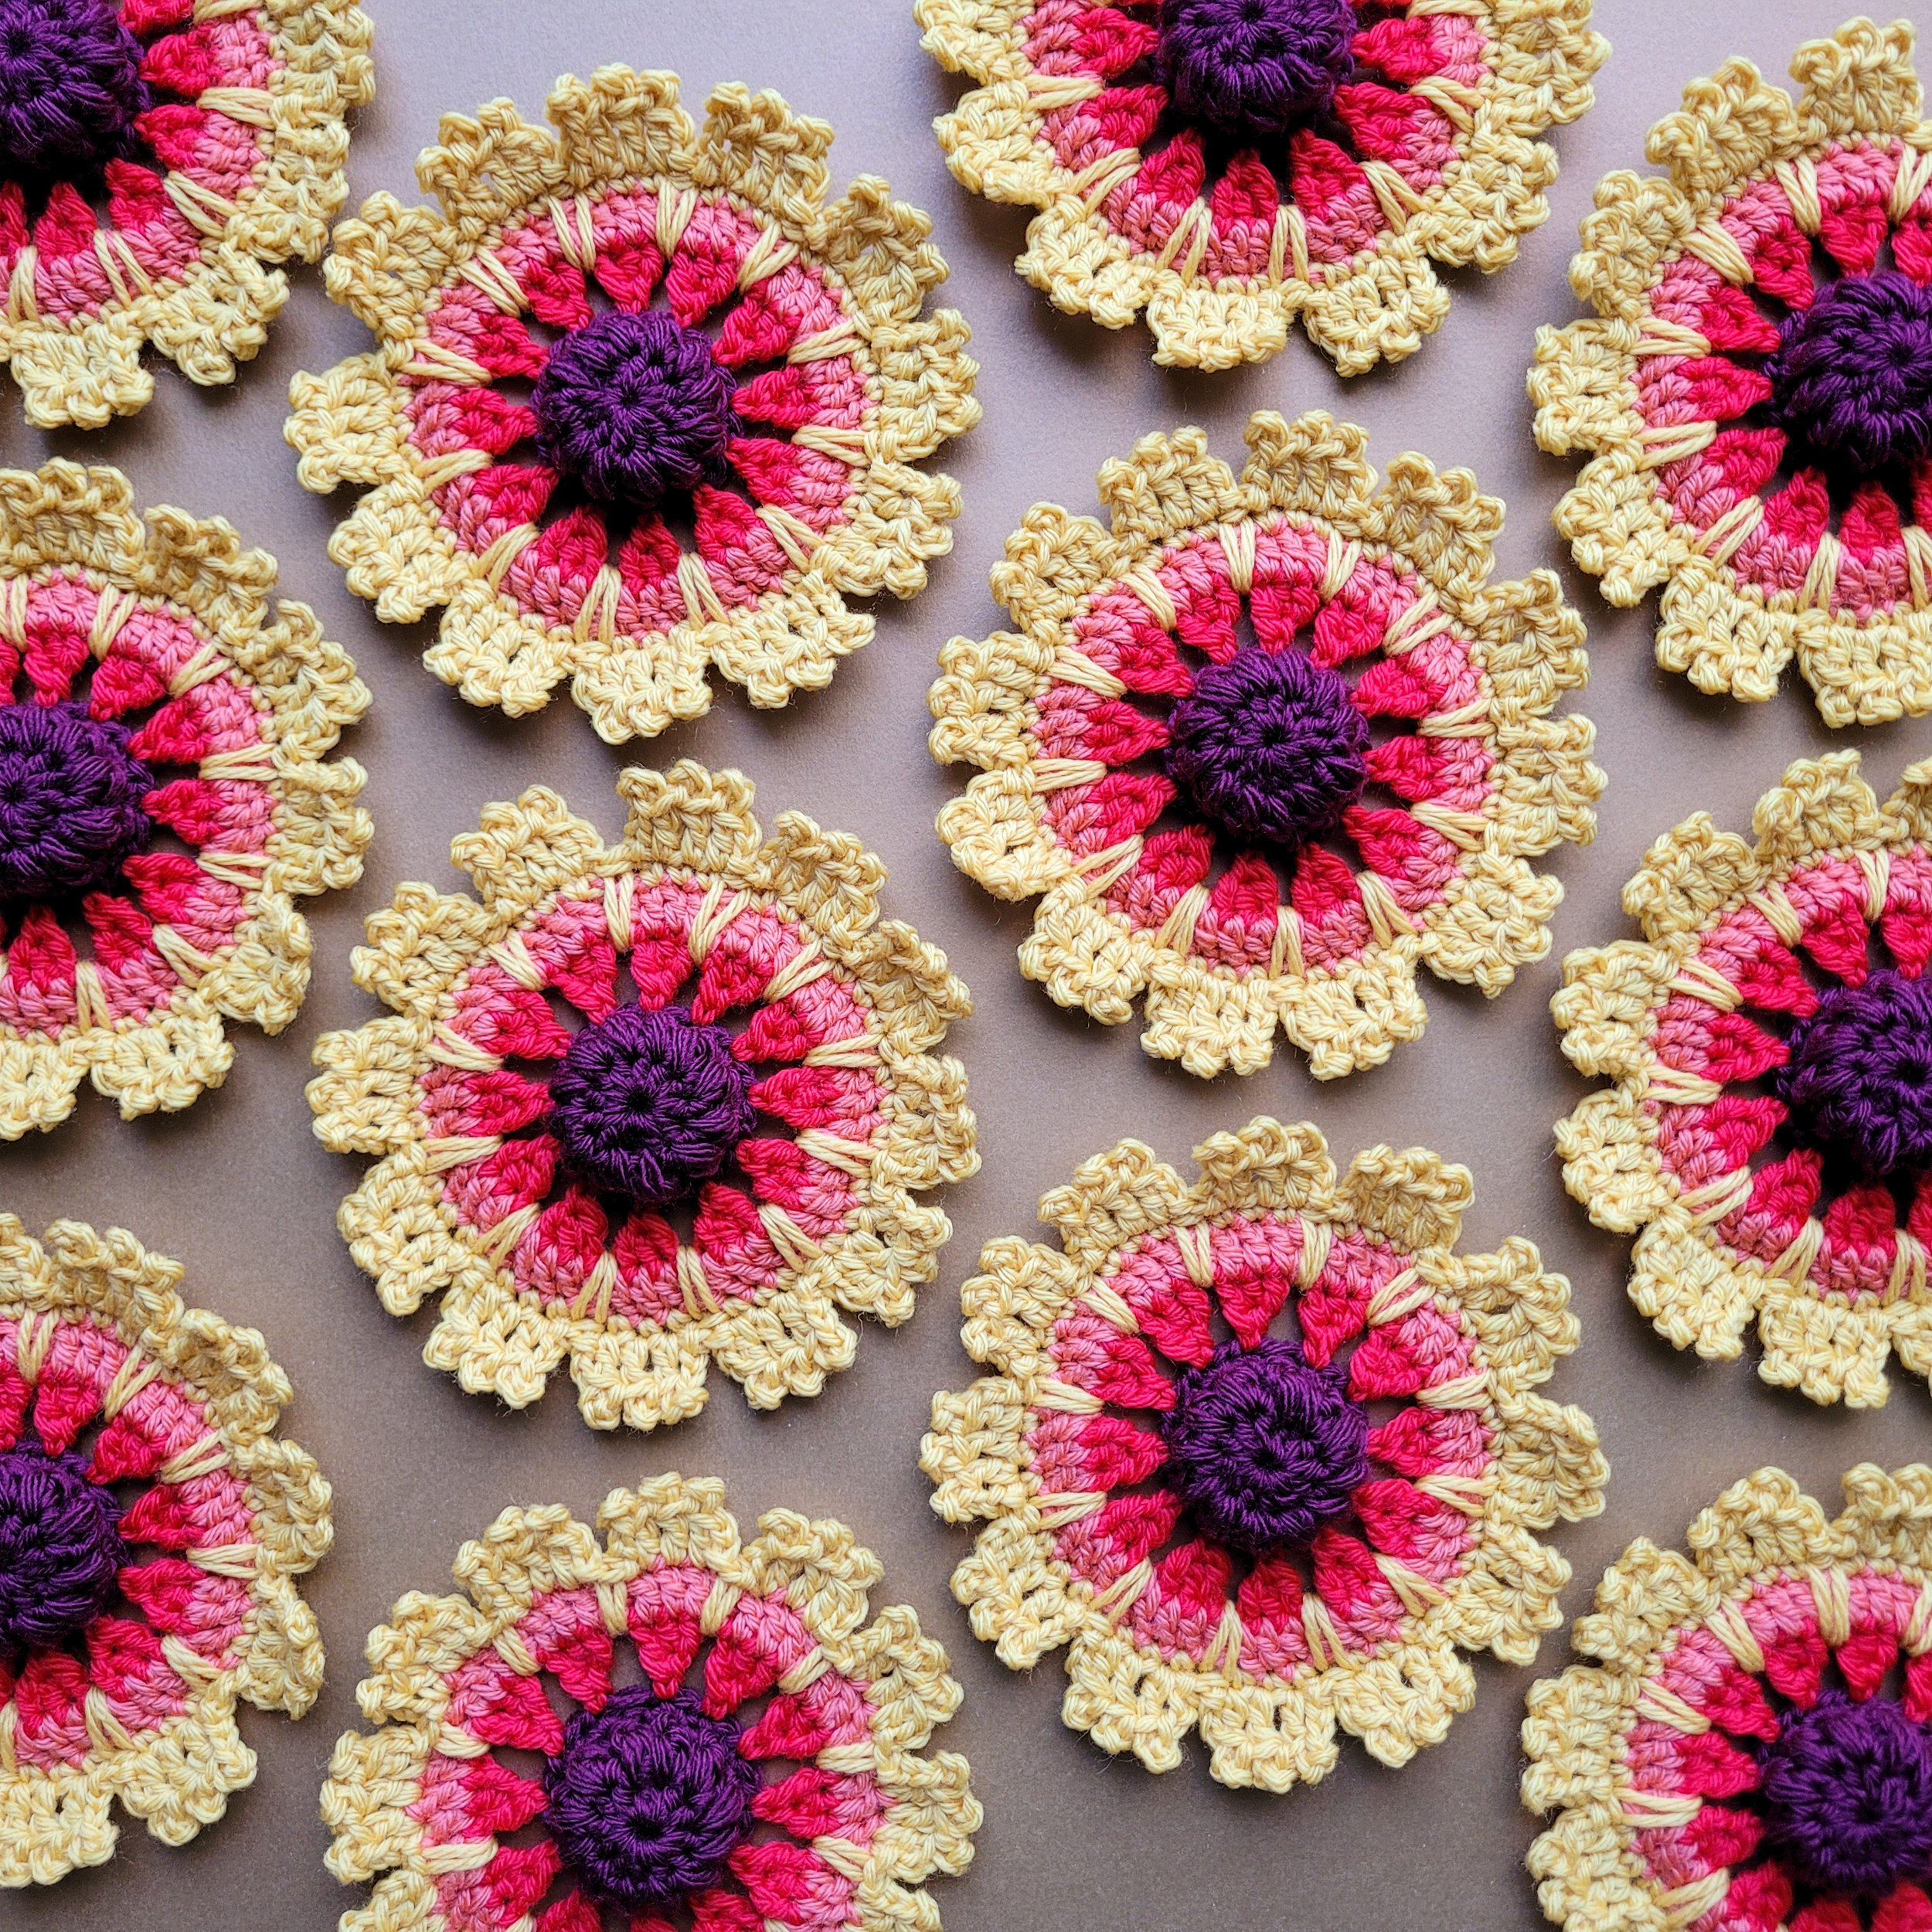
After perfecting the design, I made a dozen more blanket flowers over the course of the week. Having to make so many of these might seem tedious to some, but I really enjoy it. And it gave me many opportunities to test the pattern and make sure it’s accurate. I’m so pleased with how these are turning out!
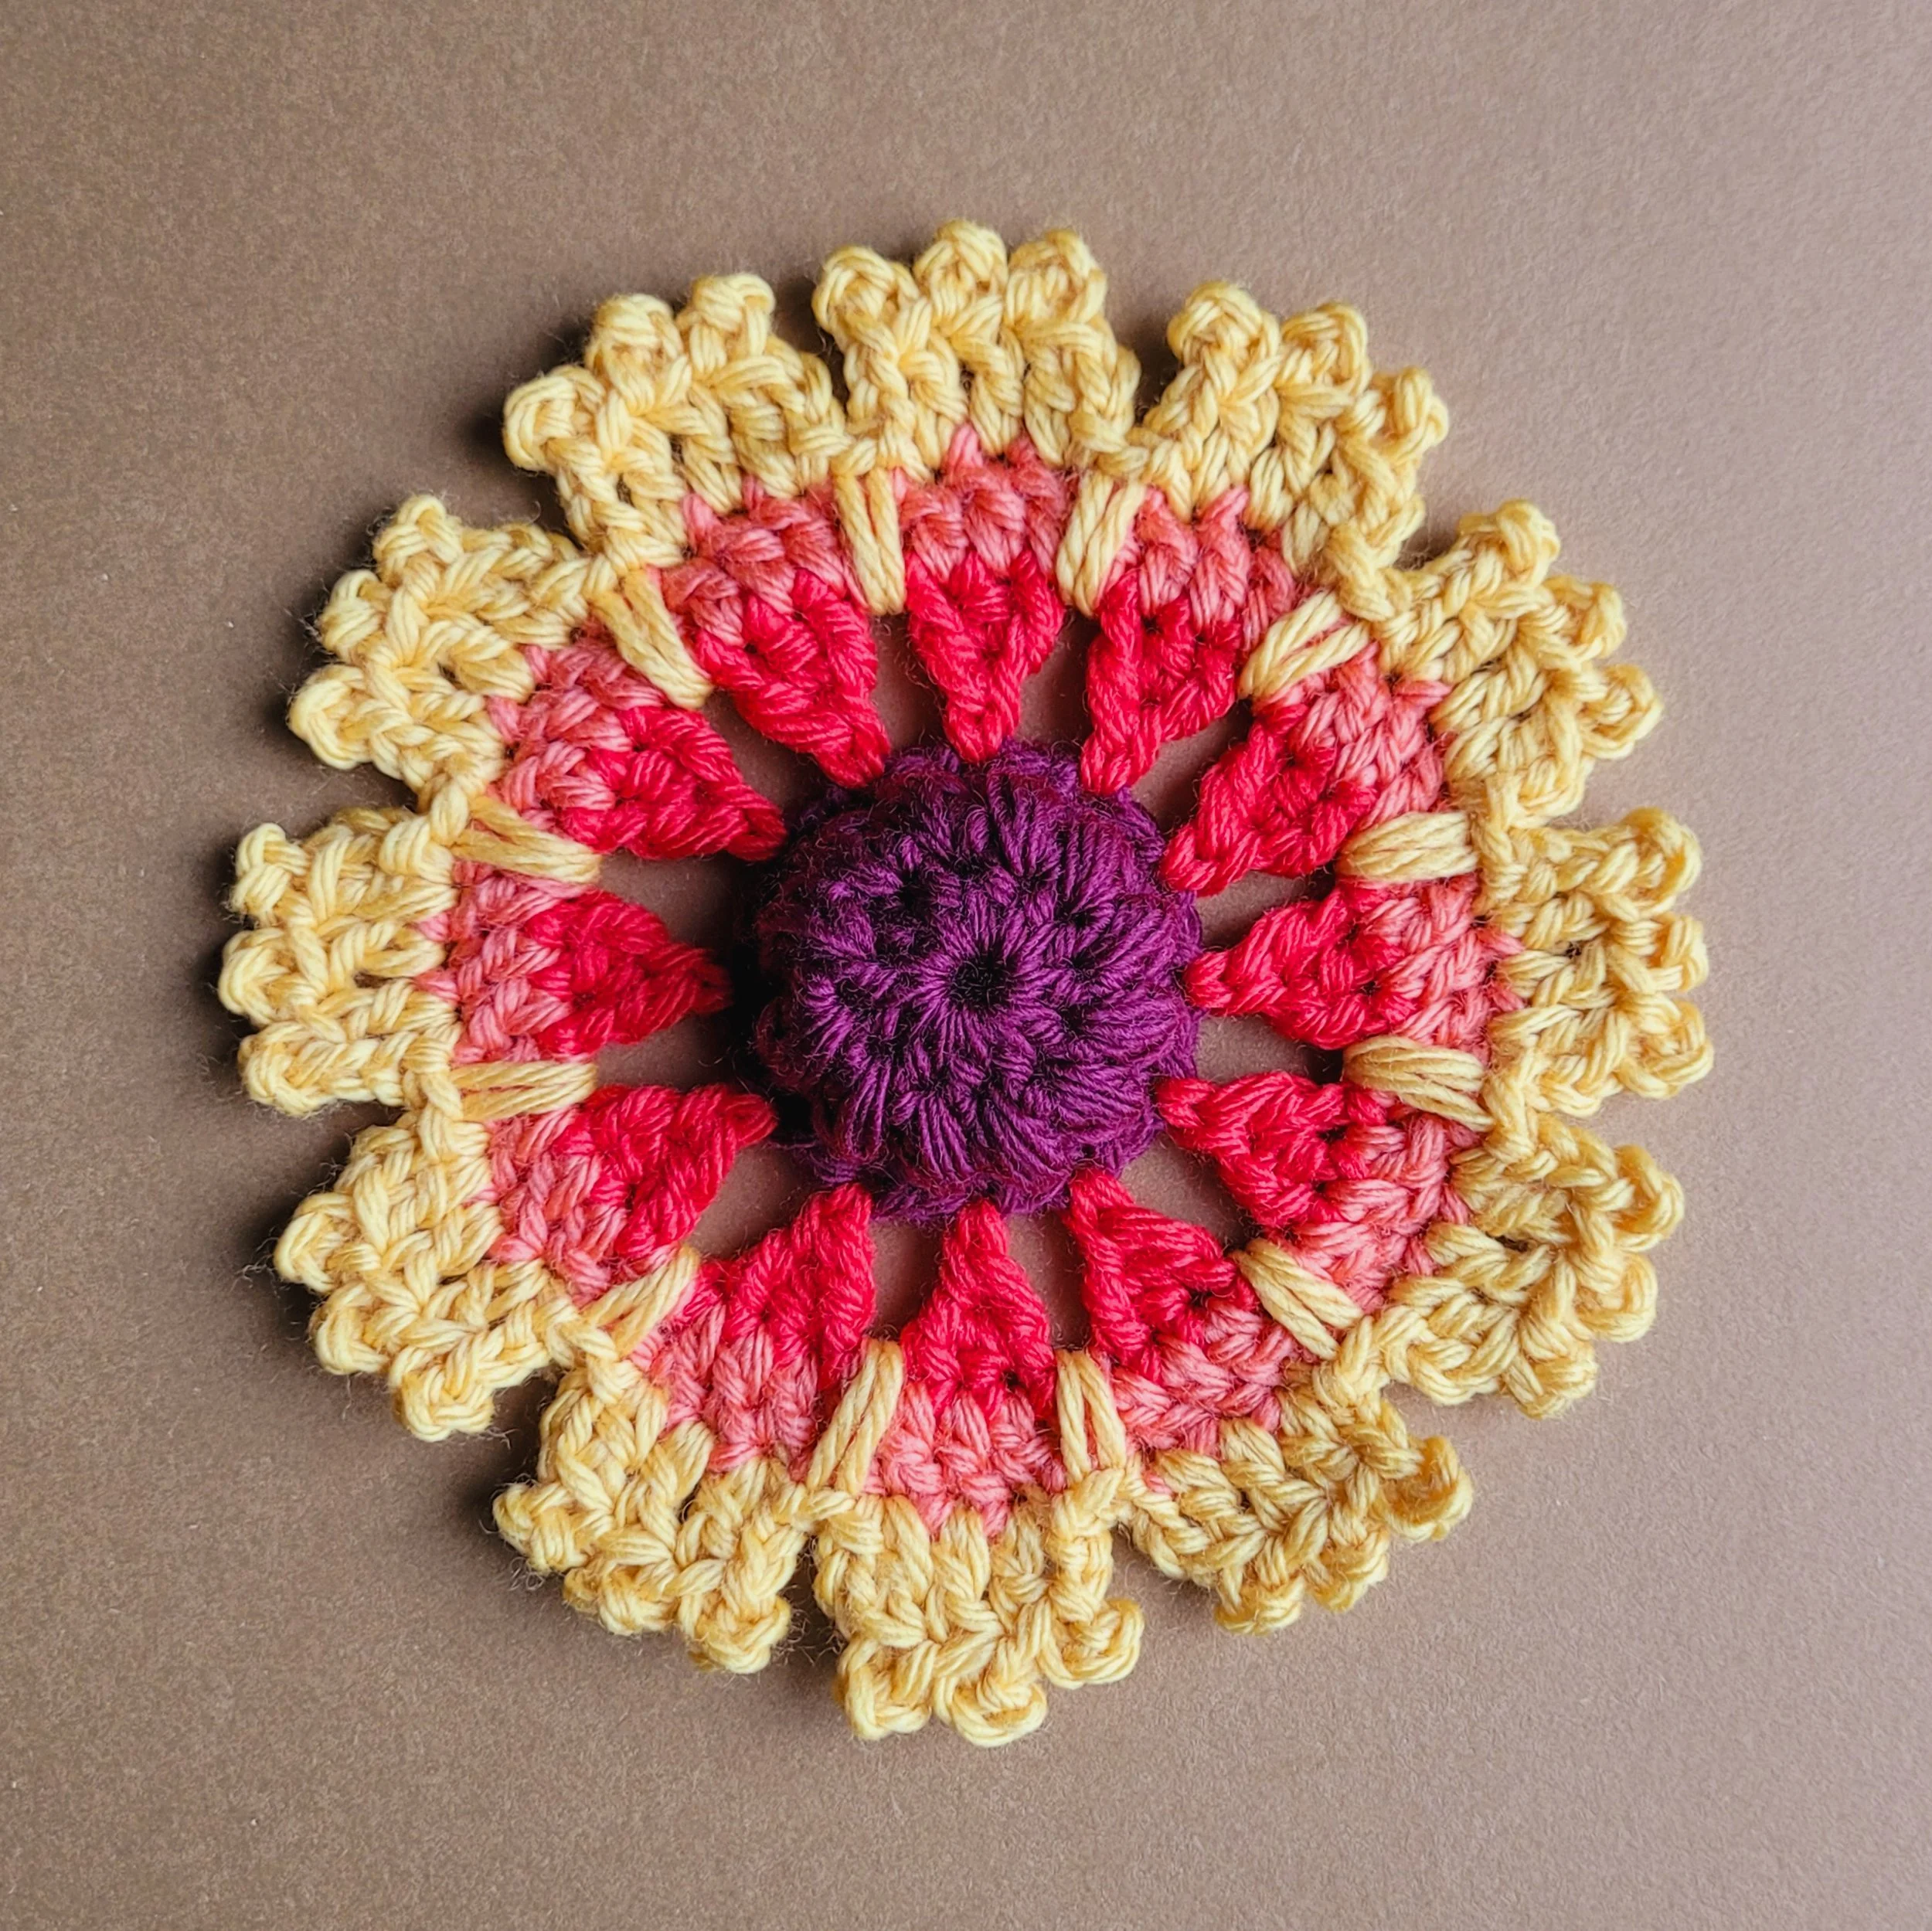
February 20, 2022
I was looking through my wildflower field guide this week for inspiration, when I came upon the blanket flower. This gorgeous and unique flower just begged to be crocheted! It took a lot of trial and error, but eventually I came up with a design that I think captures this flower’s unique features: the puffy round center, vibrant colors, and notched petals.
I enjoyed designing this flower so much that I’ve decided to make a wildflower blanket! I’ll design flower motifs based on the flowers found in the Colorado Rocky Mountains. It feels good to be inspired by the place where I live and to learn more about the flowers in my backyard. I know I’m going to have so much fun exploring this topic and designing a blanket around it. And better yet, I can’t wait to go hiking this spring and see what wildflowers I can find.