
Adjustable Ring Crochet Tutorial
There are many ways to create a magic ring in crochet, but this adjustable ring method is the only one I’ve found that truly stays closed. It creates a neat center with no hole, feels more secure than a standard magic ring, and is surprisingly easy to work once you know the steps. In this tutorial, I’ll show you exactly how I make my adjustable rings for everything from hats and granny squares to floral appliqués and toys.
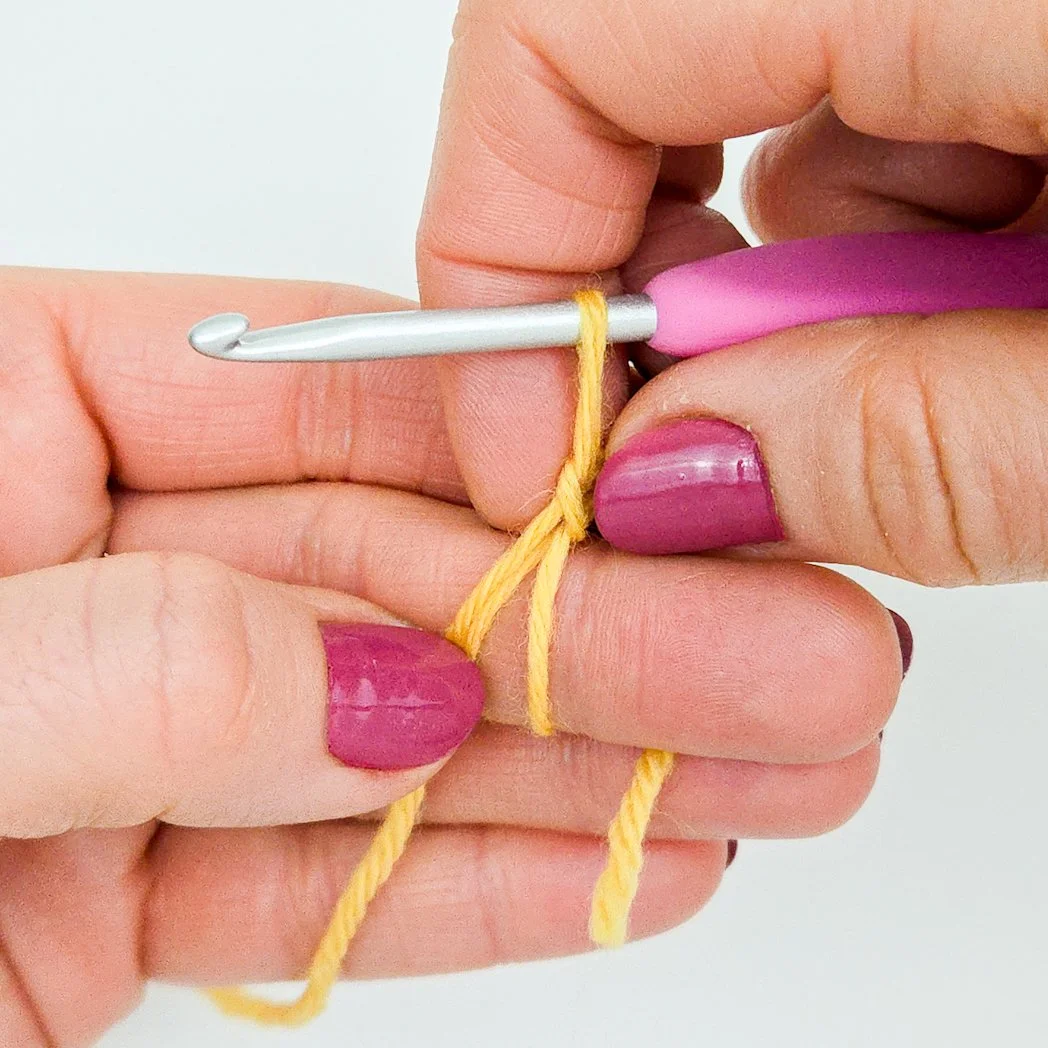
Step 1: Wrap tail end around forefinger clockwise 3 times. Insert hook under first 2 strands.
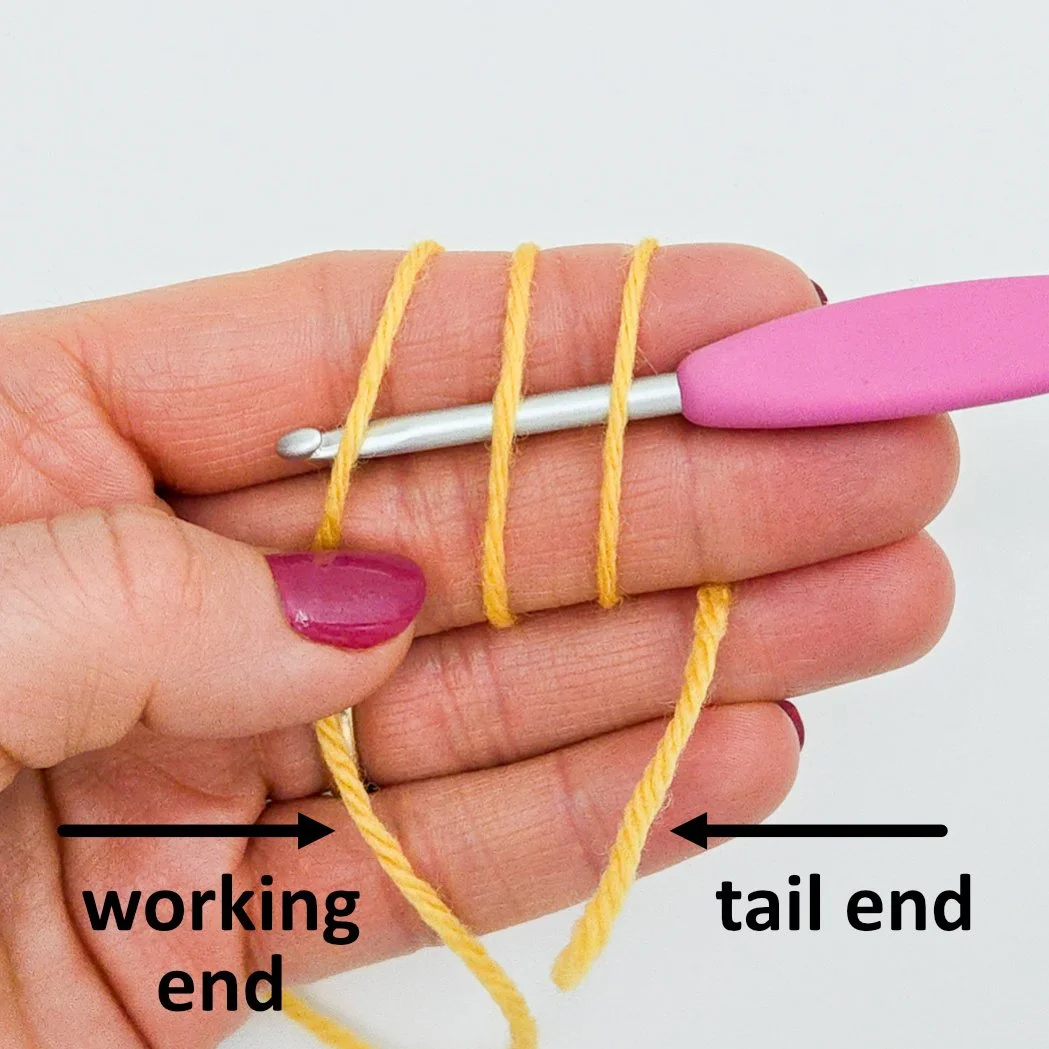
Step 2: Grab 3rd strand with hook and pull it under first 2 strands.
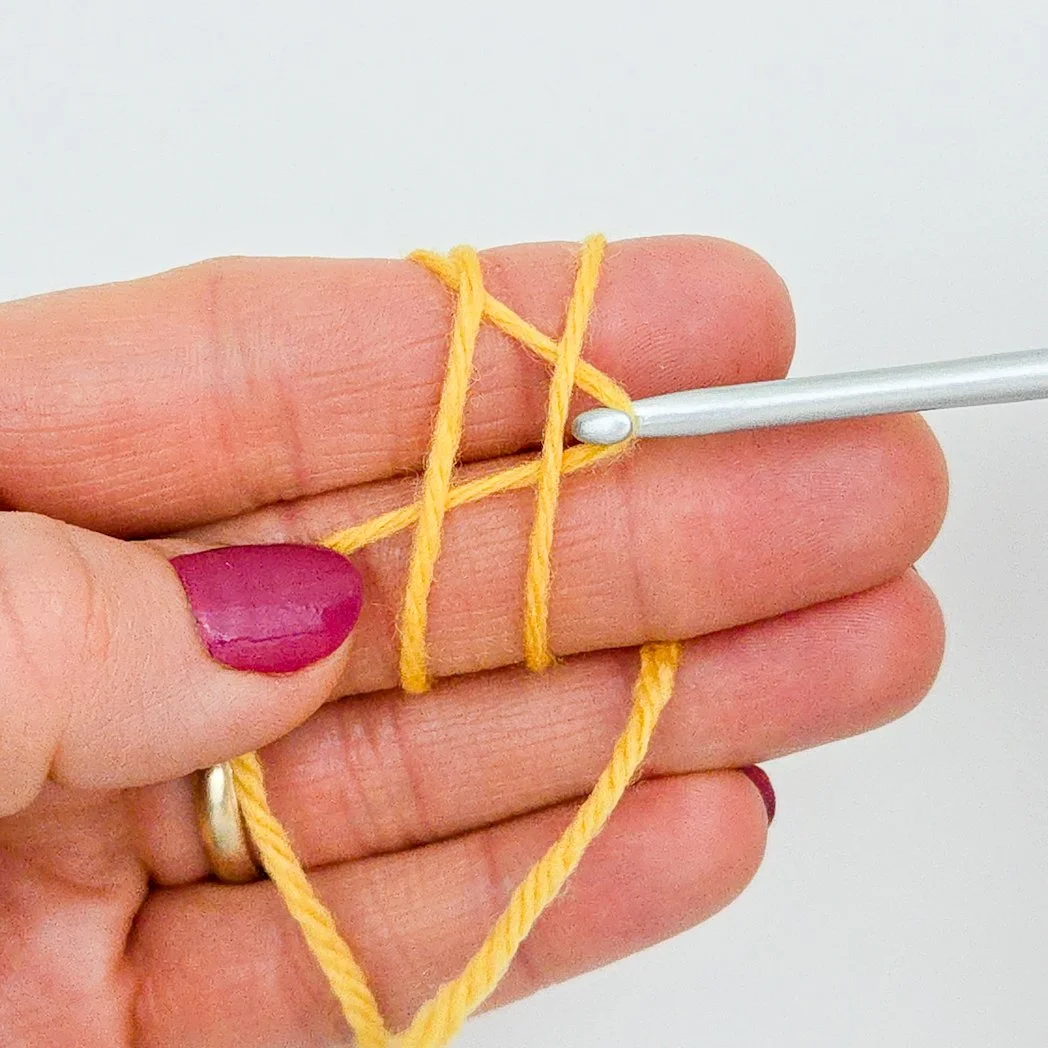
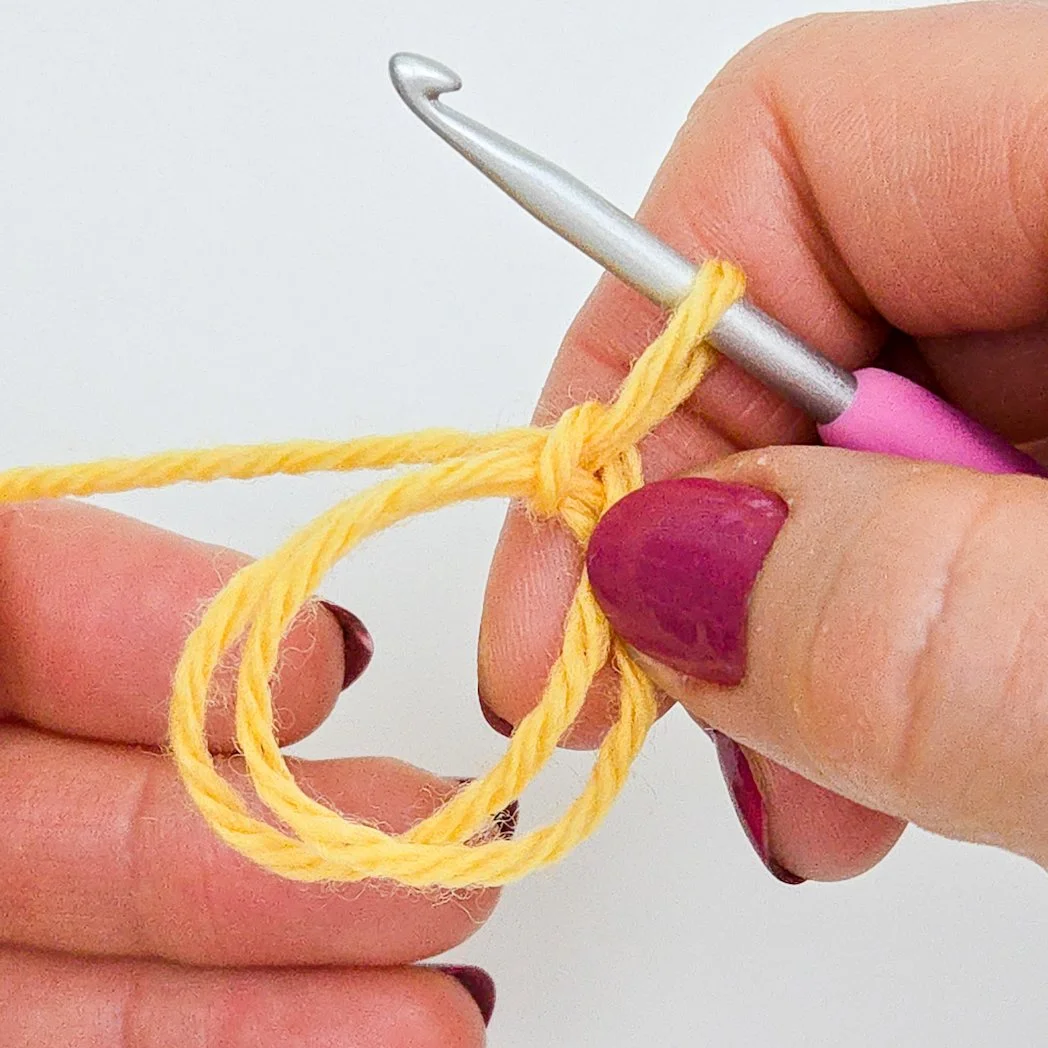
Step 3: Chain 1 to secure: yarn over with the working yarn…
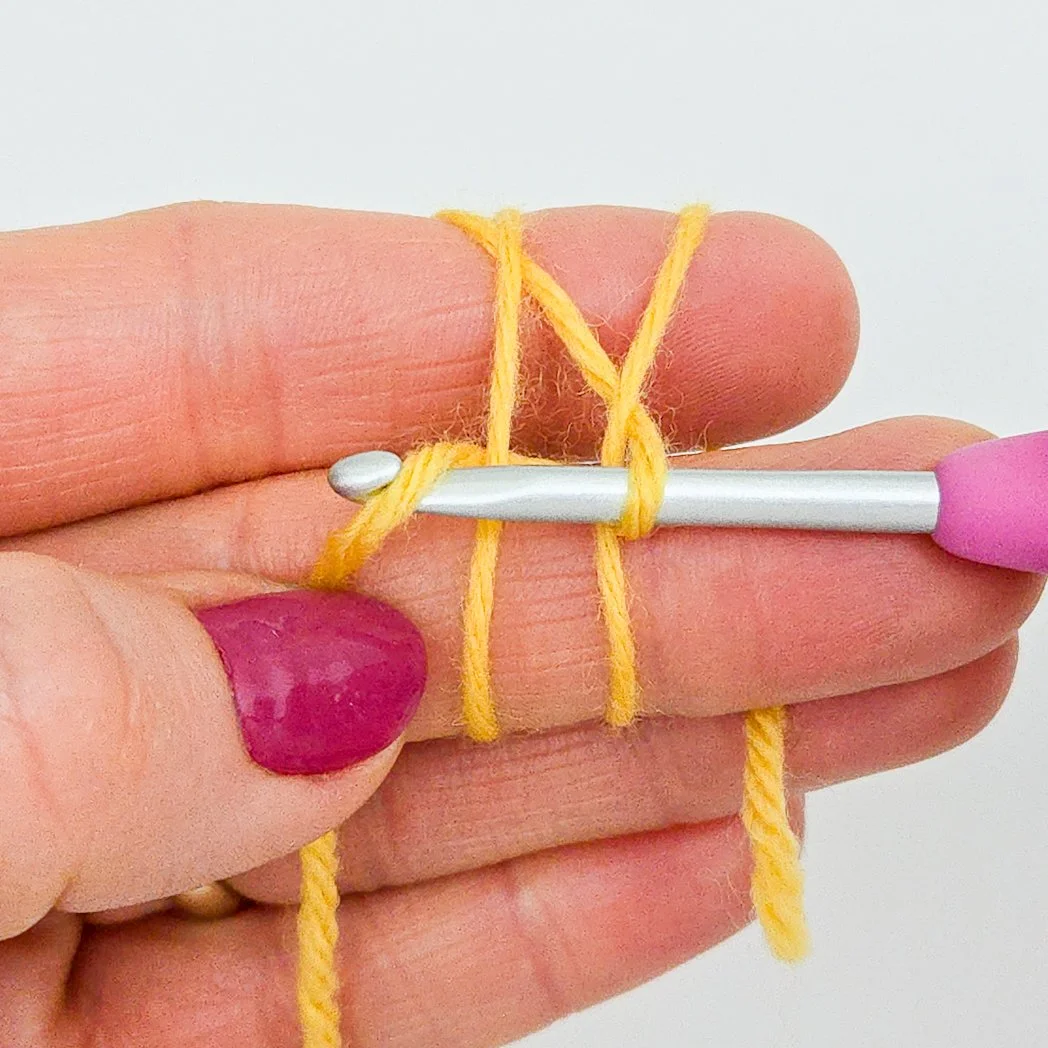
…and pull through loop on hook.
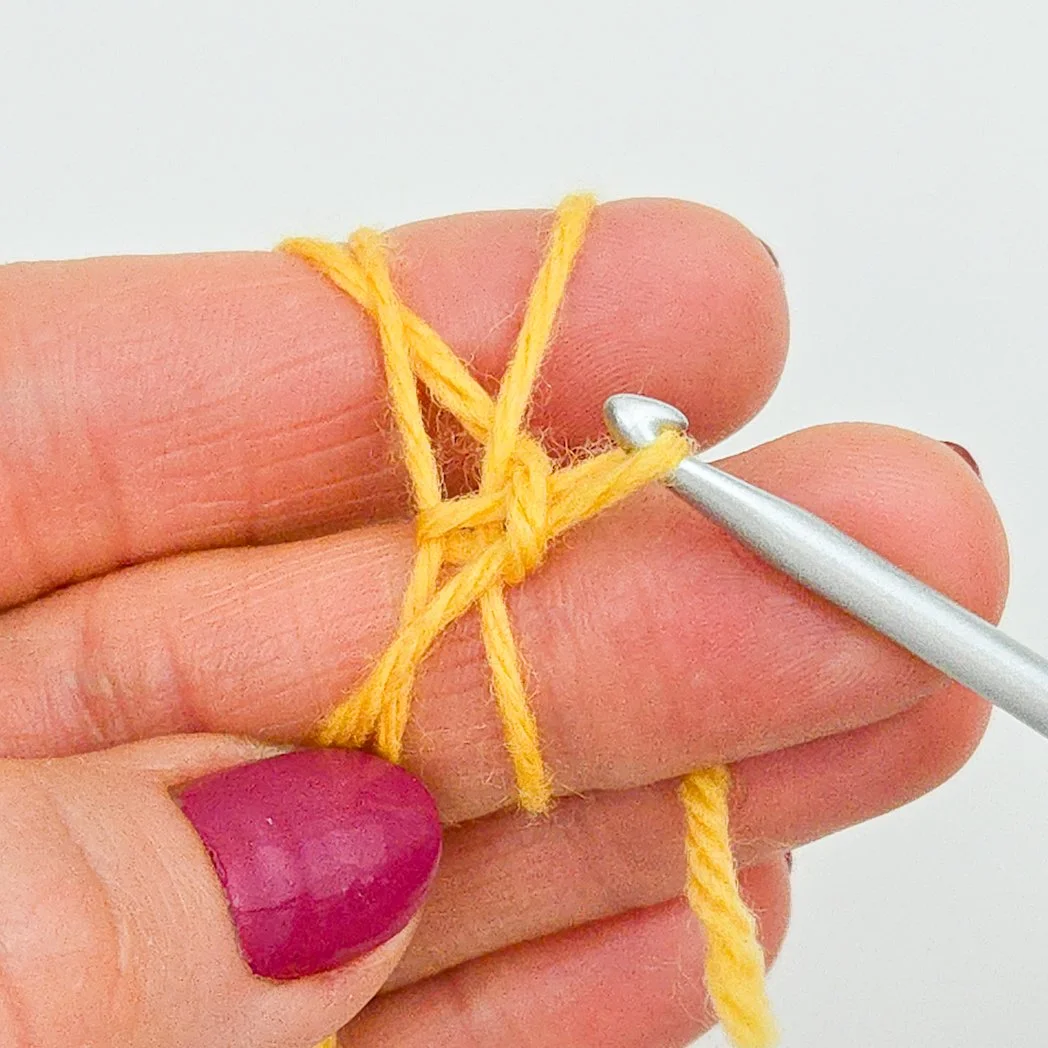
Step 4: Holding the chain you just made, slip adjustable ring off your fingers.
The chain will hold the two loops of the ring together.
Step 5: Work the stitches of the first round into the ring, working over both strands. The photo below shows a single crochet worked into the ring, but you could easily work any type of stitch or combination of stitches into the ring.
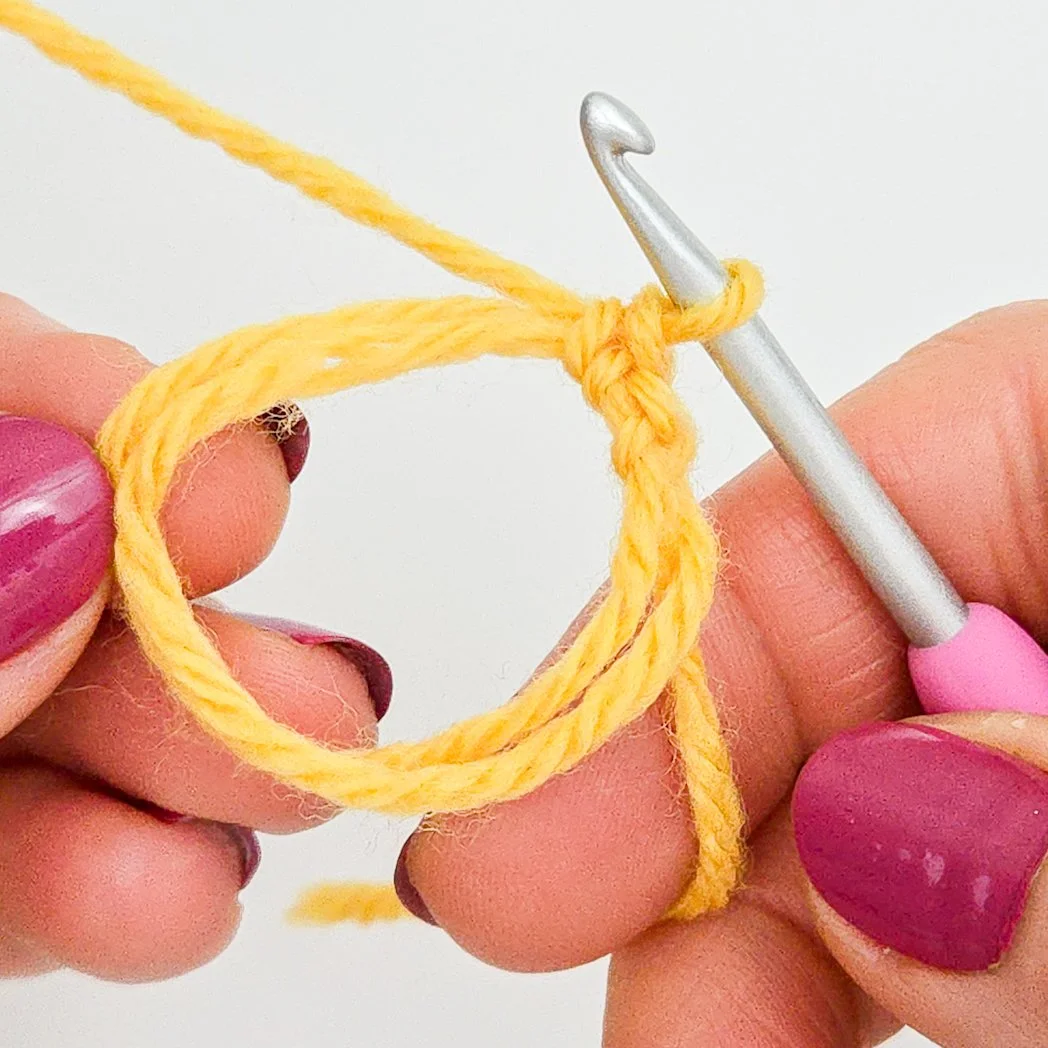
Step 6: To close the ring, grasp the stitches at the beginning of the round, and gently pull the tail end. As you do, pay attention to which loop gets smaller.
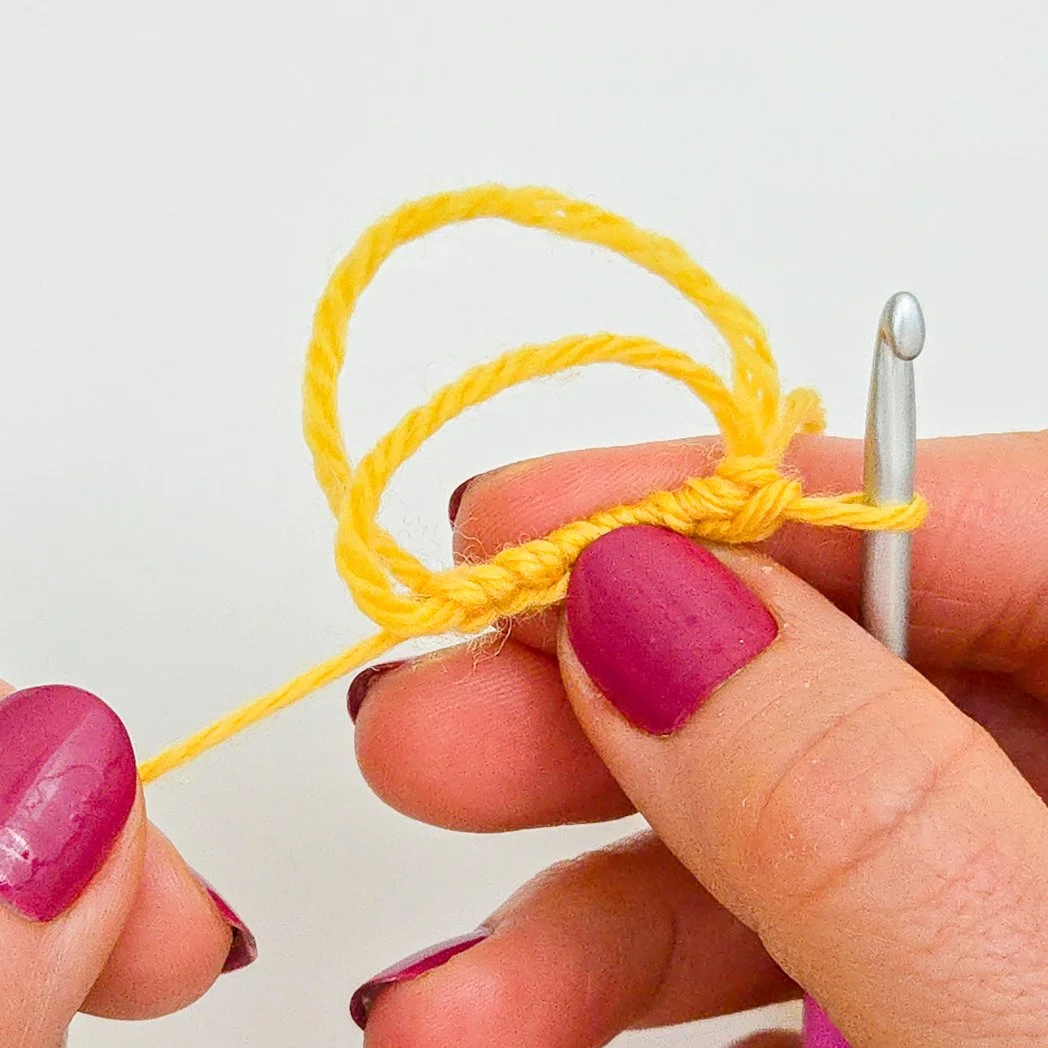
Step 7: Grab that smaller loop and pull it.
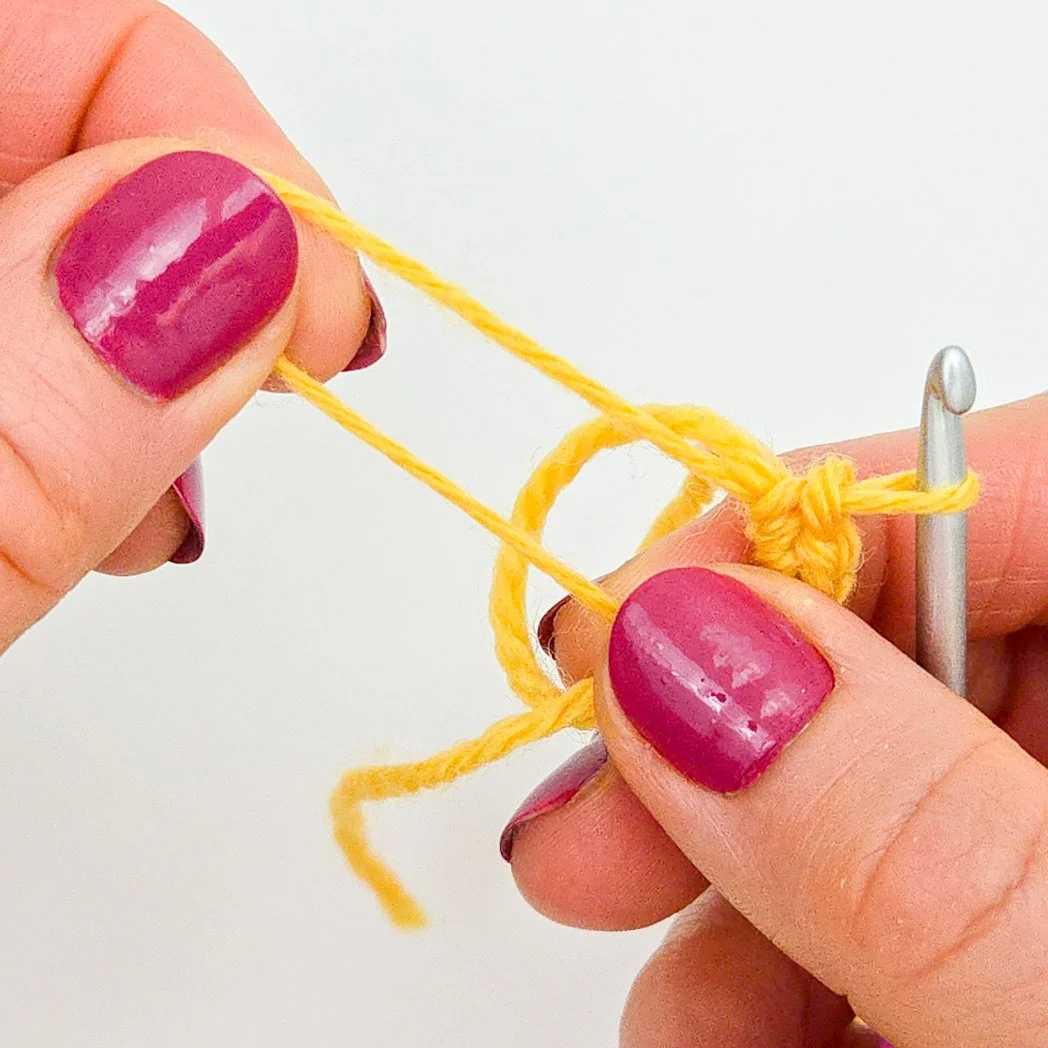
The other loop will tighten, closing the hole.
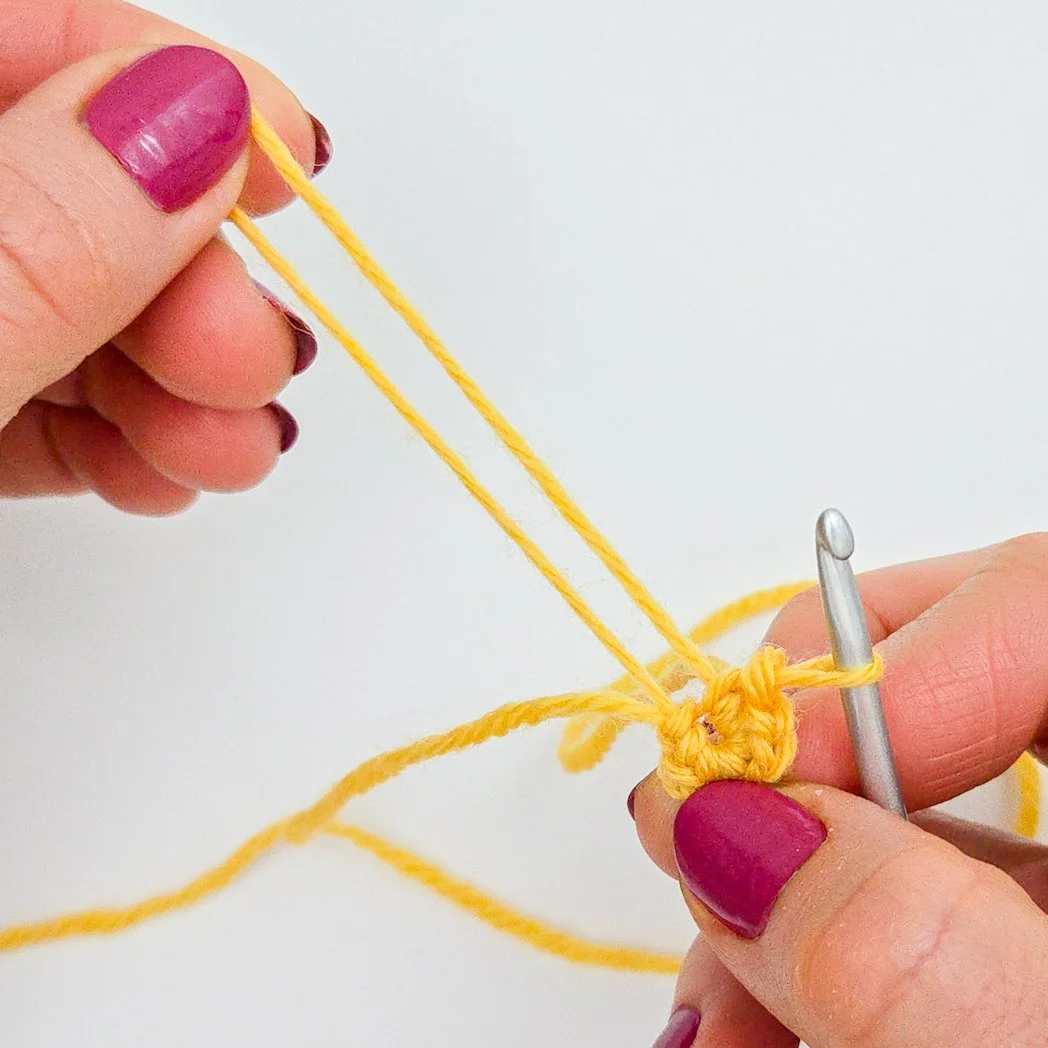
Step 8: Pull the tail end to close the remaining loop.
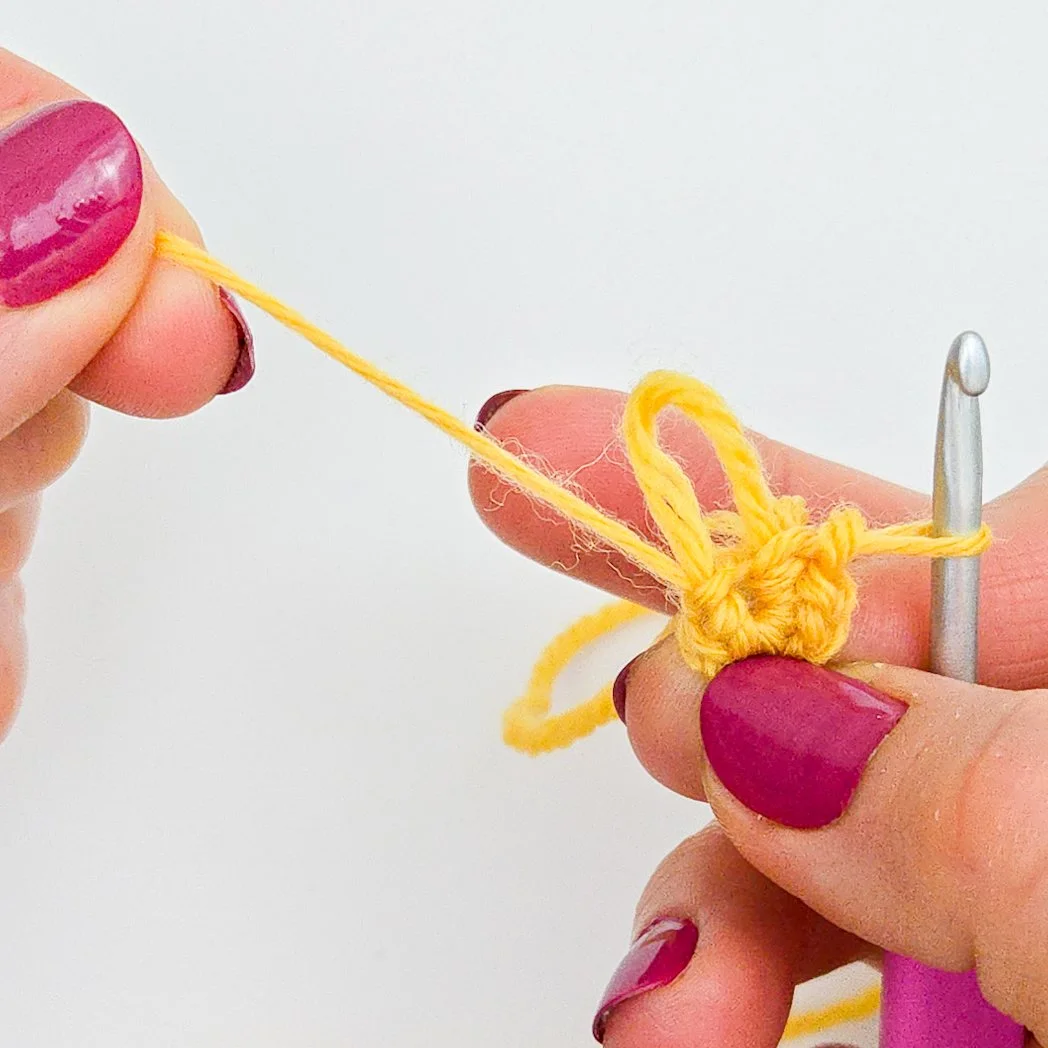
Step 9: Continue to pull the tail end until the hole in the center closes completely.
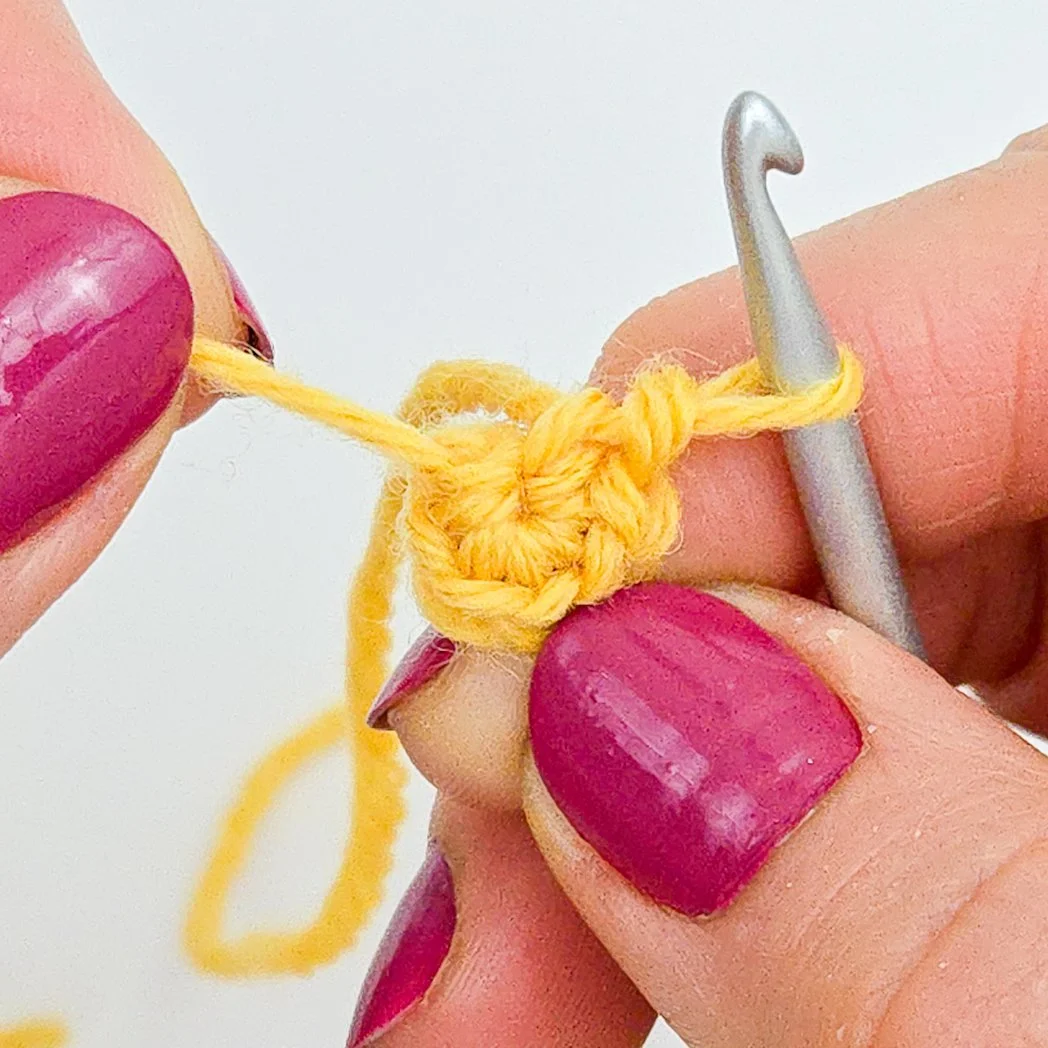
Congratulations! You’ve just used an adjustable ring to complete the first round of your crochet project. Joining instructions for the end of the round will vary from pattern to pattern, so refer to your specific pattern for the next step.
Now that you know how to create a secure adjustable ring, you’ll be able to use this technique in all kinds of crochet projects worked in the round. It’s a simple skill, but one that can make a big difference in the finished look and durability of your work. With a little practice, I’m confident this method will quickly become one of your favorite ways to start a crochet project too.
Video Tutorial
Prefer to follow along visually? Watch the step-by-step tutorial.